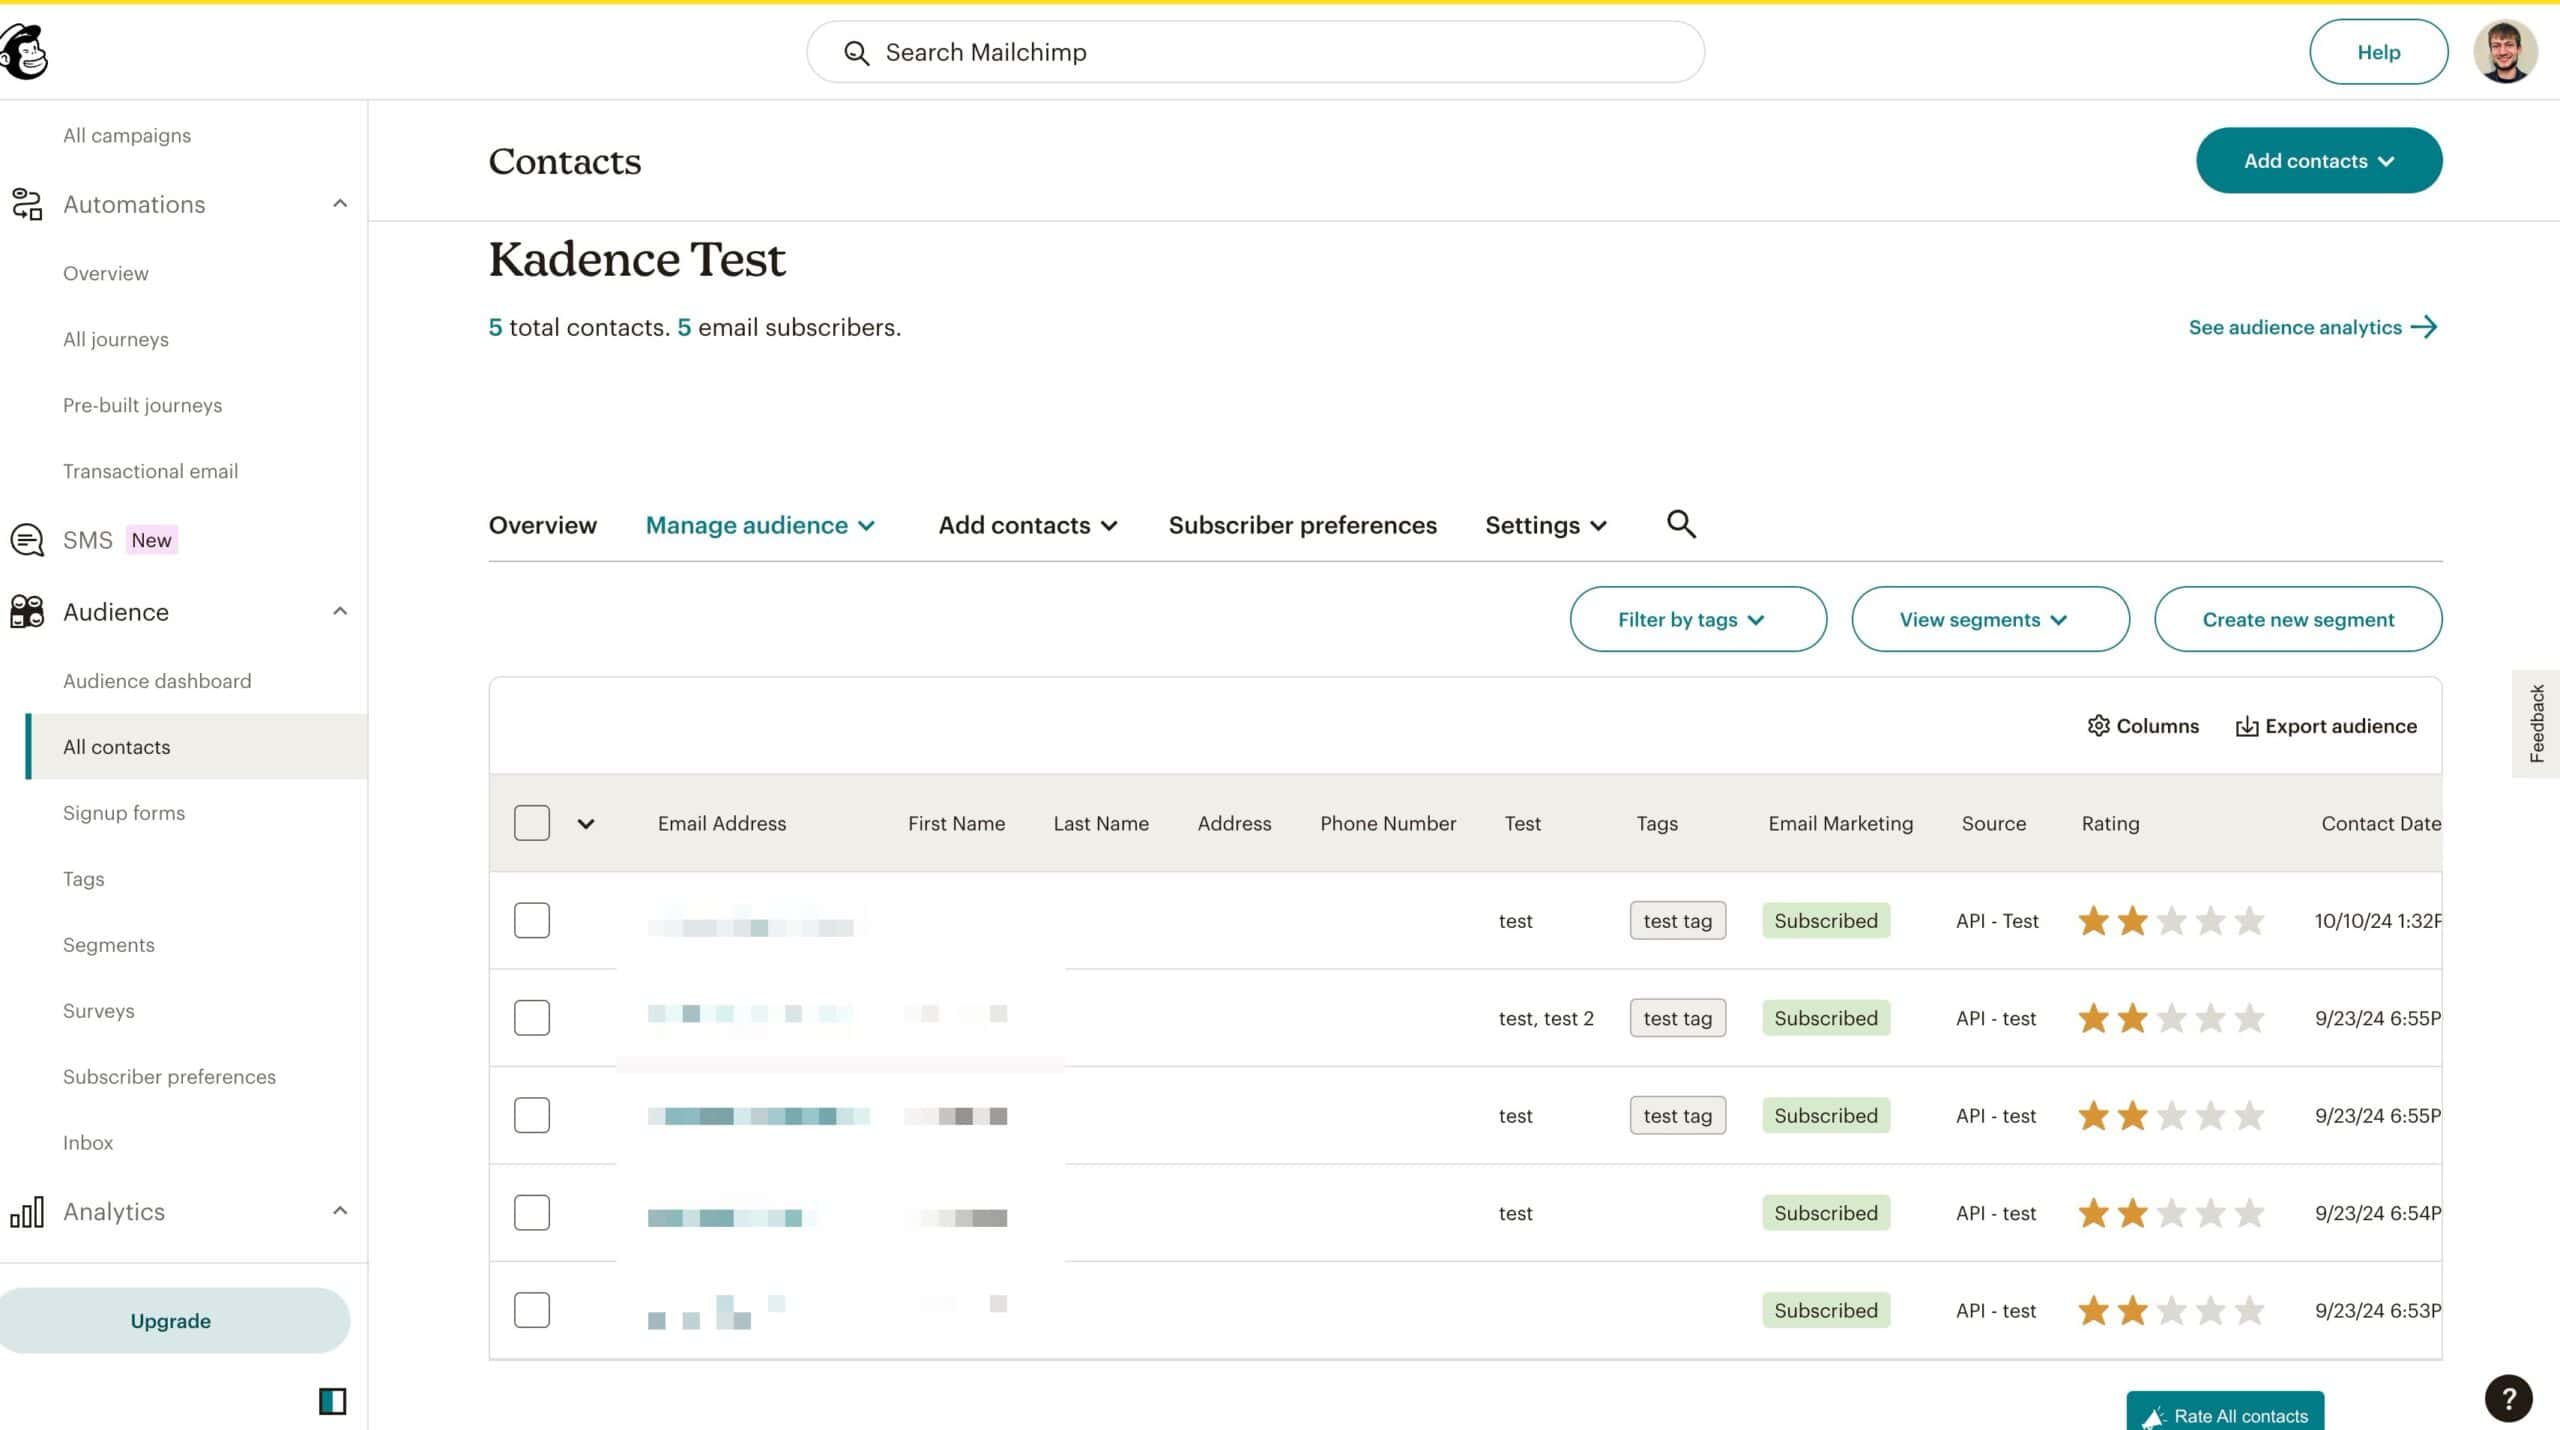
The Kadence Blocks Pro plugin adds Mailchimp integration to both the Kadence Form and Form (Adv) Blocks. Below, you will learn how you can start using Kadence Blocks Pro with MailChimp.
Mailchimp Set Up
You must set up an account with Mailchimp, and connect a Mailchimp API Key to your Kadence Form to fully integrate Mailchimp with Kadence.
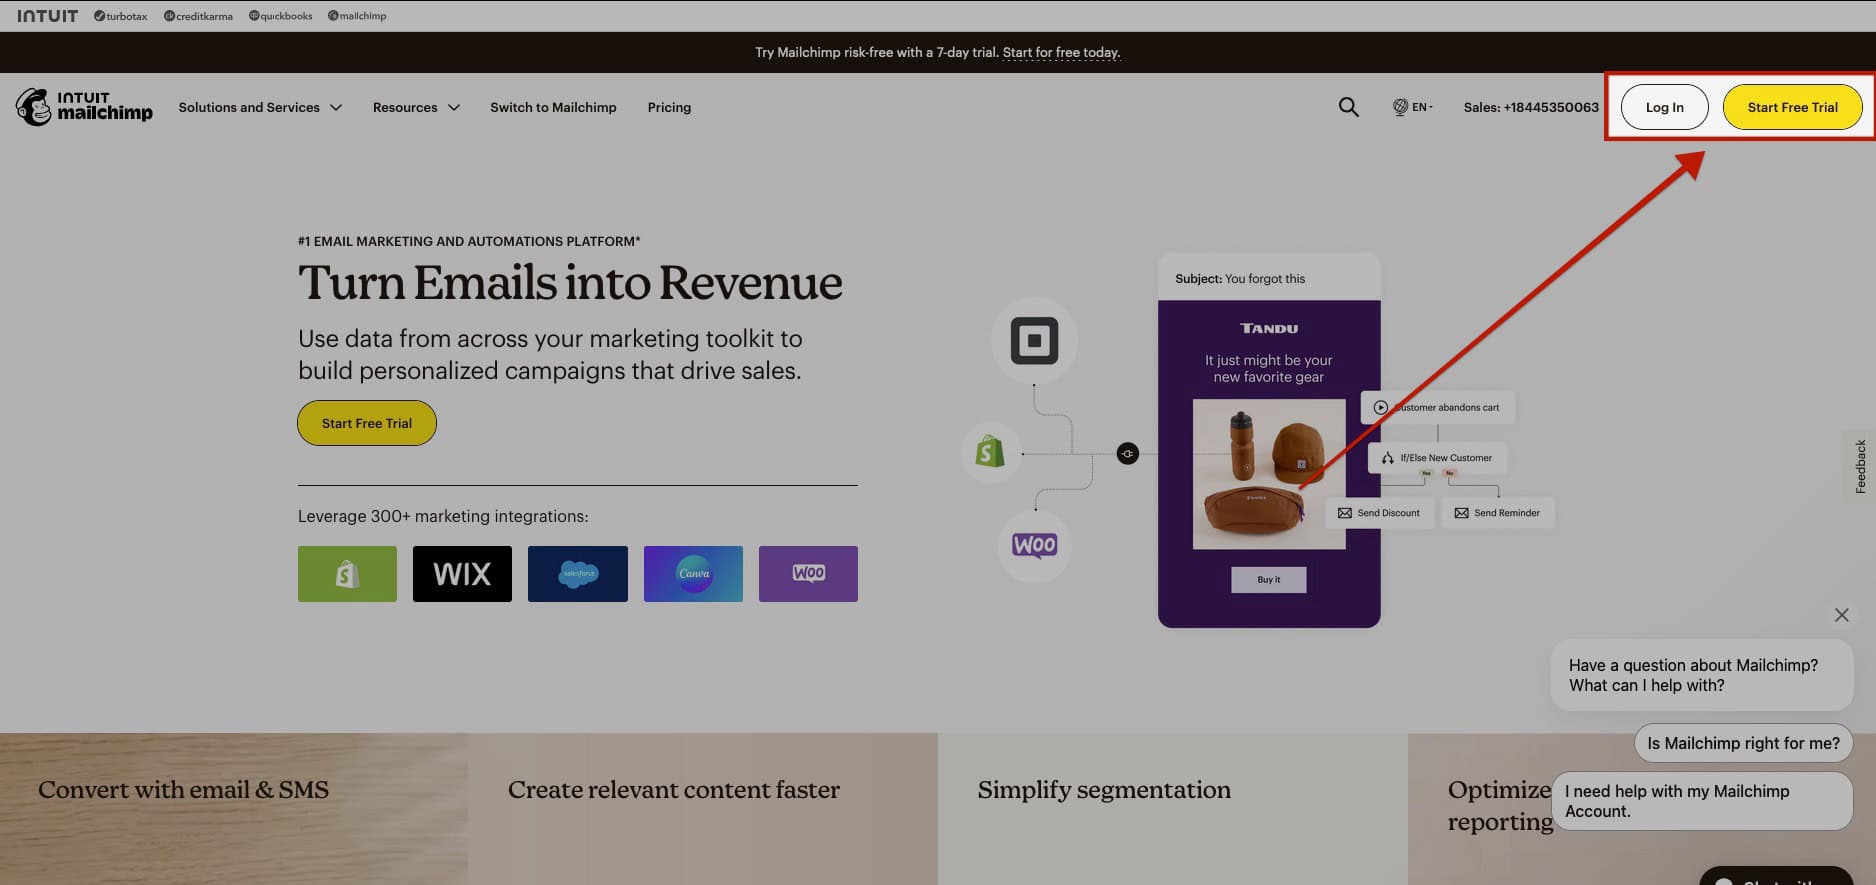
Get started by heading over to the Mailchimp Website. You can create a new account or log in to an existing one.
Managing Audiences
When using Mailchimp, all Contacts are typically added to your main Audience. While Mailchimp does offer the ability to create multiple audiences, it’s recommended to maintain a single primary audience to avoid issues like duplicate contacts and higher costs. Instead, you can use Tags, Groups, or Segments to organize your contacts within one audience.
For example, if you have a subscription form for a general newsletter and another for a specialized newsletter on the same website, Tags allow you to categorize these contacts efficiently. This way, you can ensure the right emails reach the right users without needing multiple audiences.
In addition to Tags, Mailchimp also offers Groups and Segments to further refine your audience:
- Tags are flexible labels you can apply to contacts for easy organization.
- Groups allow subscribers to self-select categories (like interests or preferences) during signup, which helps further organize contacts.
- Segments allow you to create targeted lists within your audience based on specific criteria (like locations, engagements, or tags), enabling more personalized campaigns.
By using Tags, Groups, and Segments together, you can manage all your contacts under one audience while still delivering tailored content.
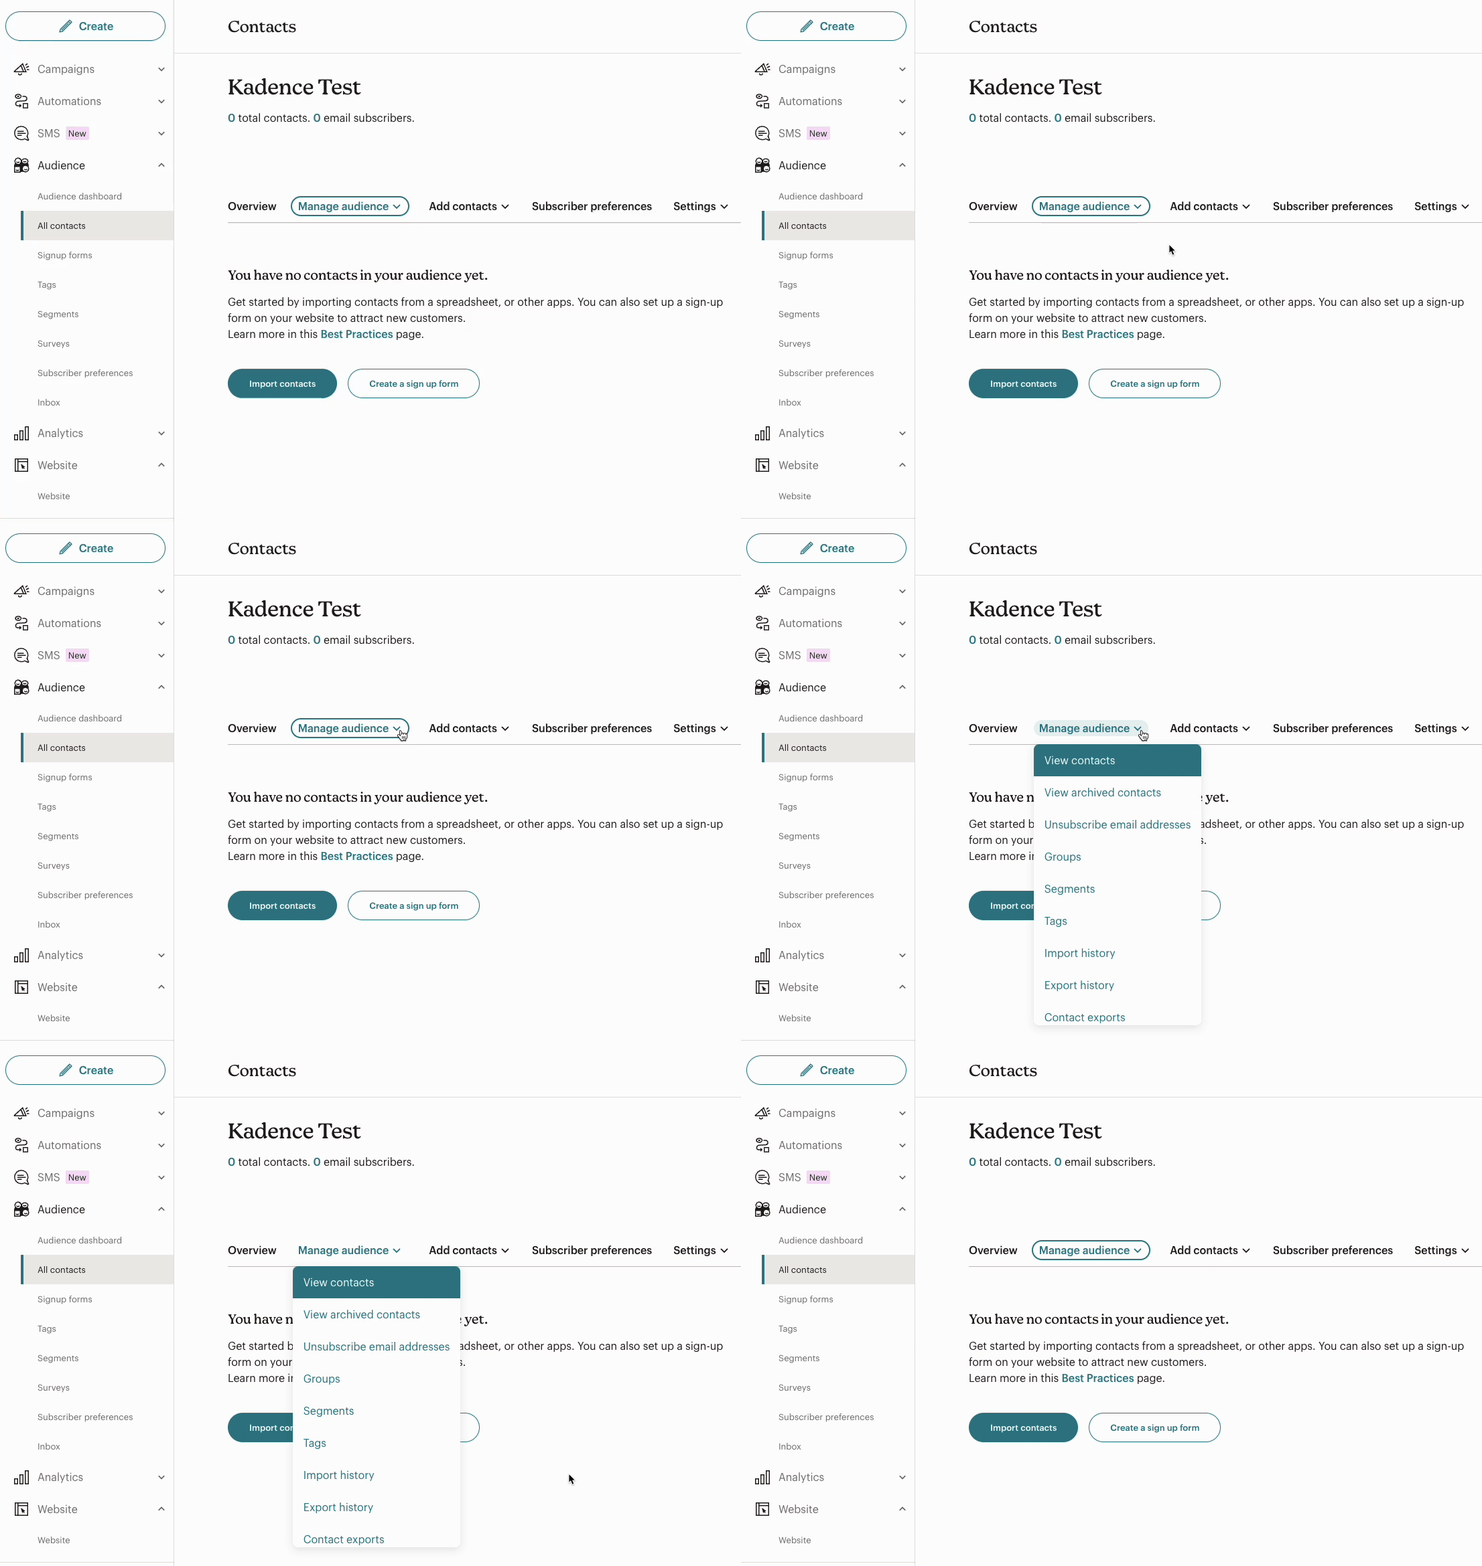
These things can be managed by navigating to the Mailchimp Dashboard, expanding the Audience tab, and selecting All Contacts. From there, you can expand the Manage Audience dropdown, where you can manage Tags, Groups, Segments, and other Audience-related features for better organization and targeting.
In some cases, having multiple audiences may be viable. For example, if you are managing two completely separate businesses or brands with distinct messaging and subscriber bases, using multiple audiences might be more appropriate to keep the data and communication strategies separated. For more detailed and precise information on how to use Tags, Groups, and Segments, please refer to the official Mailchimp Help Center.
Managing Audience Fields
When connecting MailChimp to a Kadence Form, you can link the fields from your Kadence Form to the corresponding fields in your MailChimp audience. This ensures that data transfers correctly from your Kadence Forms to MailChimp.
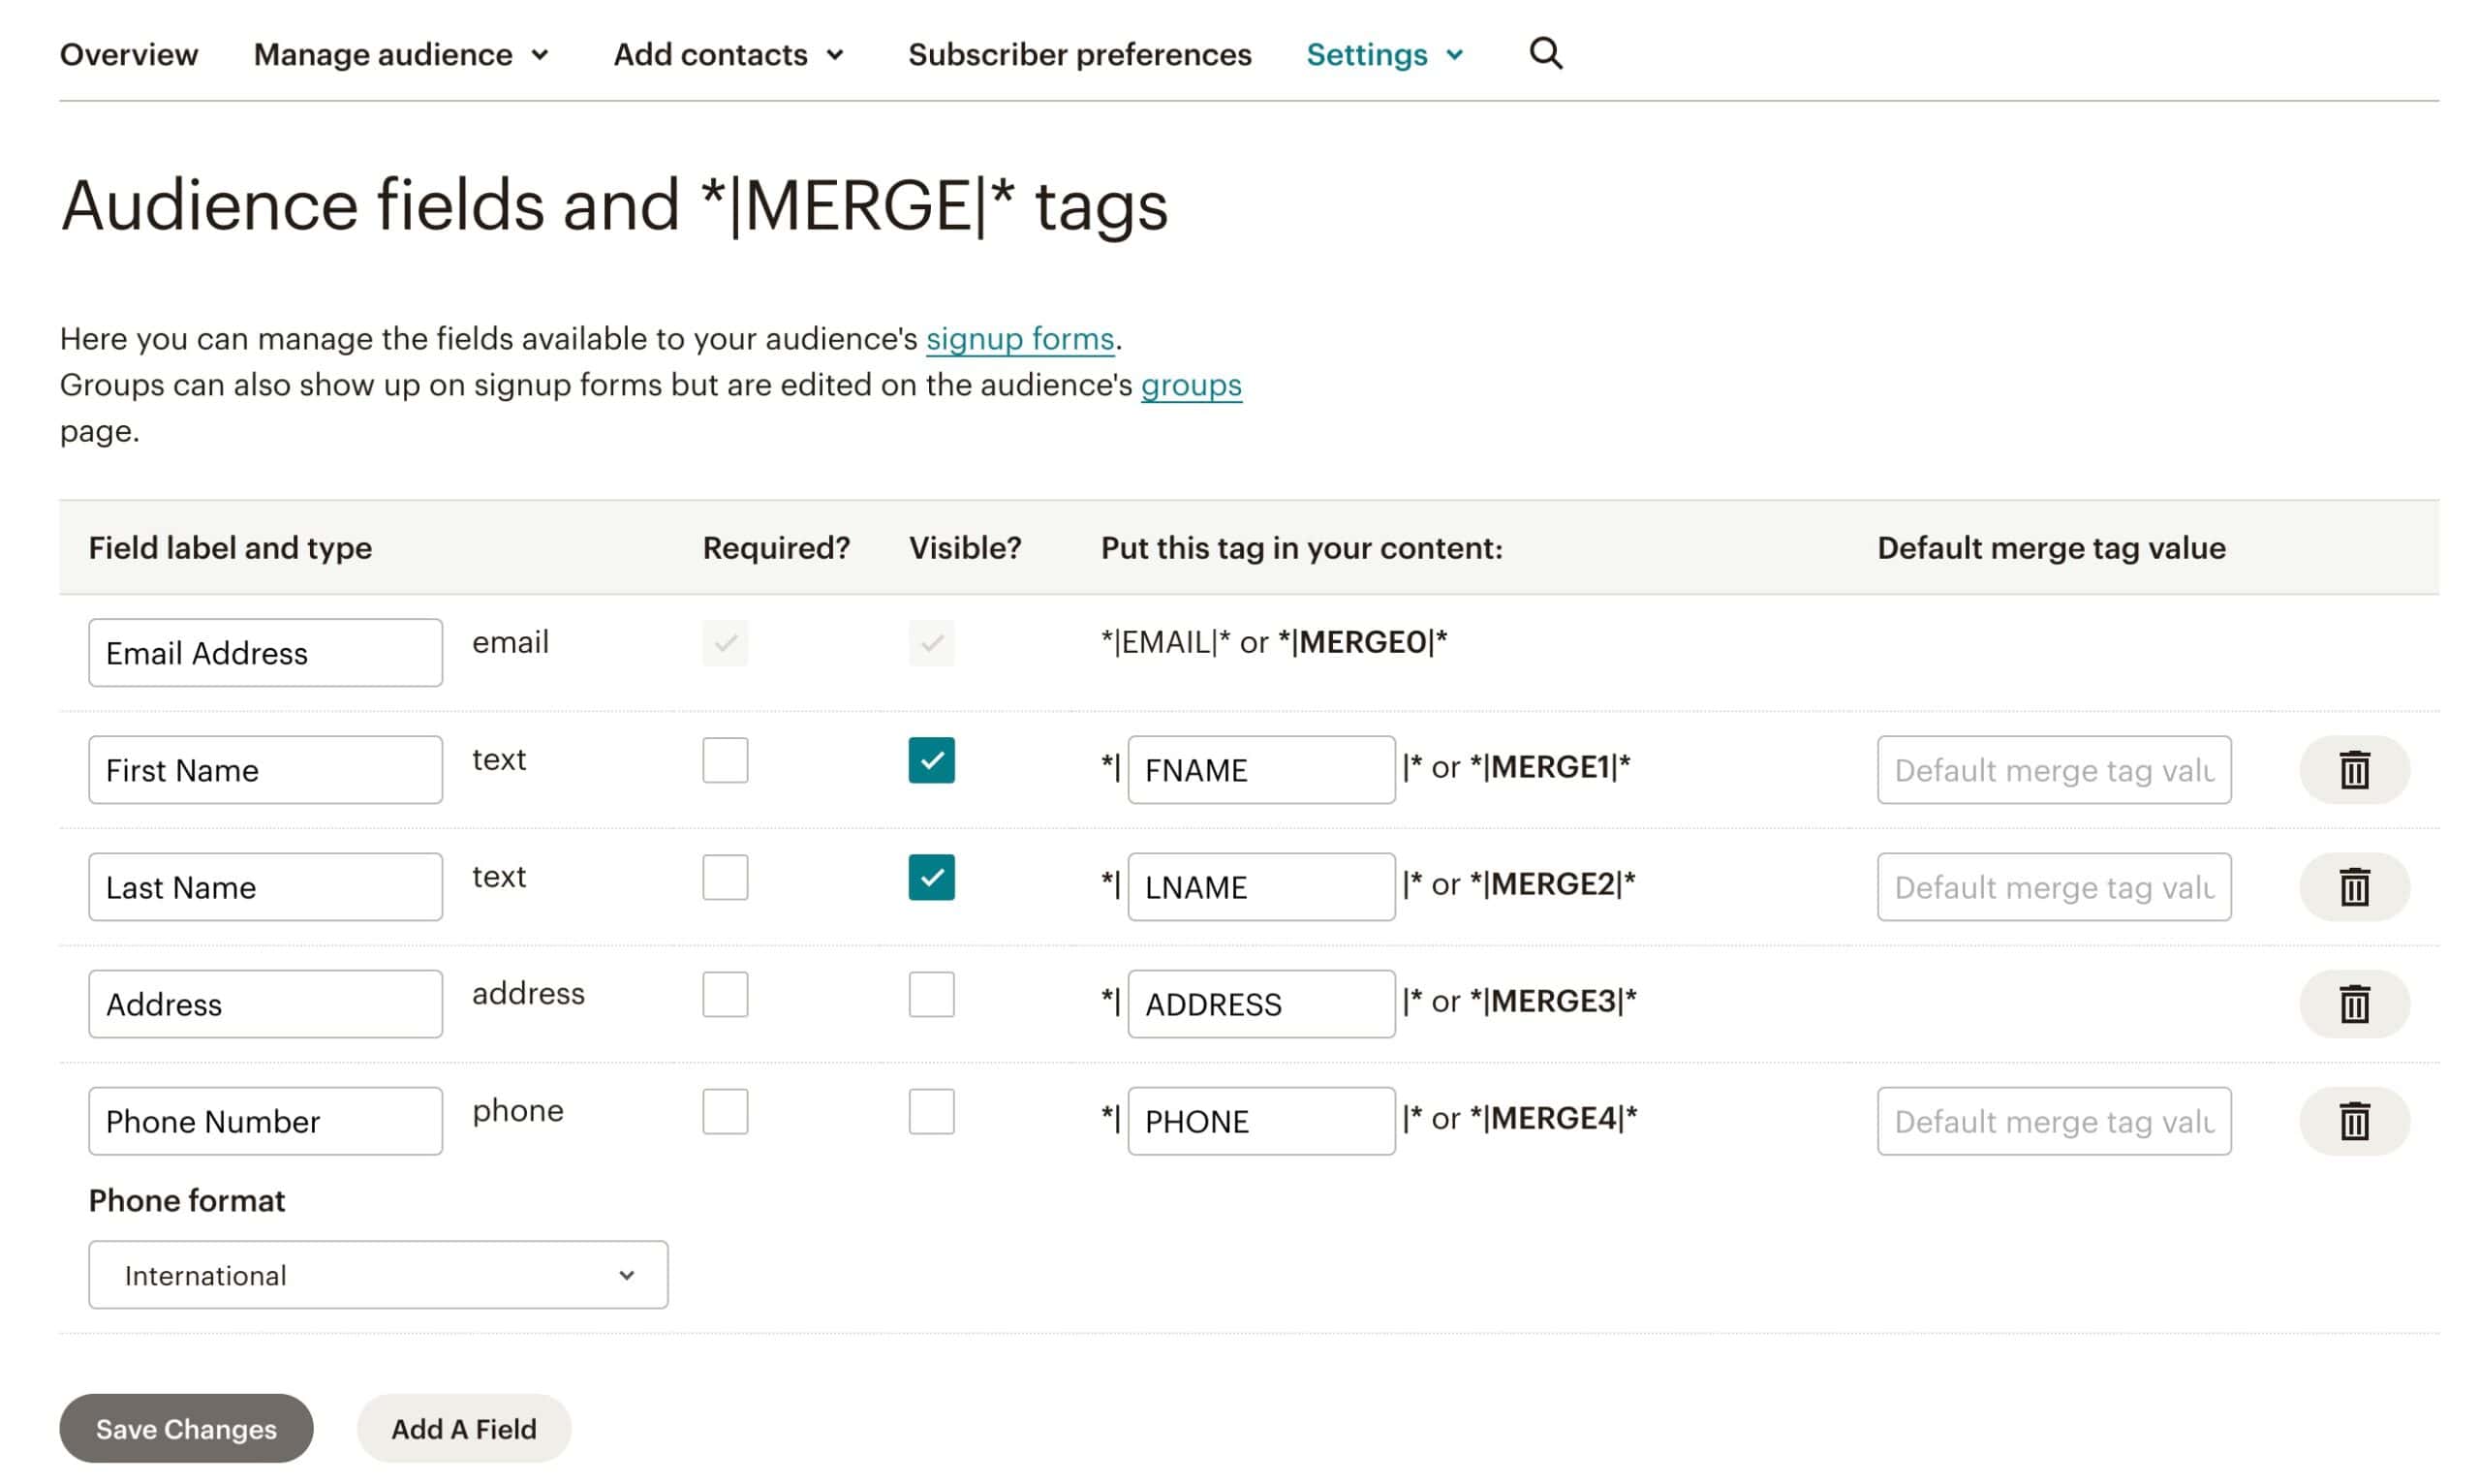
To manage your audience fields in MailChimp, first navigate to the MailChimp Dashboard and expand the Audience tab. From there, select All Contacts to view your contact list. On the contact page, click on the Settings dropdown menu and choose Audience fields & |MERGE| tags. This section allows you to add or modify audience fields, such as name, email, or custom fields, and adjust |MERGE| tags for your audience. By doing so, you can ensure that all data collected from your Kadence Form fields is properly mapped to the corresponding fields in MailChimp, ensuring an efficient data transfer from your Kadence Forms to your MailChimp audience(s).
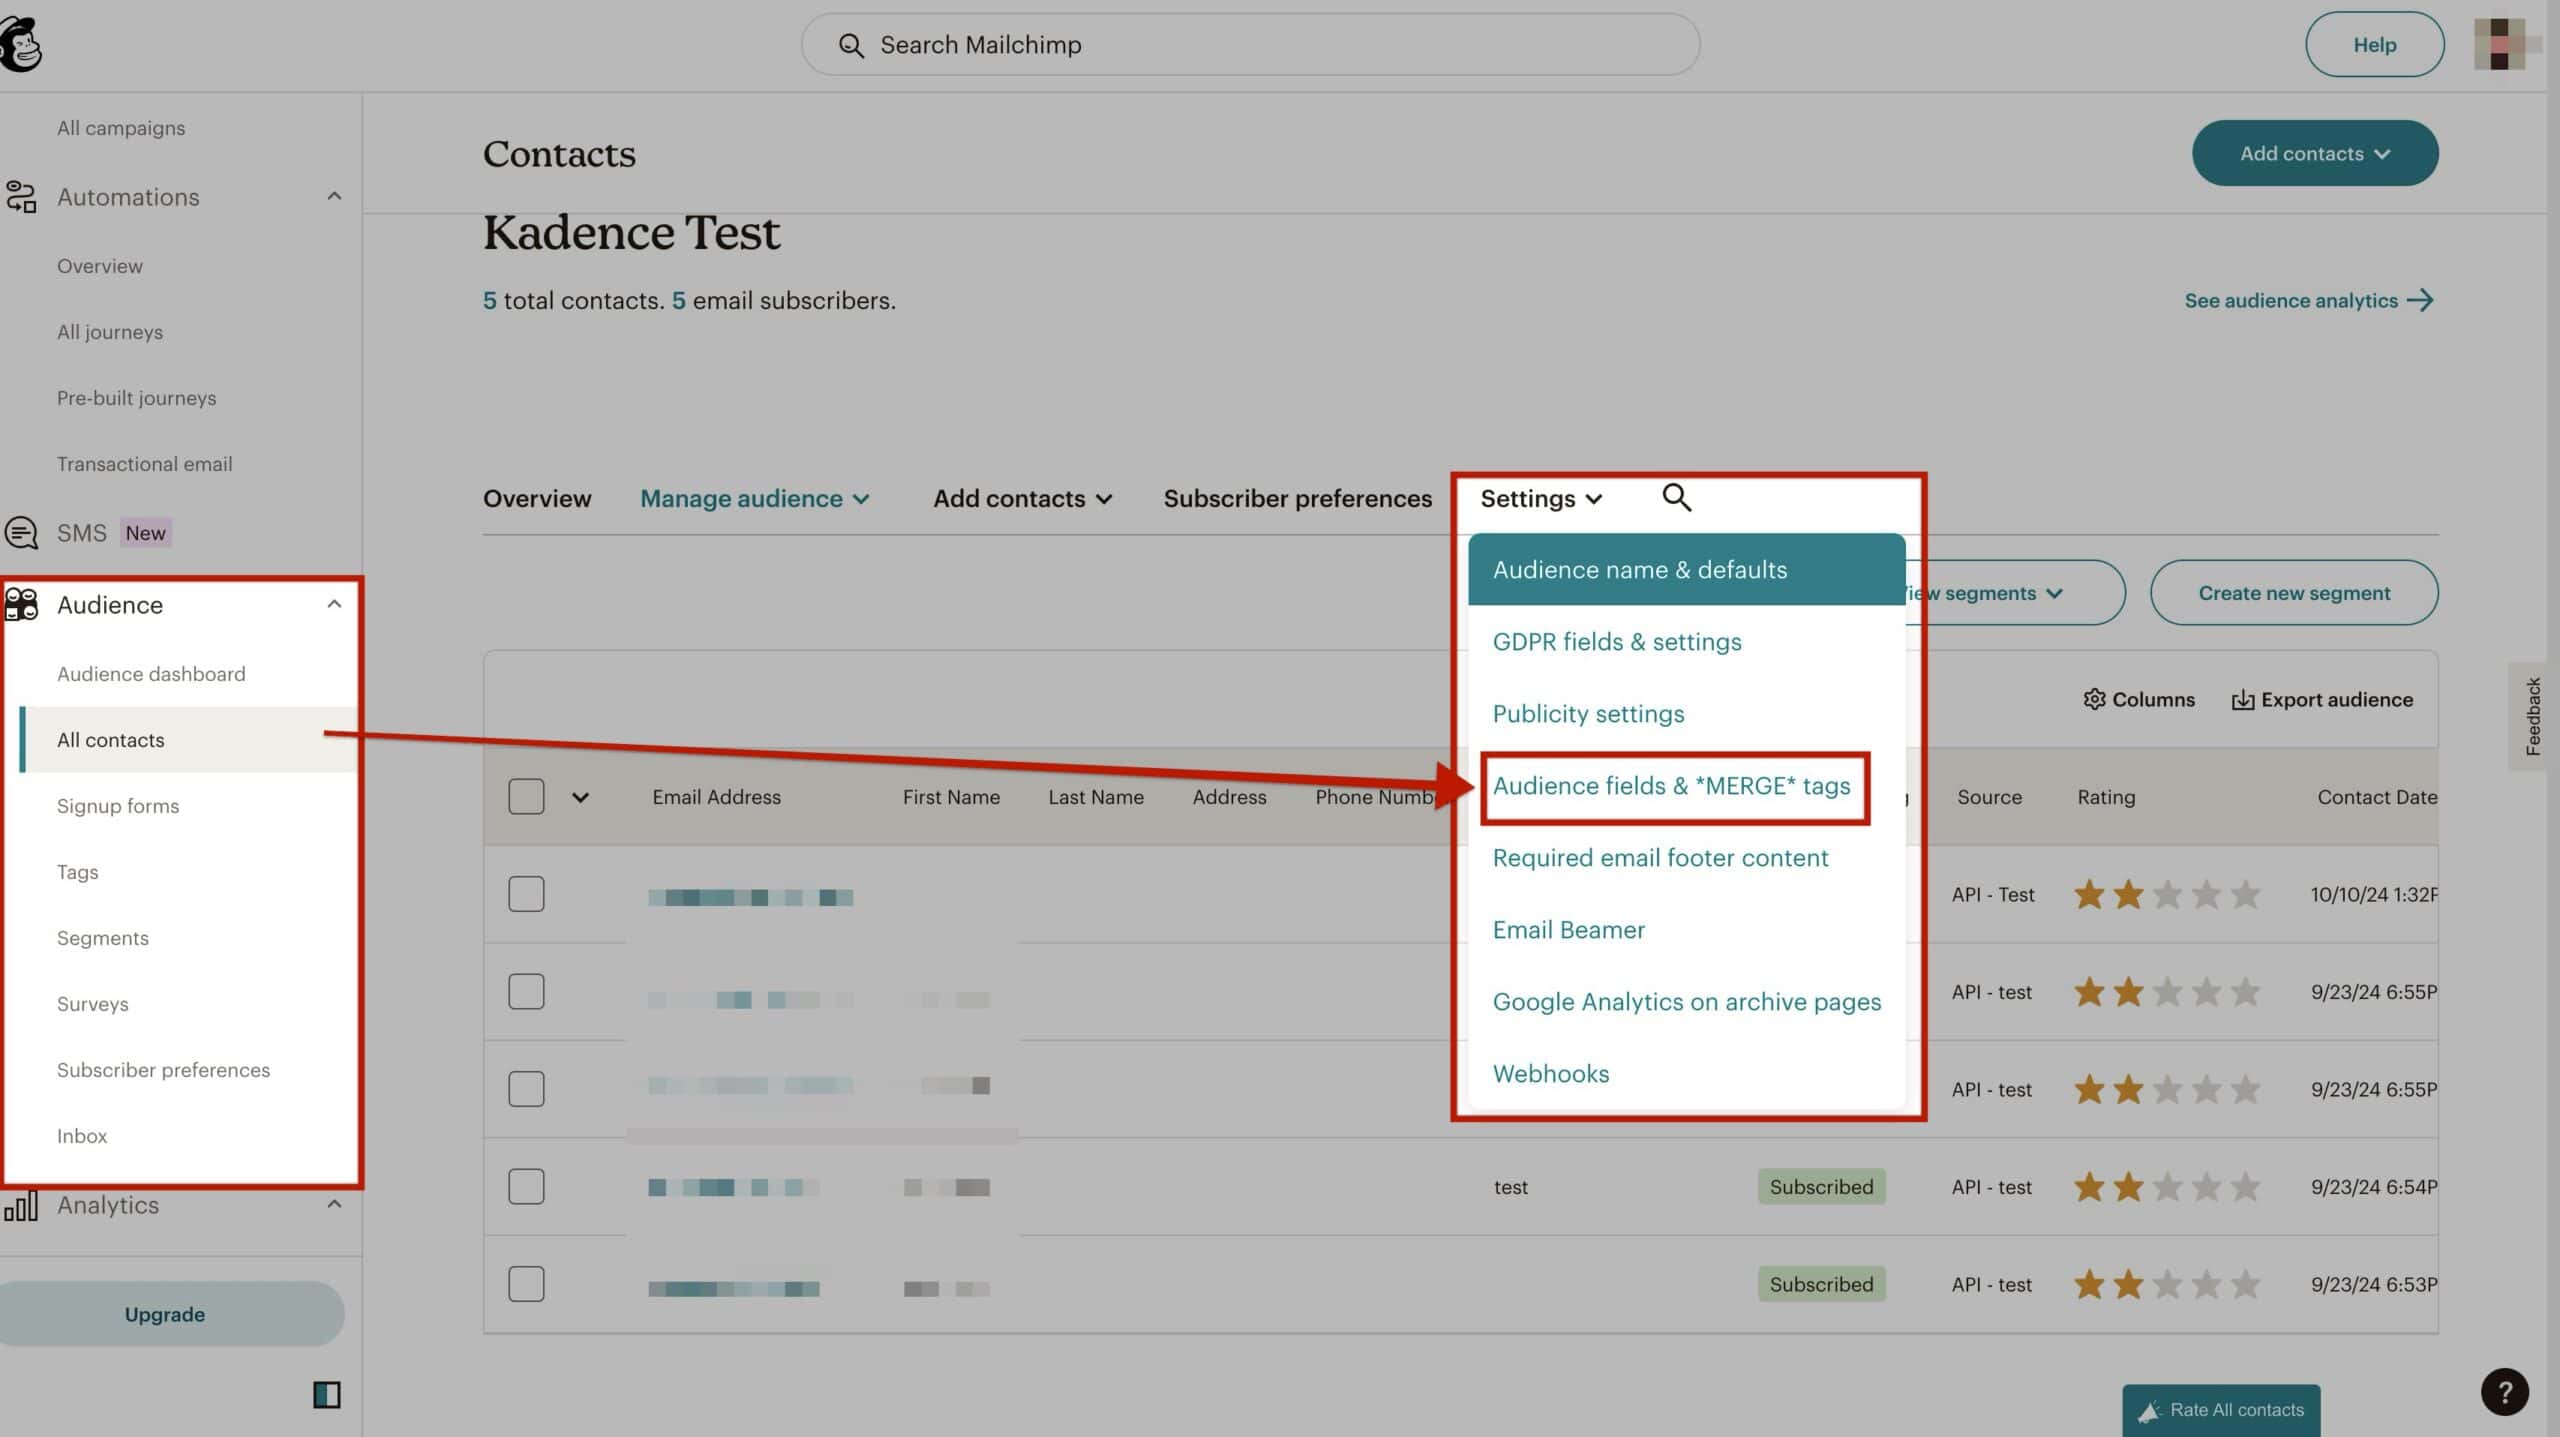
This will take you to a page where you can edit, delete, or add audience fields. These fields are important because they will be linked to your Kadence Form or Advanced Form fields, ensuring that the data collected from your website is accurately mapped to your MailChimp audience. Properly managing these fields ensures smooth data transfer and allows you to collect and organize information effectively.
Creating an API Token
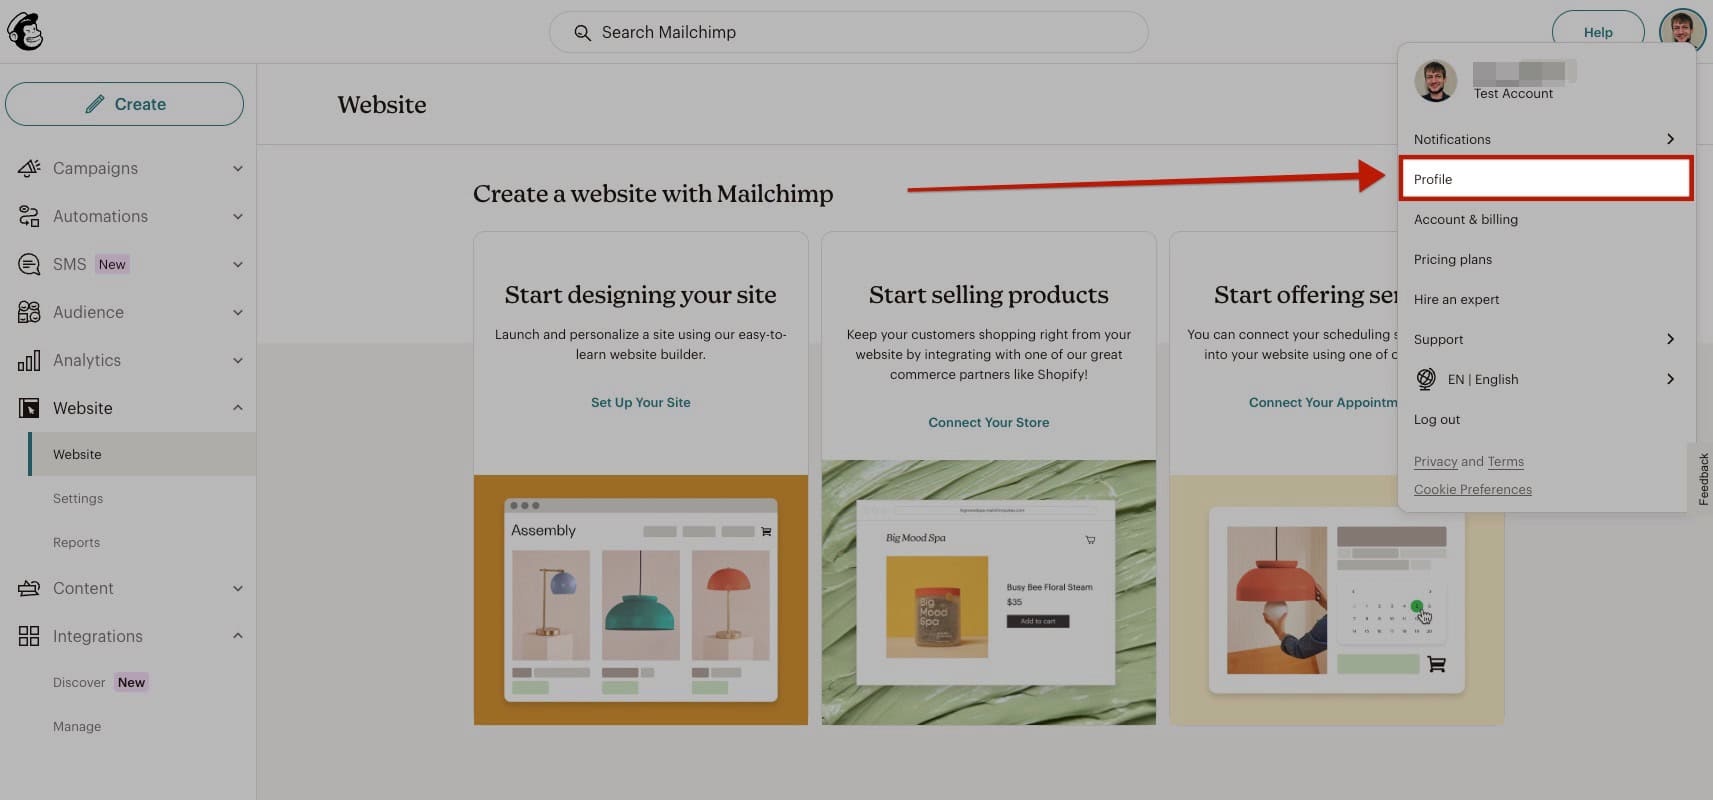
To get started with an API Token, go to your MailChimp Dashboard and click on your Profile Picture. Then, select the Profile option from the dropdown.
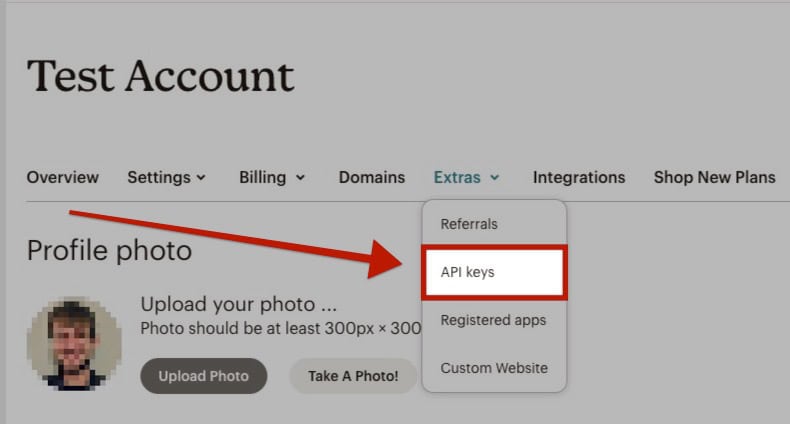
Under your Profile, navigate to the Extras tab and select the API Keys option.
On this page, click the Create A Key button to generate a new API key.
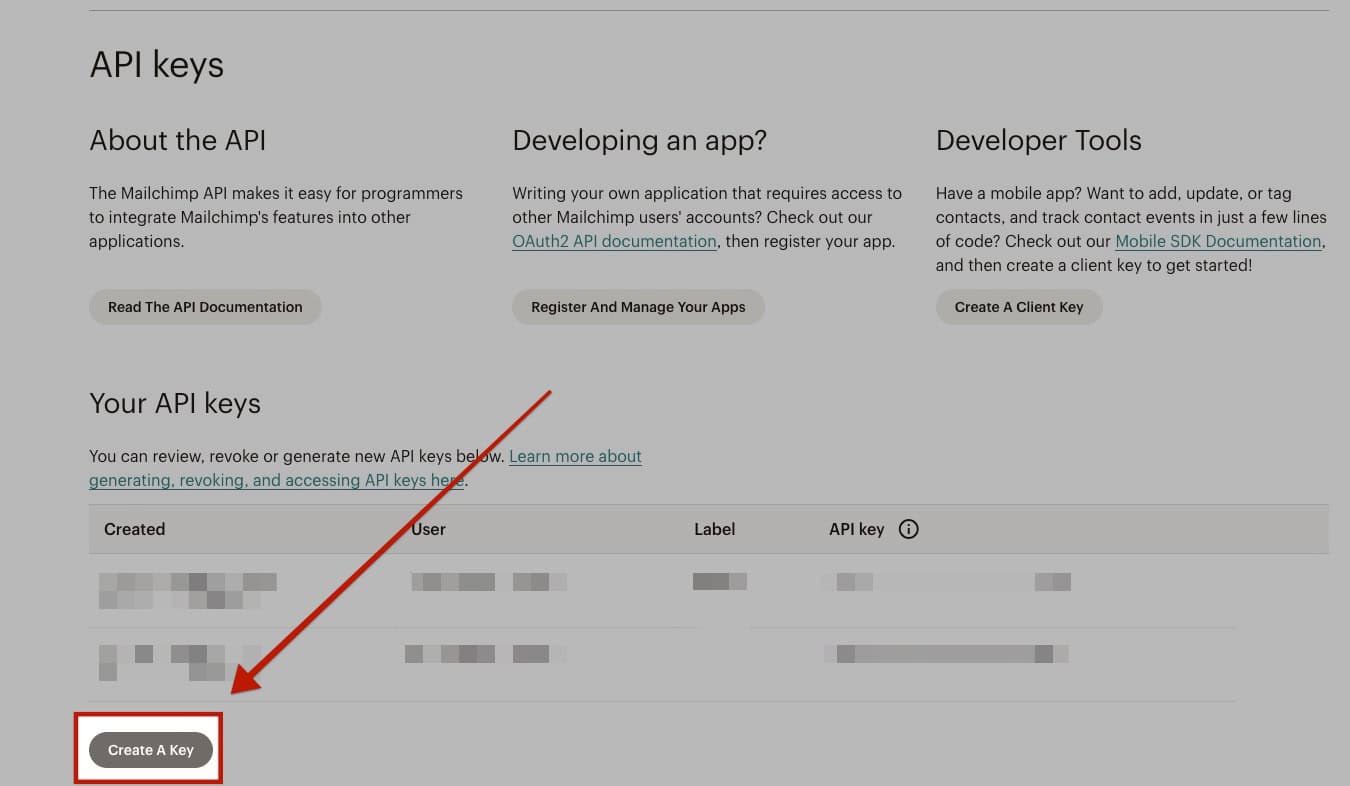
Once the key is generated, you will not be able to view it again. Be sure to save it in a secure location for future use.
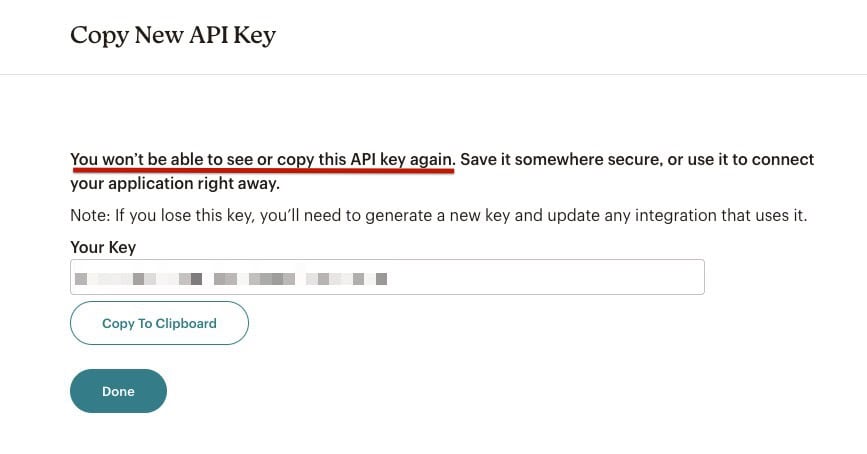
Now that you have your API key, you can use it to connect the Kadence Form Block to your MailChimp Audiences.
Using Mailchimp with the Kadence Form Block
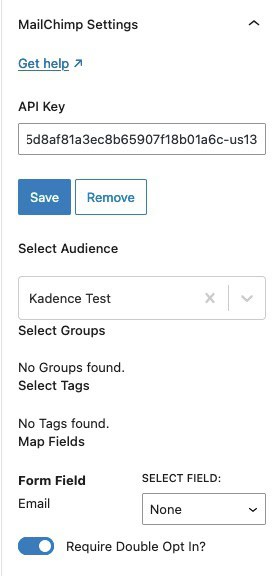
First, enable the MailChimp option in the Kadence Form Actions After Submit block settings. This will add a new tab in the Kadence Form General block settings labeled MailChimp Settings.
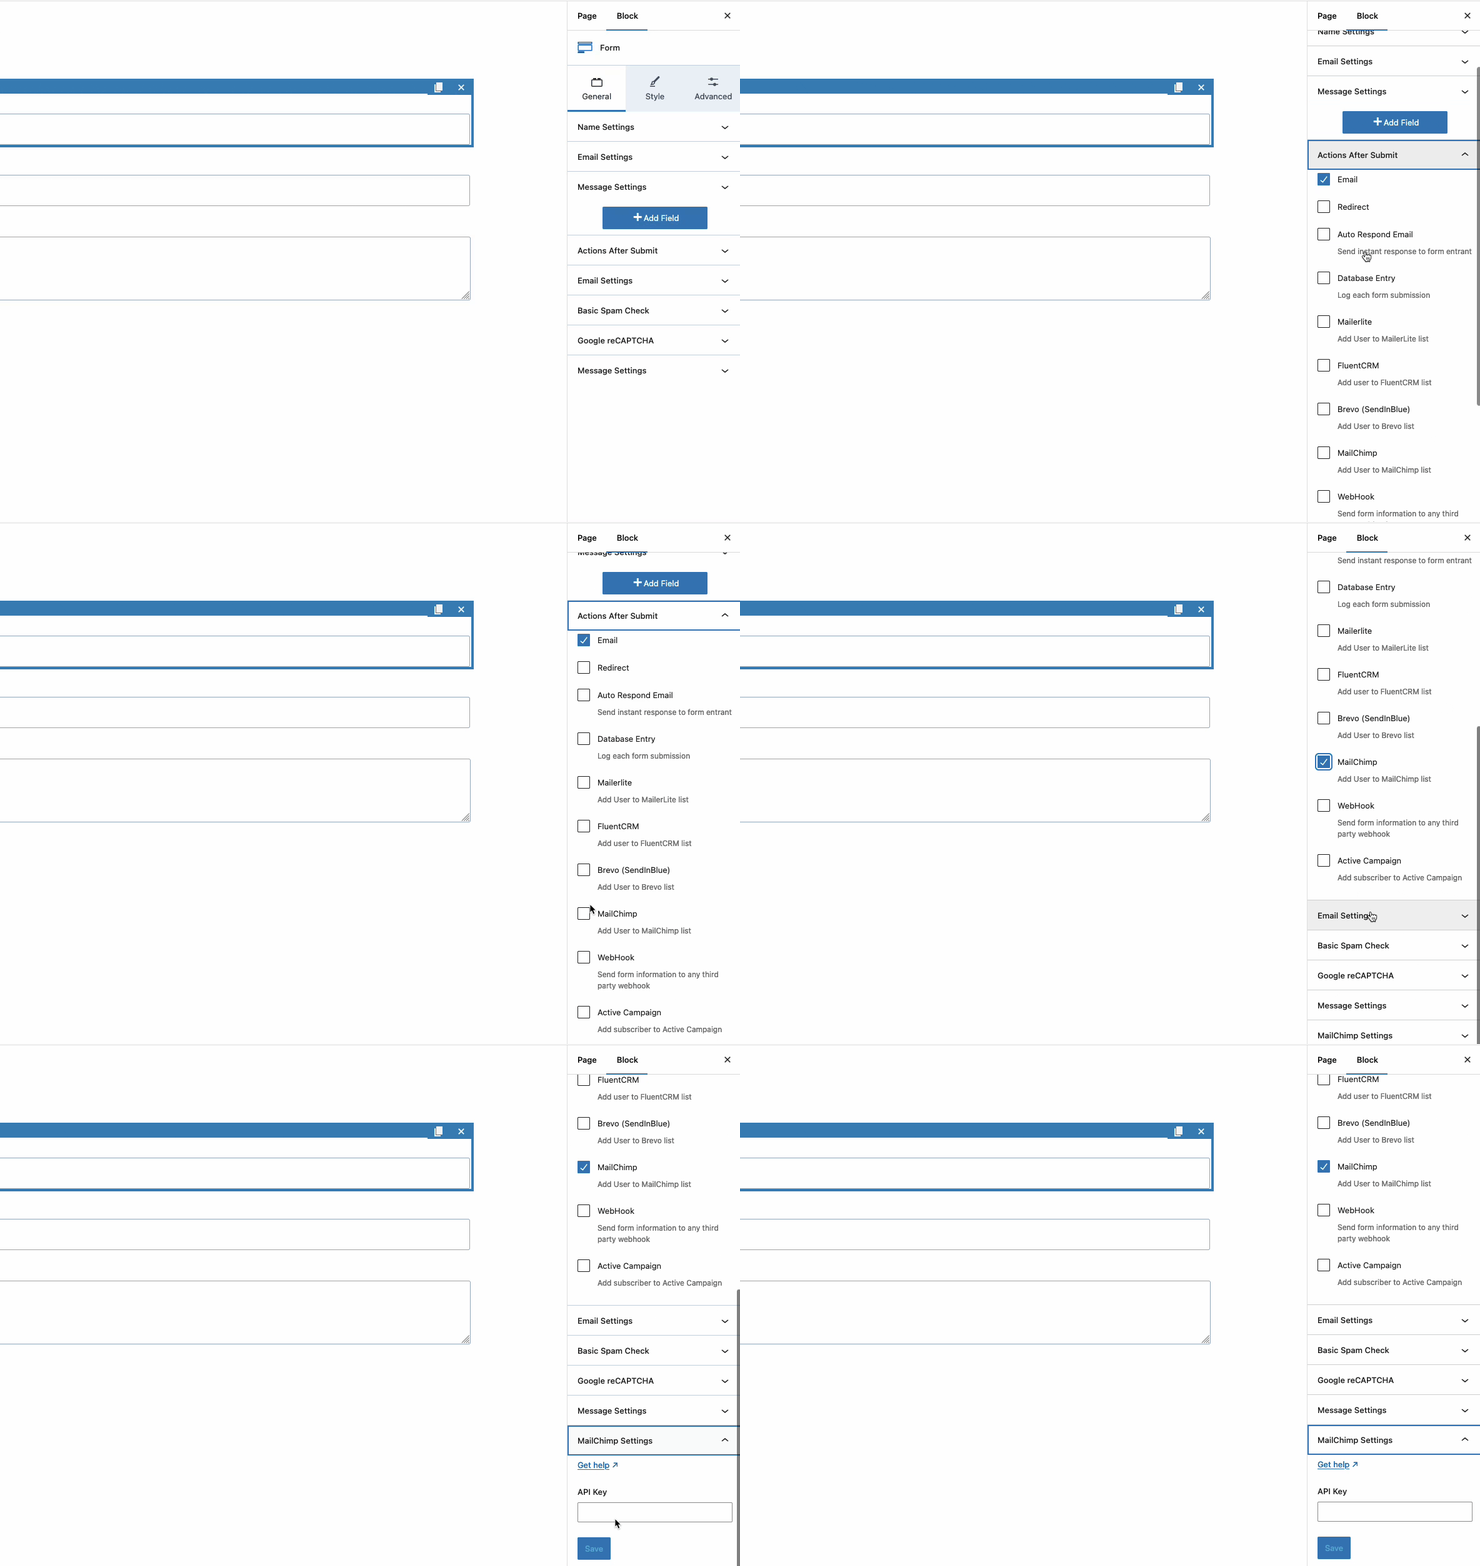
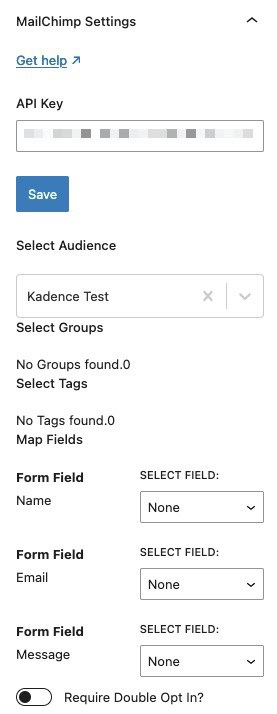
Next, expand the MailChimp Settings and enter your MailChimp API Key in the API Key field. Then press Save. This will unlock the options to select your Audience and any applicable Tags and Groups where you want the form submissions added.
You can then assign each form field in the Kadence Form to the corresponding Contact Fields in MailChimp.
Using Mailchimp with the Kadence Advanced Form Block
First, enable the MailChimp option in the Kadence Form (Adv) Submit Actions block settings. This will add a new tab in the Kadence Form General block settings labeled MailChimp Settings.
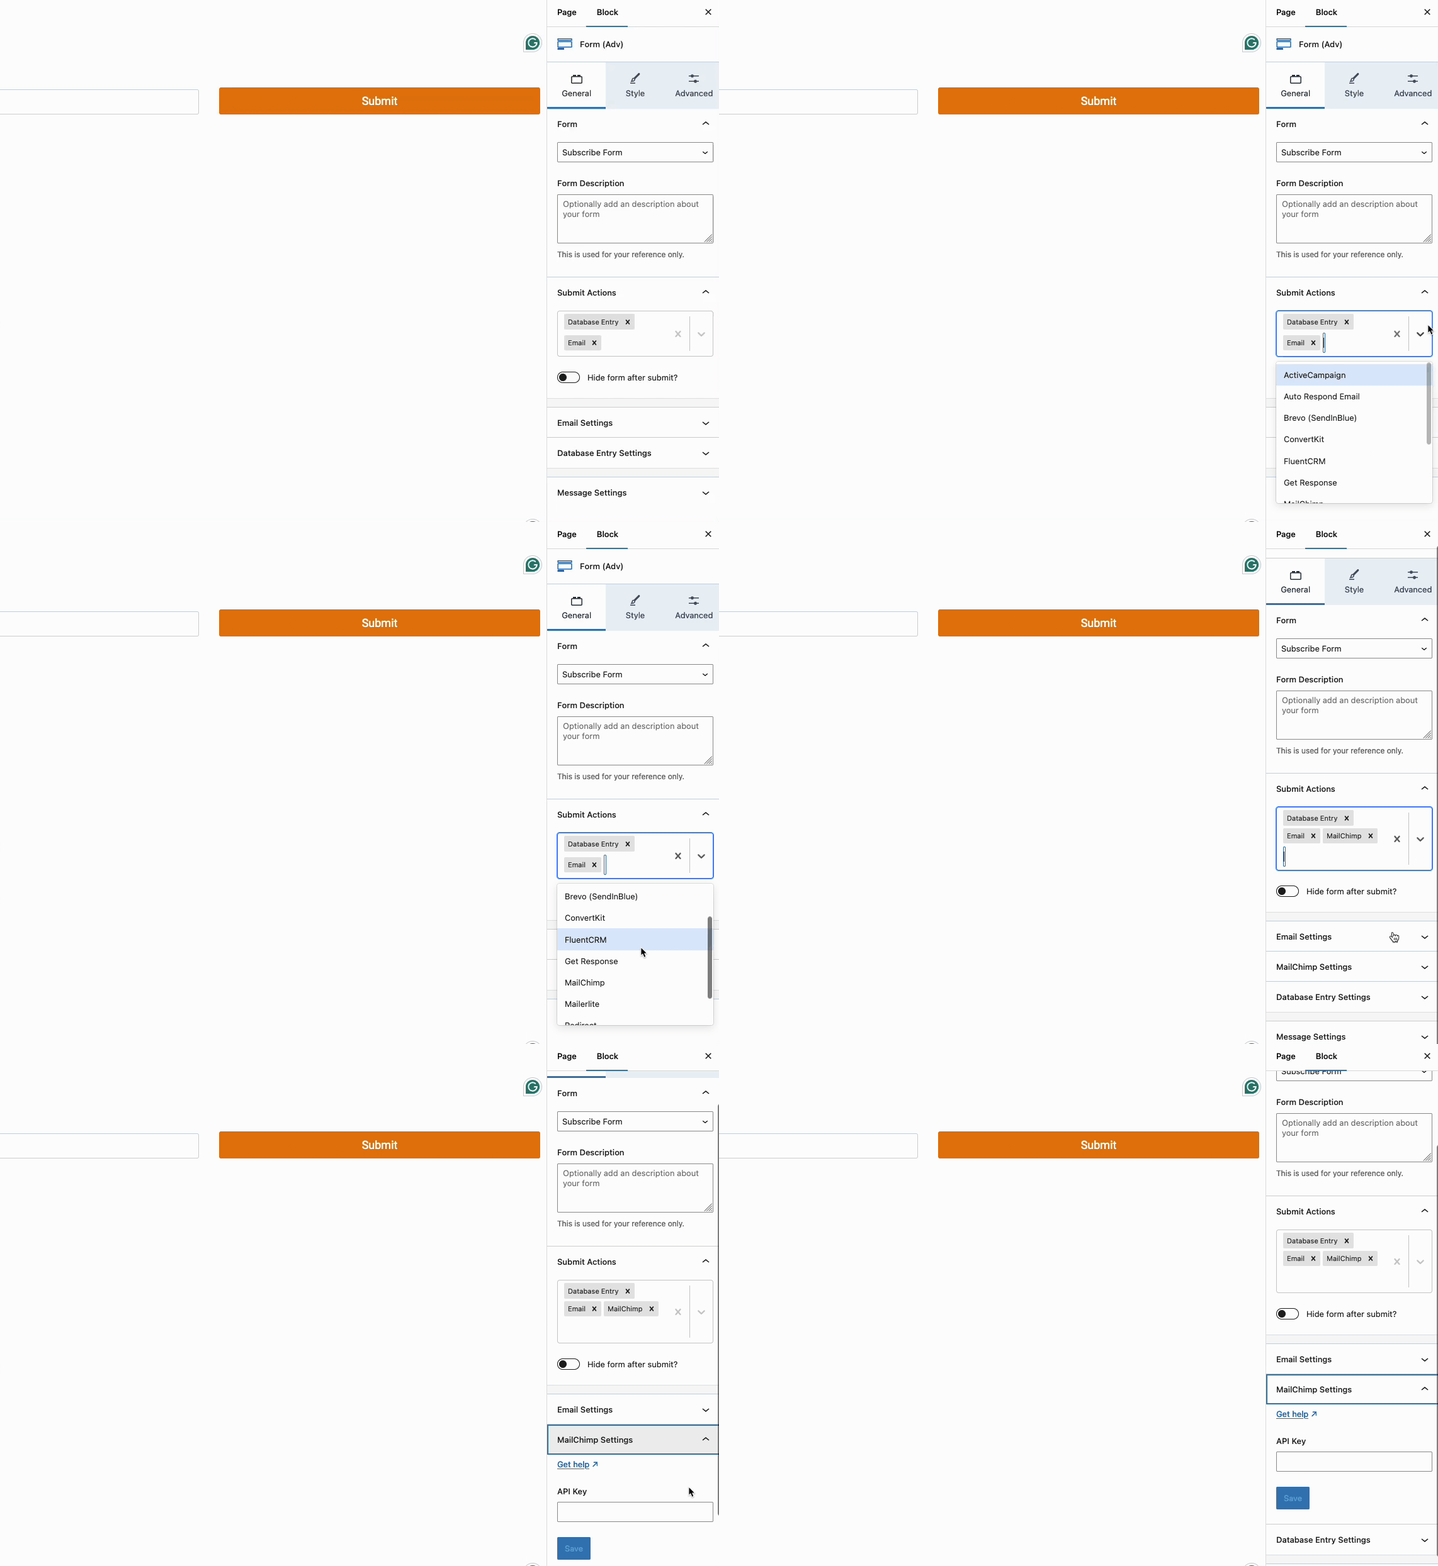
Next, expand the MailChimp Settings section and input your MailChimp API Key in the API Key field. Afterward, click Save. This will enable the options to select your Audience, along with any applicable Tags and Groups for adding the form submissions.
You can then map each field in the Advanced Form to the corresponding Contact Fields in MailChimp.
Viewing Contacts
Once a user fills out the form, the next step is to navigate to your MailChimp Audience Dashboard. Here, you can view your contacts, including new subscribers, and track key statistics.
To view your contacts, click the View Contacts button.
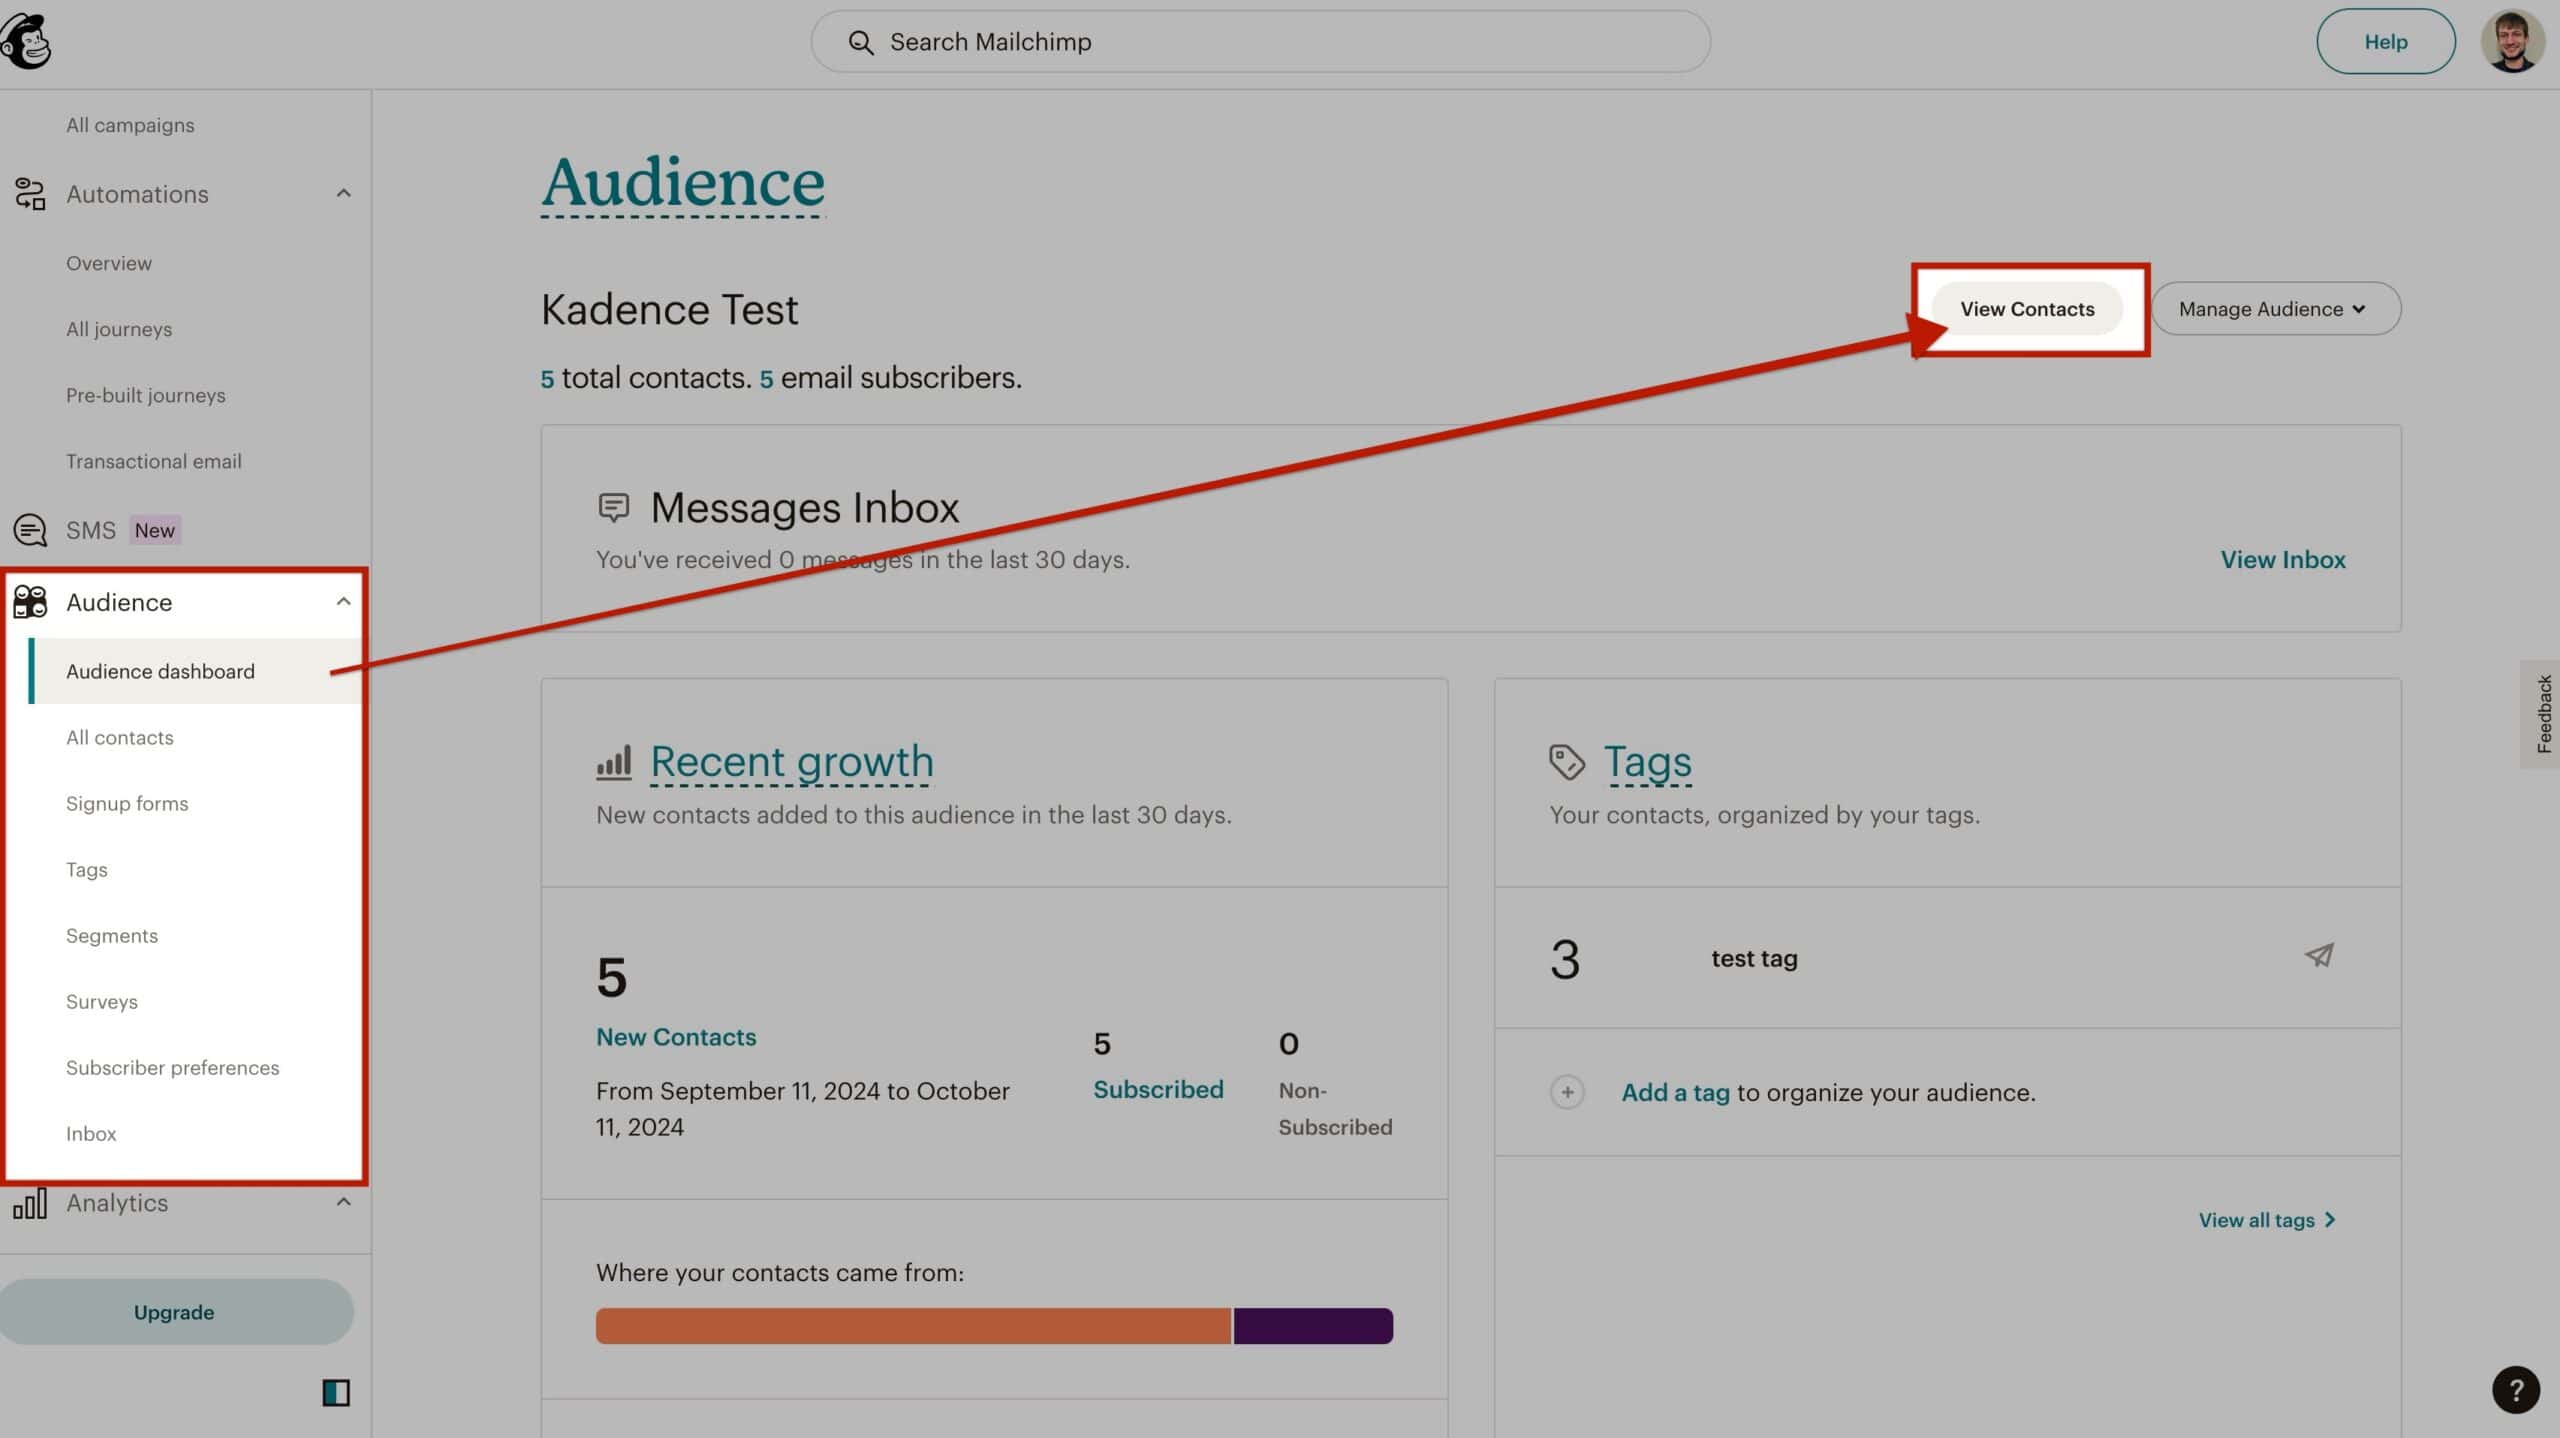
This will take you to the MailChimp Contacts page, where you can manage and view all your contacts.
