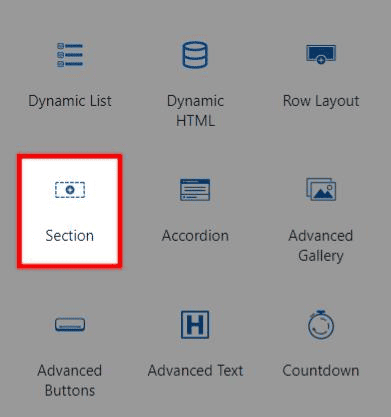
Kadence provides the Section block to help design sections of content. The Section block is automatically included in Row Layout blocks and can also be used outside of Row Layout blocks. You can add any block to the section and design it using block settings.
General Settings
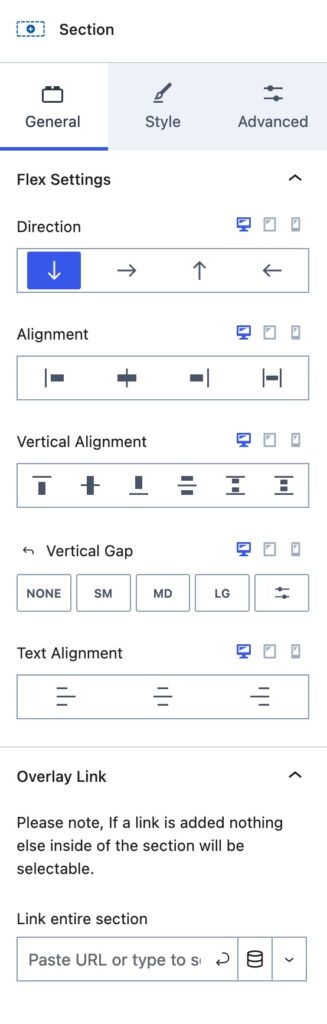
The Section Block General Settings can be used to adjust the flex and other general settings for a Section Block. The first settings displayed are the Flex Settings.
Flex Settings: These settings control the Flex CSS used on your Section. The direction will determine which other Flex Settings are available. If the Direction is changed, it will also change the remaining flex settings to match that Direction.
Vertical Flex Direction
The Vertical Flex Direction is the default one used on new Section Blocks. The Vertical Flex Direction and Reverse Vertical Flex Direction options present the same flex settings.
Direction: This determines the direction your Section will present inner content. By default, this is set to Vertical. So blocks will stack on top of each other within the section. Other available options are Horizontal, Reverse Vertical, and Reverse Horizontal. When using a reverse option, it will reverse the inner contents order.
Alignment: This determines where your Items will Align. This can be set to Start, Center, End, or Stretch. Stretch will force the content to stretch and fill in any extra space between inner items.
Vertical Alignment: This is for the Vertical Alignment of the items within your Section. This can be set to Top, Middle, Bottom, Space Between, Space Around, or Space Evenly.
Vertical Gap: This sets a Vertical Gap between items within the Section.
Text Alignment: Set a specific Alignment for the inner text of the Section Block.
Overlay Link: You can use this option to add an Overlay Link to your Section. This will turn the entire Section into a clickable link.,
Horizontal Flex Direction
The Horizontal Flex Direction and Reverse Horizontal Flex Direction options present the same flex settings while allowing the content to display horizontally.
Alignment: This determines where your Items will Align. This can be set to Start, Center, End, Space Between, Space Around, or Space Evently.
Vertical Alignment: This is also for the Vertical Alignment of the items within your Section.
Horizontal Gap: This sets a Horizontal Gap to add spacing between items that are Horizontal to each other.
Vertical Gap: Whenever the Horizontal content wraps, it will have items vertically below your inner contents. The Vertical Gap can be used to adjust that spacing.
Wrap Content: Whenever a Section doesn’t have room to stay Horizontal, the Wrap Content option can be used. This can be set to inherit, wrap, wrap reverse, or no wrap.
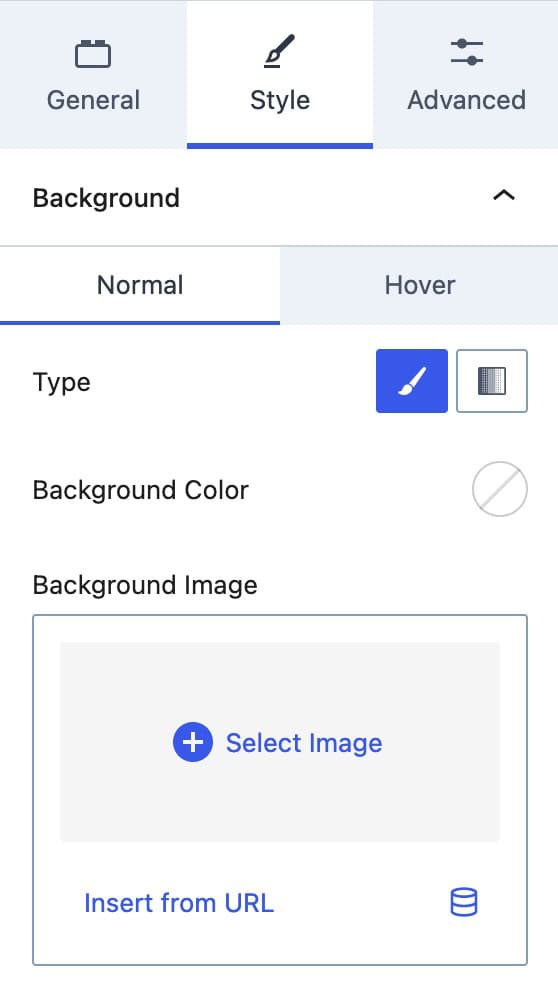
Style Settings
The Style settings have settings for the background, background overlay, border styles, and text color settings.
Background: Set a Background Color or Image for the Normal and Hover state of your Background.
Type: Set your Background Type as a Color or a Gradient Color.
Background Image: Rather than using a color, a Background Image can be used instead. This option also supports Dynamic Content.
Backdrop Filter
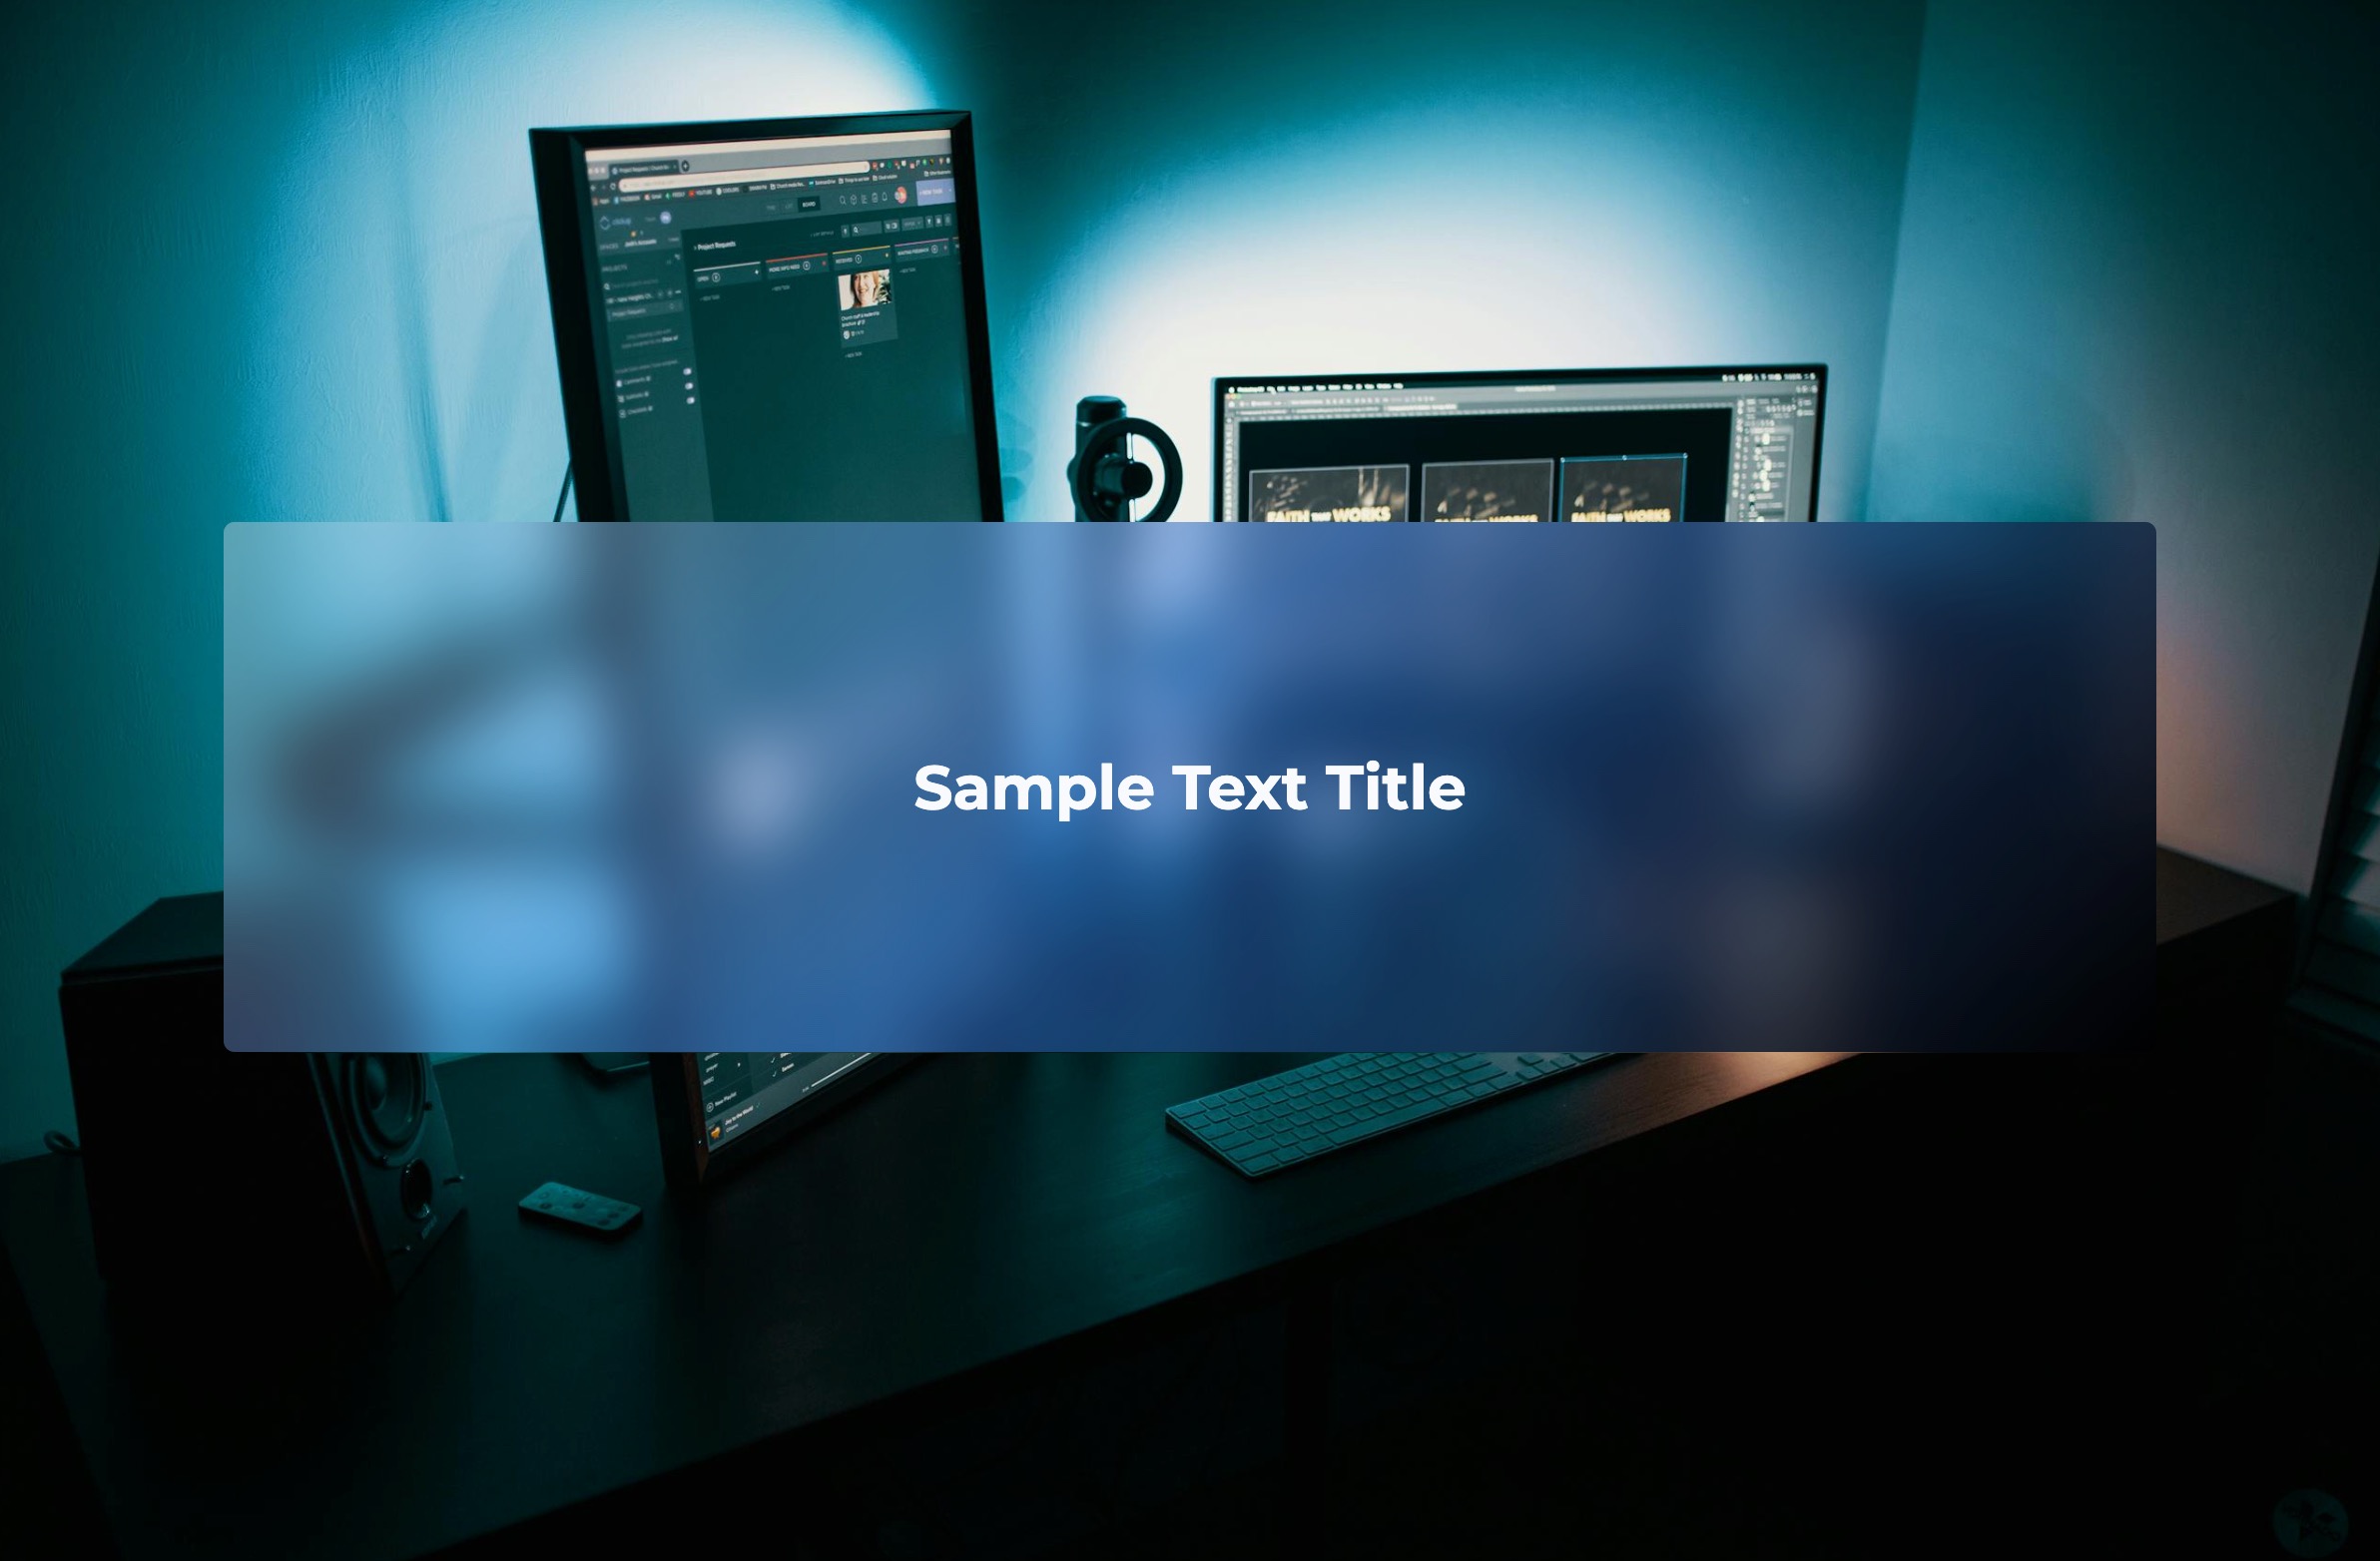
The Backdrop Filter settings allow you to apply a Backdrop Filter effect to Sections layered over other content, such as Row Layout Images Backgrounds. These settings are specifically designed for Sections with completely Transparent or Semi-Transparent Background Colors or Gradients. By default, the Section Block Background is transparent, enabling the Backdrop Filter to apply automatically.
To make the Backdrop Filter effective, having content behind the Section is important. For example, if you’re using a Row Layout Block with a nested Section Block, you can set an Image Background for the Row Layout Block. Then, apply the Section Backdrop Filter to create an effect over the Row Layout’s Image Background.

Optionally, you can add a Semi-Transparent Background or Gradient to the Section Block to further refine the Backdrop Effect. Use the Opacity Slider within the Color Picker to adjust the transparency level, enhancing the filter’s visual impact.

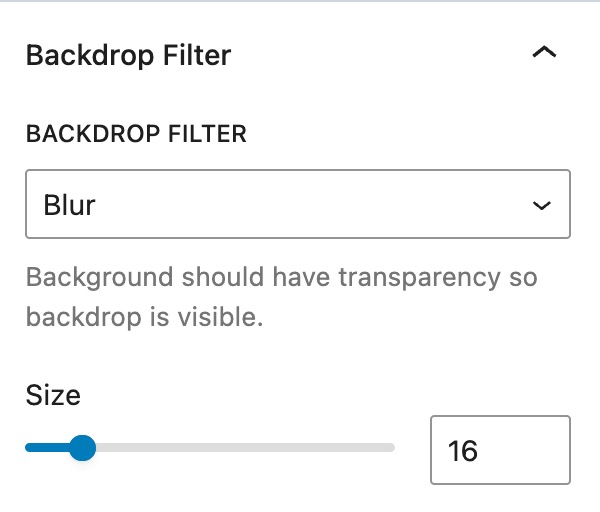
Backdrop Filter: Add a Backdrop Filter to the Background of the Section Block. Use the Size Slider to emphasize how strong you would like the Backdrop Filter to apply.
Available Filters: Blur, Brightness, Contrast, Greyscale, Hue Rotate, Invert, Saturate, or Sepia
Example of a Blur Backdrop Filter.
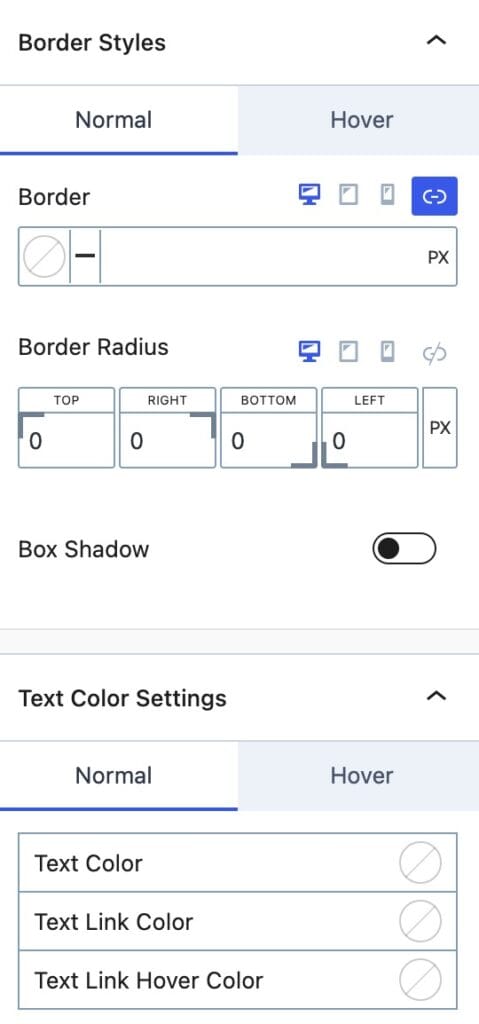
Border Styles: Adjust the Section Border Styles for the Normal and Hover States.
Border: Apply a Border to your Section. On the left side of the Border setting, a Border Color can be selected.
Border Radius: Add a Border Radius to your Section.
Box Shadow: Enable and use a Box Shadow on the Section.
Text Color Settings: These settings control the text colors within a Section. These settings can be set for the Normal and Hover State.
Text Color: This is the regular color of text.
Text Link Color: This applies to Link Texts within the Section.
Text Link Hover Color: This applies to Link Texts within the Section whenever they are hovered over.
Advanced Settings
The Advanced Settings allow you to adjust advanced settings such as spacing settings, structure settings, visibility settings, and more.
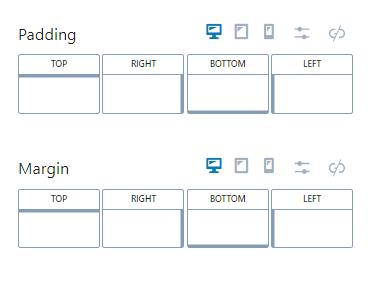
Padding: Adjust the padding around the Section.
Margin: Adjust the margin around the Section.
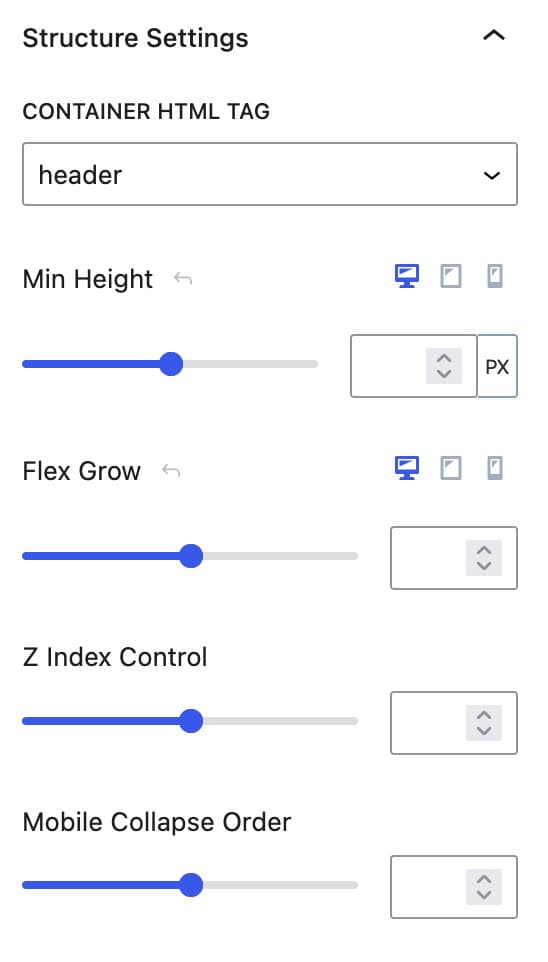
Container HTML Tag: Set the HTML Tag that the Section Block will use. By default, this is set to Div and doesn’t need to be changed unless there is a specific use case to change the HTML Tag. The options available are div, header, section, article, main, aside, or footer.
Min Height: Set a minimum height for your Section. This ensures the Section is at least the height of this setting or greater.
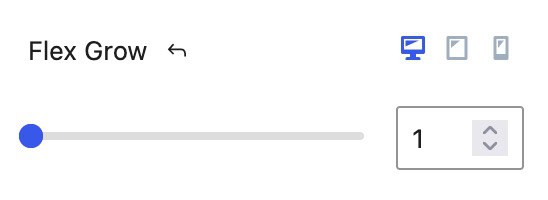
Flex Grow: Set Sections to use the Flex Grow feature. This can grow Section sizes and cause Sections to increase in size to fill a space. View the Flex Grow Demonstration below for an example of how this can be used.
Z Index Control: Control the Z Index of your Section. This can be useful for cases where you may need to display content behind or in front of a Section.
Mobile Collapse Order: Whenever a Section is inside of a Row Layout Block and the screen size goes from Desktop to Mobile, sections will usually collapse into rows. In this case, you can set a Mobile Collapse Order for each section.
Flex Grow
The Flex Grow setting can be used whenever you have multiple sections in a layout like the one below:
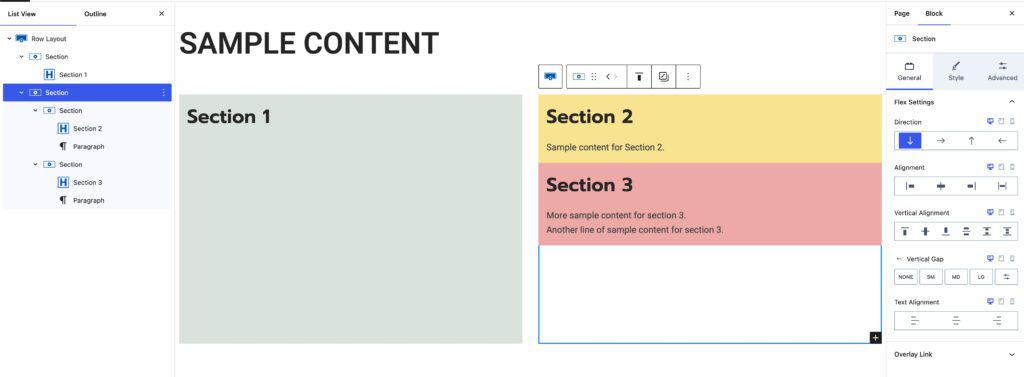
In this case, the second and third sections have empty space below them. In many cases, it is ideal for these sections to stretch and fill in areas like this. Using the Bottom Vertical Alignment option along with setting a Flex Grow to the sections used, allows the sections to grow and fill in so there is no space left.
In the demonstration above, there is a Row Layout Block with two main sections. Inside the second section, there are two more sections. In this case, we would focus on the Row Layout Block’s Second Main Section and the two Nested Sections within it.
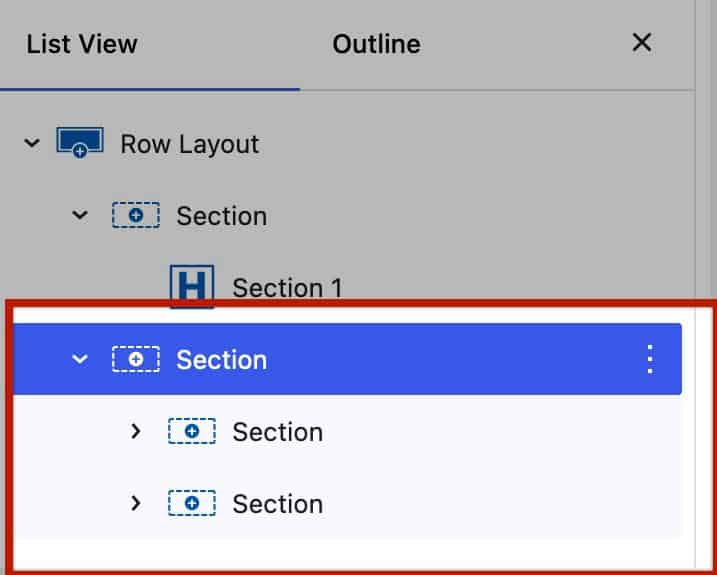
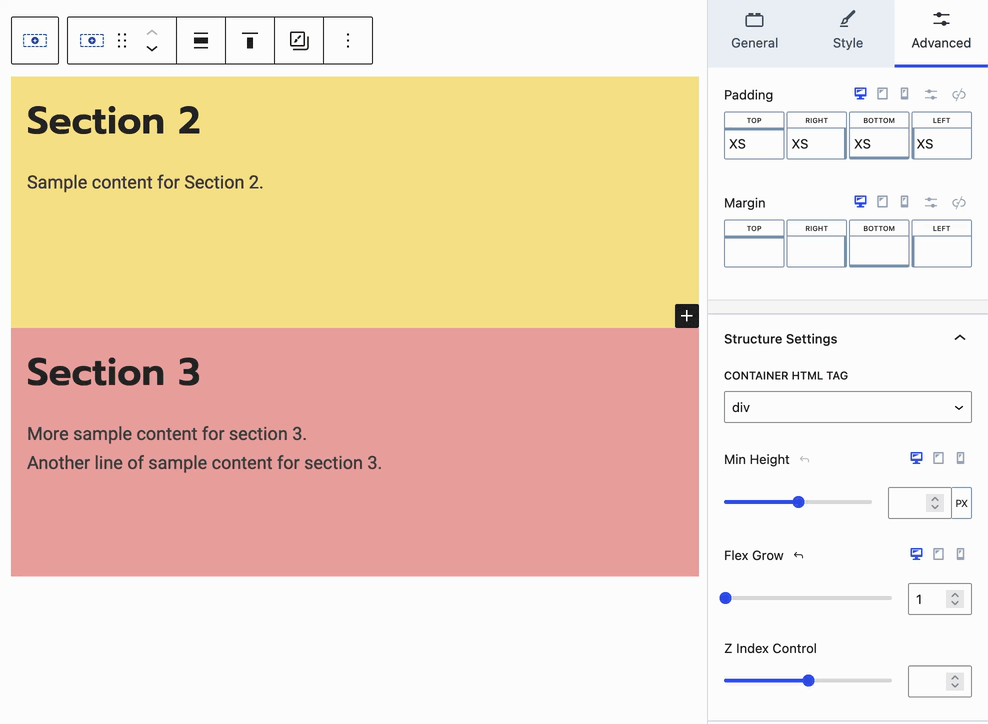
The first step to make the Second and Third Sections grow would be to set the Parent Section Vertical Alignment to the Bottom option.
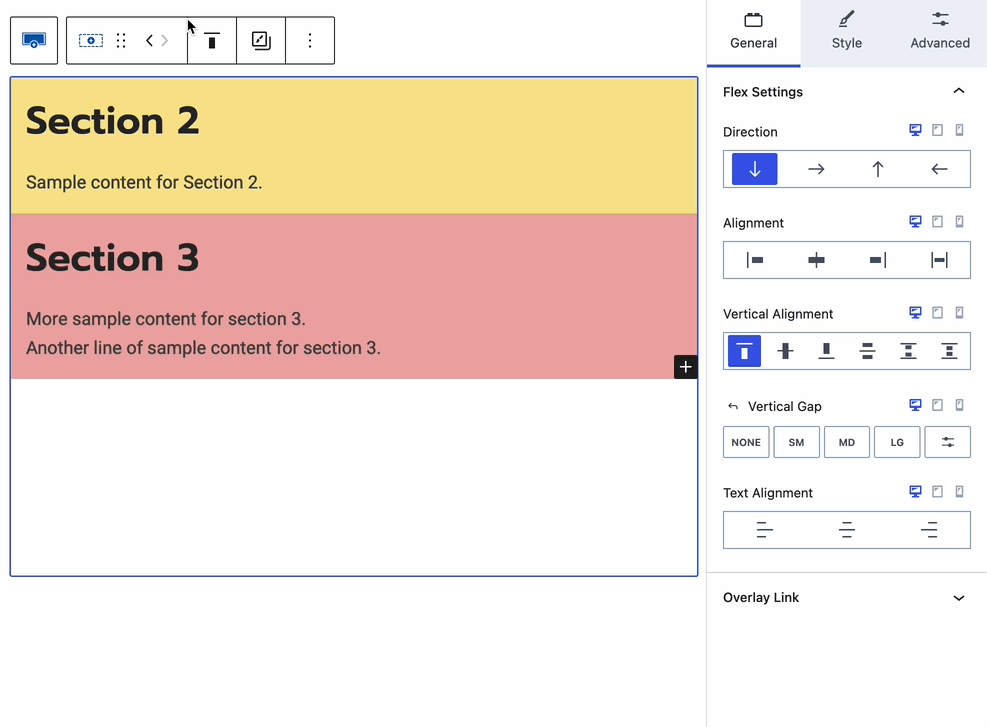
Then, in the Advanced Block Settings -> Structure Settings, apply a Flex Grow of 1 to the Parent Section. (The flex-grow values can vary based on the design. This is just for demonstration purposes)
Finally, each Nested Section can be set to also use a Flex Grow of 1 or another preferred value. This will make each Section use the same Grow and equally fill in the Parent Sections Space.
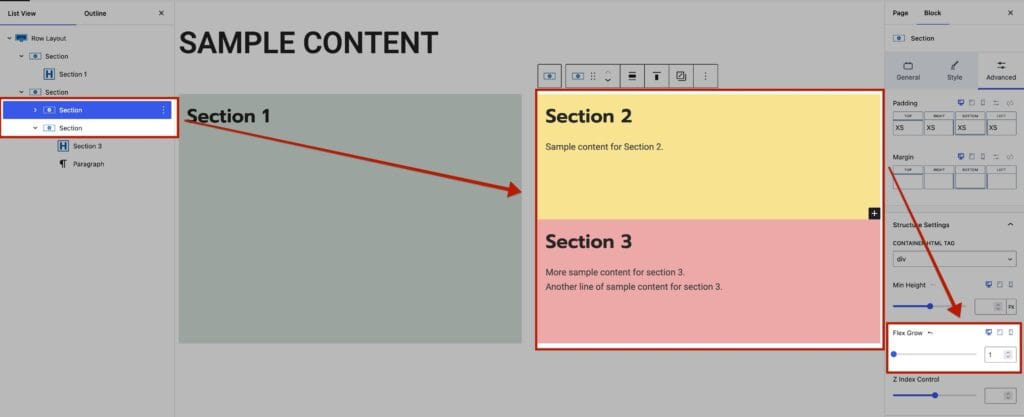
The Flex Grow setting can be adjusted on each Nested Section individually to get the desired layout. Increasing the Flex Grow value will allow the Section to take up more of the available space. Lowering the Flex Grow value will make the Section take up less space.
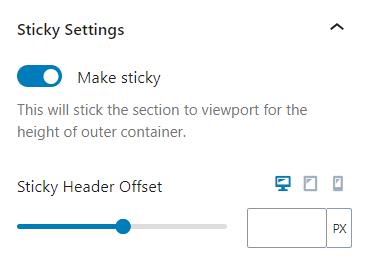
Sticky Settings
Sticky Settings: The Sticky Option can be used on a Section inside of Row Layout Block. Making a Section Sticky will keep it sticky as the user scrolls through a row. This is particularly useful when dealing with multiple columns of varying heights.
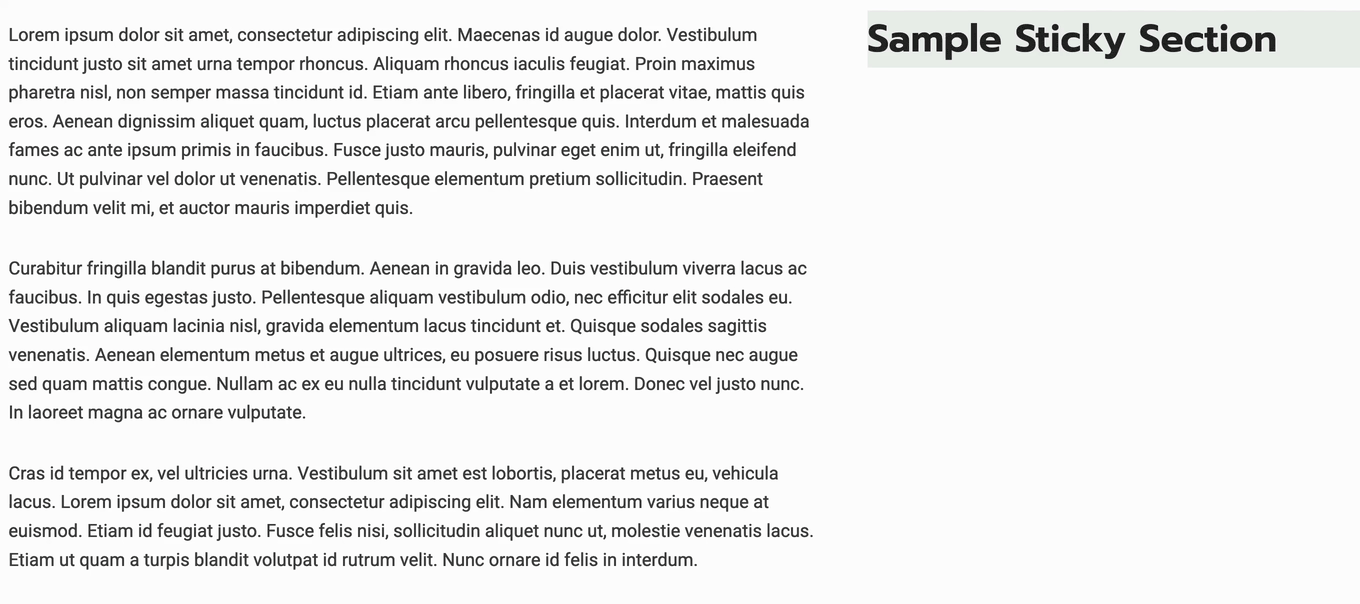
The section sticks to the top of the page but can be offset for the header.
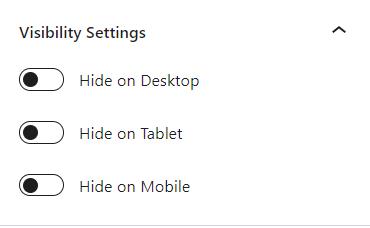
Visibility Settings: Hide the Row Layout Block for specific devices. The Row Layout Block can be hidden for desktop, tablet, and mobile devices. You can also hide the Row Layout Block from logged-in and logged-out users.
Block Defaults: You can save your Section Block Settings as a Block Default Click here to learn more,
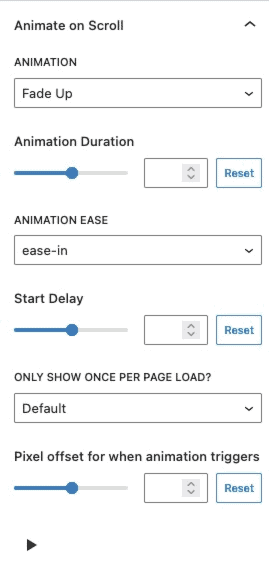
Animate on Scroll (Pro)
The Animate on Scroll settings allows you to add an animation to your block. This is a PRO feature and requires Kadence Blocks Pro in order to work. You can select an animation duration, ease, and start delay. You can set this animation to show once per page and set a pixel offset for when the animation triggers.
You can press on the play icon at the bottom of the settings to see how your animation looks in the editor.
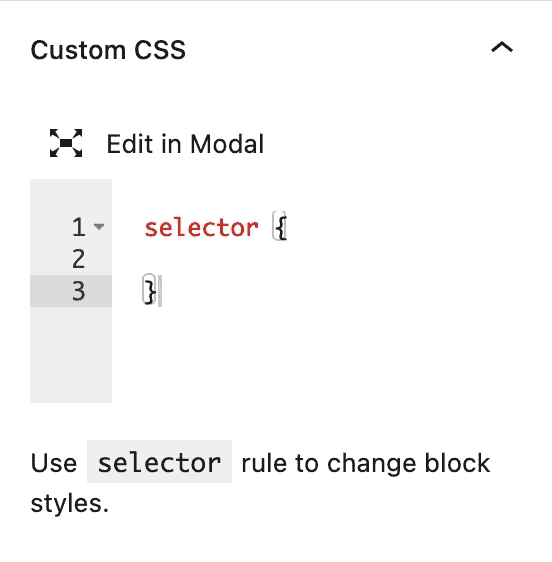
Custom CSS: Add CSS directly inside the Section Block using this Block Setting. Click on the Edit in Modal button above the Selector to view the CSS in a larger popup modal. Use the Selector rule to change the Section Block Styles when using Custom CSS.
For example:selector {
color: #ffff;
}
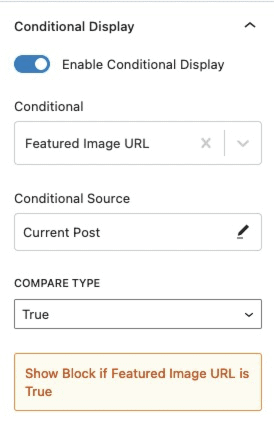
Conditional Display (Pro)
The Conditional Display setting allows you to display the button based on a condition. This is also a Kadence Blocks Pro feature.
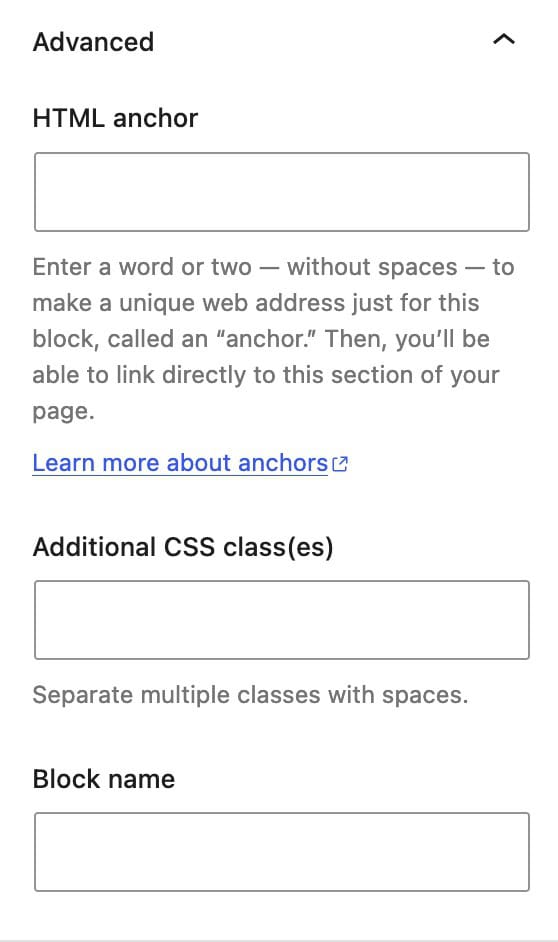
HTML Anchor: Set an HTML Anchor ID to your Section.
Additional CSS Class(es): Add additional custom CSS Classes to the Section.
Block Name: This controls the Block Name shown throughout the Editor.