The Form block allows you to not only create custom forms, but style them however you want! With the Form block you have the ability to add unlimited custom fields and it also includes Google ReCaptcha support!
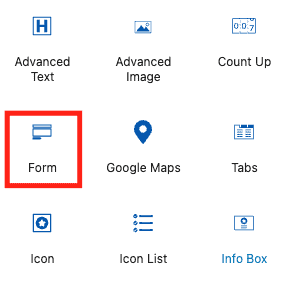
To get started, add a new block to your page and select the Form Block.
Settings and Styling
Create as many custom fields as you would like. You can duplicate rows, adjust the size of the columns, choose whether or not they are a required field, etc.
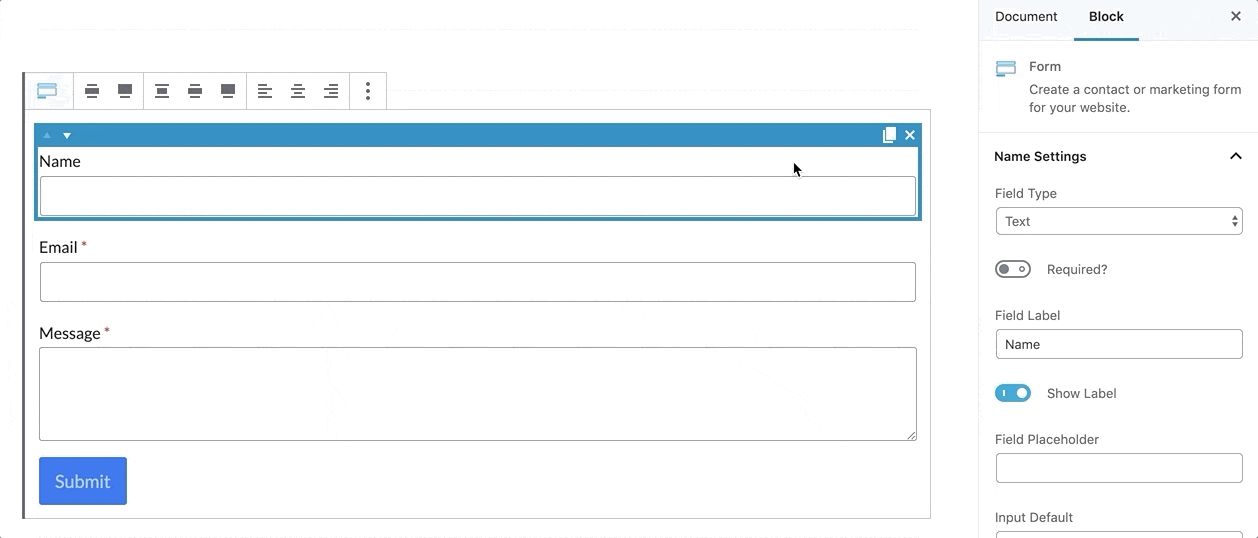
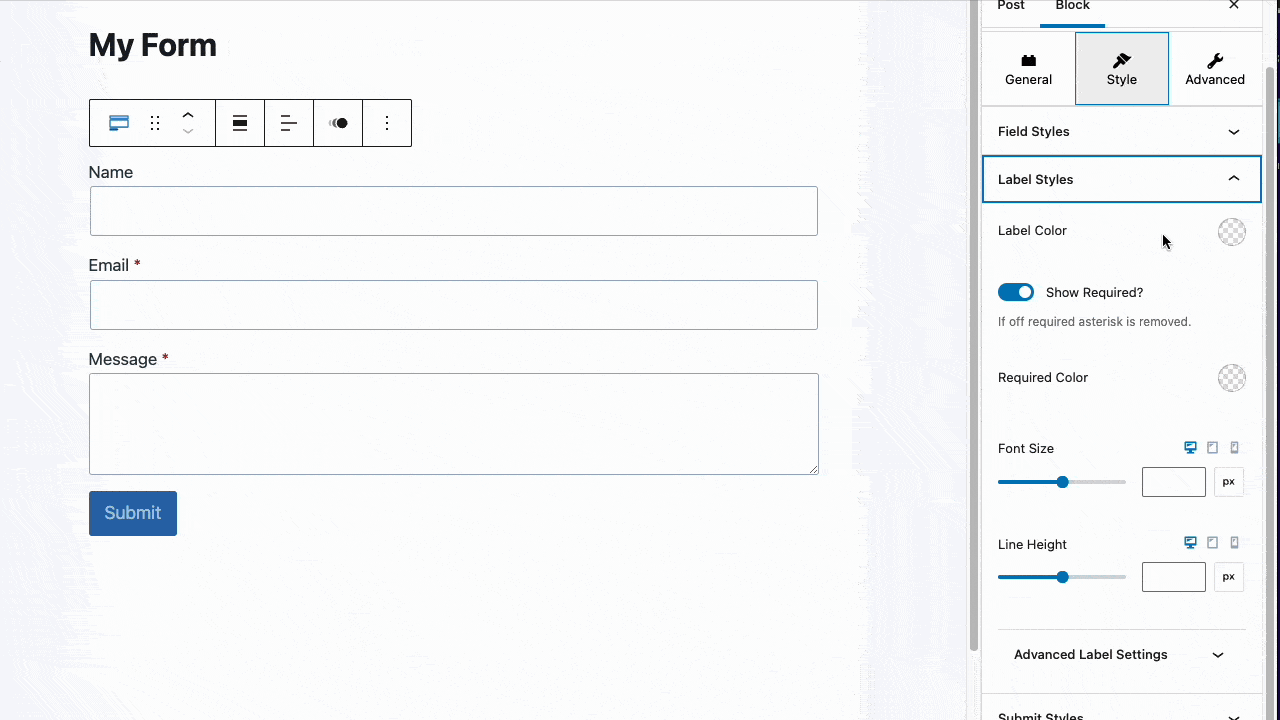
Adjust your field settings, including input background color, border settings, font styles, button settings, field row gap, and more!
Actions After Submit
You can adjust your Actions After Submit settings within the Form Block settings. Choose if you want to receive an email after, whether or not you want the user redirected after submission, whether or not you want to incorporate an auto-response email, and if you want to set up a database entry. Check out Kadence Blocks Pro if you want MailChimp and SendInBlue integration, WebHooks calls, and new Database entries upon form submission.
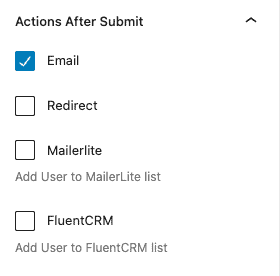
As each option is selected, you will see a tab that allows you to customize each action after submission.
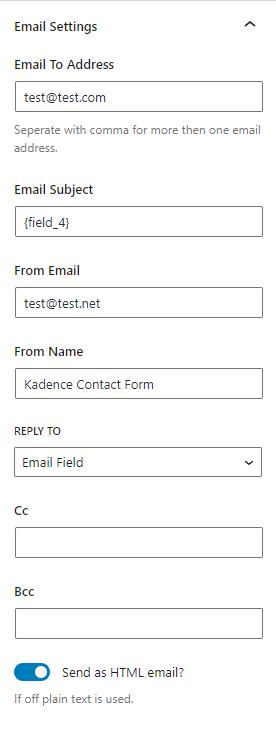
Email Settings
Email Settings appear if you choose an Email action after submitting, and lets you add the address that receives the email when a form is submitted. You can also set the subject line, the “from” email, and the “from” name. you can choose to reply to the email field or the from field. You can also set Cc and Bcc addresses. There is also an option to send HTML or a plain text email.
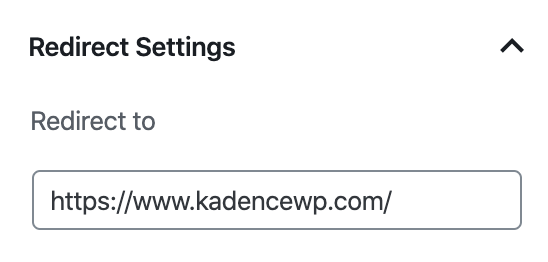
Redirect Settings
You can set a link that the form redirects the user to after they submit the form. You must enable the Redirect action after submitting to see this setting.
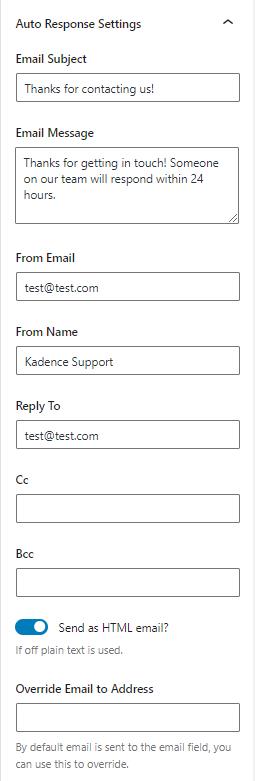
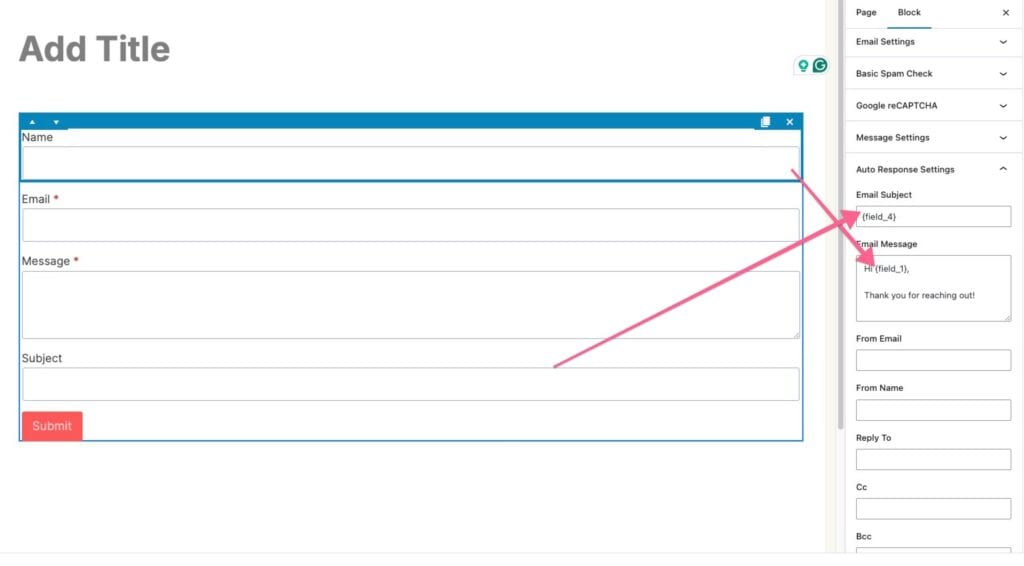
Auto Response Settings (Pro Addon)
Auto Response Settings are similar to Email Settings. You can add an email subject and message. Also, there are fields to set the “from” email address and name, a “reply to” address, and Cc and Bcc addresses, and enable an HTML message. There is also an option to override the “email to” address.
Using Dynamic Placeholders
The Form Block enables you to incorporate dynamic placeholders to populate certain settings based on the input values submitted through the form. These placeholders are particularly useful for actions such as “Auto Respond” and “Email.”
To utilize this feature, use the {field_#} dynamic placeholder format, where # corresponds to the position of the field in your contact form. For instance, if “Subject” is the third field (following “Name” and “Email”), its placeholder would be {field_3}.
Note: The numbering of placeholders is determined by the sequence of fields you’ve added to the form.
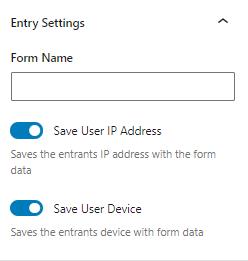
Entry Settings (Pro Addon)
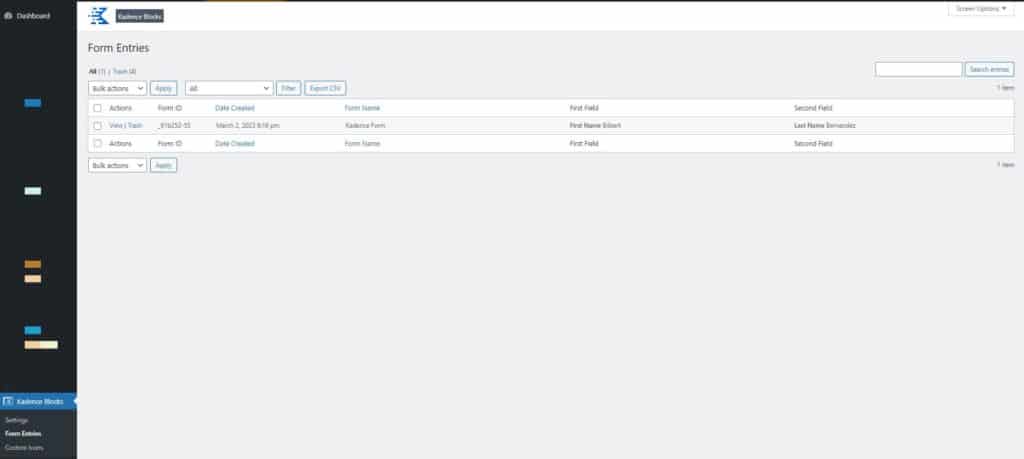
If you check the Database Entry action after submitting, Entry Settings let you set the form name as well as if the entry will save the user IP address and device. The entries are in the admin dashboard under Kadence Blocks > Form Entries.
Spam Prevention
The form block includes native support for Google reCAPTCHA versions 2 and 3. Basic honeypot checks can also be enabled to ensure you’re not getting spam submissions.
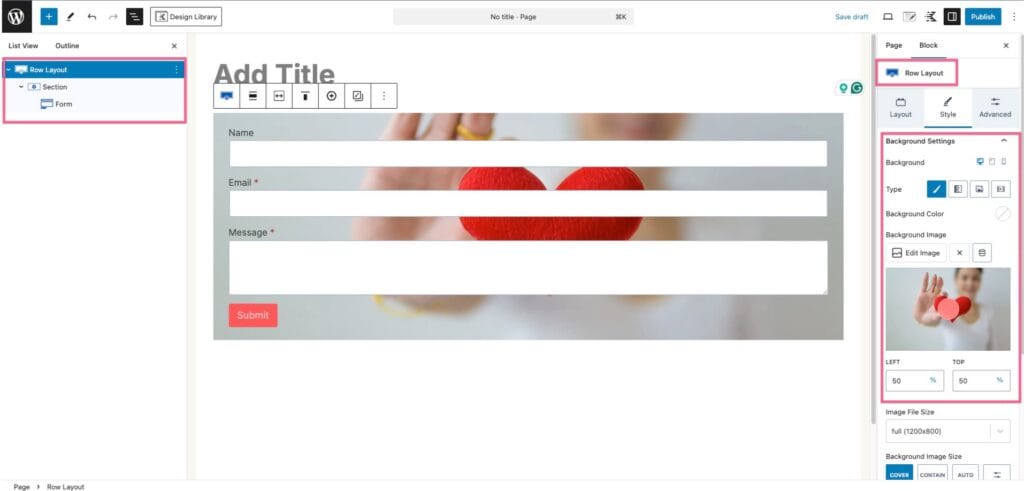
Optional Background
You can use the Kadence Row Layout Block to add a background to your form. Create a row with a full-width background image, then drag your contact form into a column within the row. Then you can set a background color for the column and adjust the opacity as desired.