Hooked Elements (or Element Hooks) which provides an interface to build an element using the WordPress Gutenberg editor (or custom code) and hook it to one of the several locations on your site’s pages so it appears exactly where and when you want.
In short, element hooks allow you to add content in different areas of a page, with unlimited customization options.
Just one amazing thing they allow you to do is restrict content to certain posts, pages and even users. There are entire plugins devoted to that purpose and here is a Kadence hooked element ready to do it all, humbly waiting in the background. When you get right down to it, hooked elements have overwhelming potential. Naturally, that does mean they are a pro add-on.
Enable Hooked Elements
To get started, let’s walk through how to enable Hooked Elements. As mentioned before, this is a Kadence Pro Addon so make sure you have installed and activated Kadence Pro in order to enable this feature. It is included in Kadence Membership and can also be purchased individually.
Once you have installed and activated Kadence Pro, enter your license key and email at Appearance > Kadence.
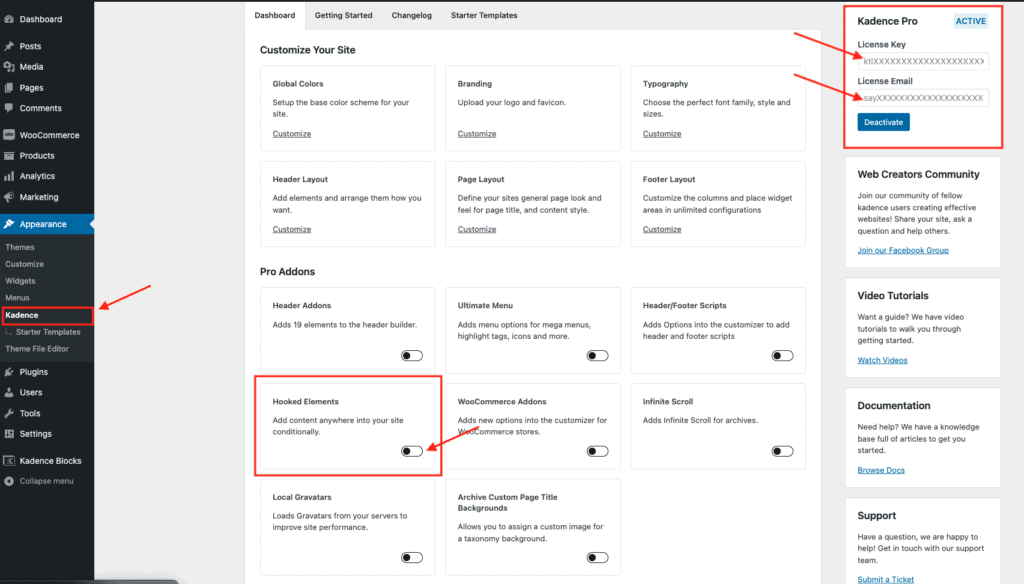
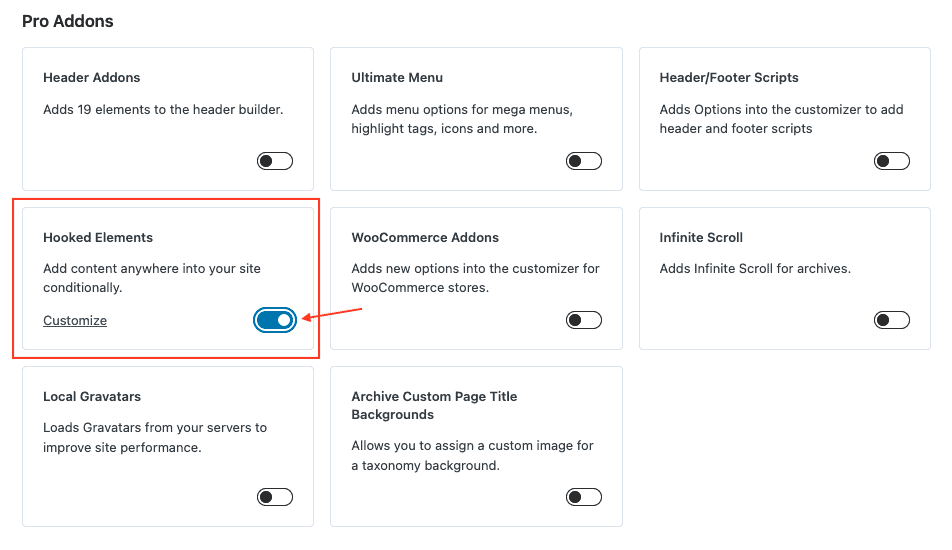
Once you are an official Pro user, you will notice all the Pro Addons have been unlocked and are available to enable and begin using. Enable “Hooked Elements.”
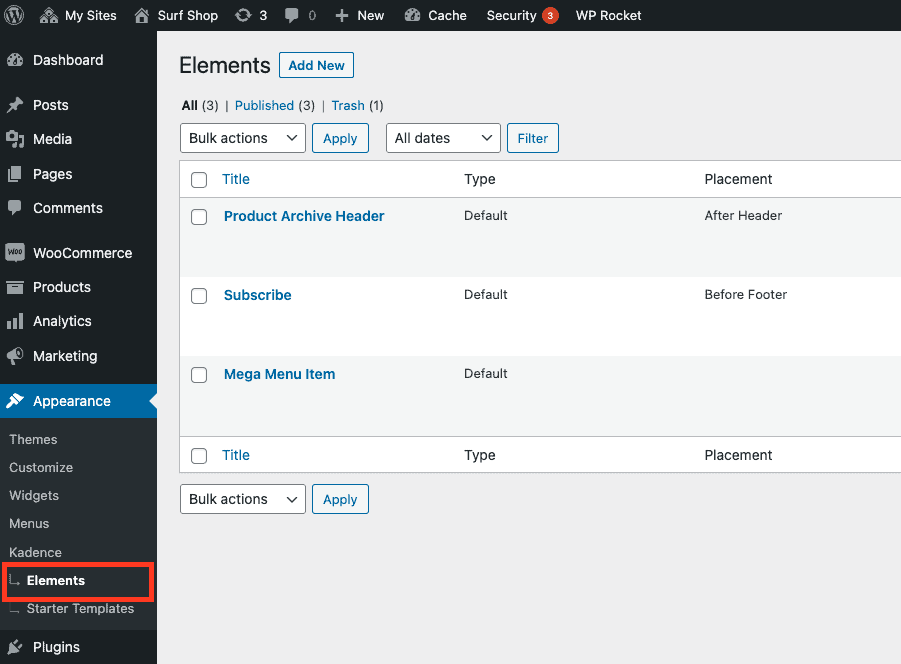
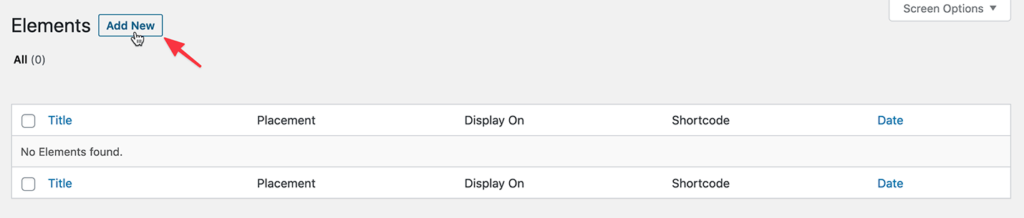
Once “Hooked Elements” is enabled, refresh your page. Now you should be able to see an additional submenu item under “Kadence” titled “Elements.”
Click on “Elements” and you will see a table with all the elements you create. This table will be empty until you create one.
Now onto the fun part.
Creating an Element
Click Add New to add a new element. Pretty simple so far, right?
Now you should see 4 options that intimidate you and tempt you to forget hooked elements ever existed. But wait!! I’m here to explain everything! We ‘re going to take this one step at a time.
Here is an explanation of the 4 element types and scenarios for when you might choose one over the other.
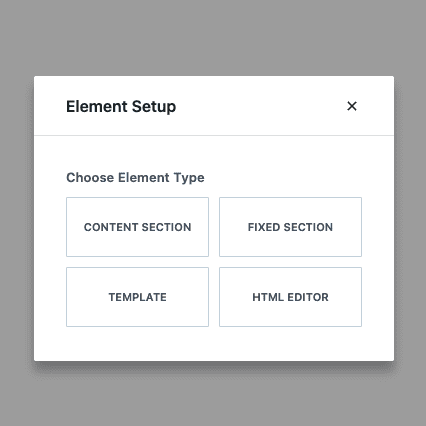
1. Content Section
This is element type I go with most often. It is exactly what it sounds like, a section of content. Working with this type is no different than building sections of a post or page.
Potential Use Cases:
2. Fixed Section
Fixed in this case just means the section will be visible at all times. You may think of this as a “sticky” section. Where ever you configure the placement of this element type, you will always see it there regardless of where you scroll to on a post or page.
Potential Use Cases:
3. Template
Template allows control over the layout of a custom post type without using code. It is also the choice you will likely want to use if you are using any dynamic content in the element.
Potential Use Cases:
4. HTML Editor
The HTML Editor element type allows you to write your own HTML and CSS. This might be a good option if you don’t want to use any 3rd-party css or blocks. You could also have something custom you want implemented that blocks can’t accomplish.
Potential Use Cases:
Element Settings
Once you have created your new element, the full potential can be realized. Now you have the mighty power to decide, where this can be seen (not only posts and pages but exactly where on the page or post you want it displayed- ie. header, footer, etc), who can see it, and how long it can be seen for.
Let’s take a beat and really let that power set in. Okay, that’s enough, moving on.

In the screenshot above I have chosen to use the Content Section element type. This is just a row block with a background, advanced text, advanced buttons and a bottom row with a search bar, nothing too crazy.
Make sure you have the Element Settings selected by clicking on Element Settings icon next to the gear icon near top right. Now you should see all the display and visibility settings.
For this element I have set the Placement to After Header – so directly below the logo, navigation and all that jazz. However, I don’t want it to appear on all that pages, so I have Display Settings to only show on the Product Archive page. If I wanted to add a rule to show on an additional page, I have that option, but for now, I’m good with just the one page. I also have the option to say show on All Pages and then Exclude the posts or pages I don’t want to show the element on.
Next, you see where you can set which users are allowed to see it. Here I have it set to All Users, but you might have a scenario where you only want users who are Logged In, or users with a specific role like Subscriber. The possibilities are endless people. And if that wasn’t enough, you also have the option to choose what type of devices it can display on. Have a vendetta against tablets? We’ve all been there! Now you have the option to shun all tablets from seeing your amazing element.
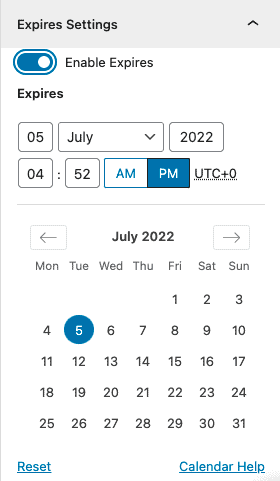
Finally, we have the Expire Settings. By default it is disabled, but when enabled you will see all the date and time options.
Expires Settings section enables you to specify whether the element should automatically be removed (not shown) at a specified date and time.
This setting comes in especially handy if say you have a sale or promotion going on and want to set the expiration for an ad banner or something of that nature.
Once the element is configured, publish it to see it in action.