
There are many plugins and many developers doing things in a lot of different ways. It’s very hard to isolate your code in WordPress so conflicts are inevitable. What’s crucial to be able to diagnose a problem and find a solution you have to be able to determine which plugins are conflicting. The simplest form of this is to deactivate plugins one by one until you uncover what the conflicting plugin is.
Many people do not want to deactivate their plugins one by one for fear of breaking something on their site, or breaking the site while a potential user is viewing the site. Thankfully there is a better way to test for conflicts by using the Health Check Plugin developed by the WordPress community.
Using Troubleshooting Mode in Health Check
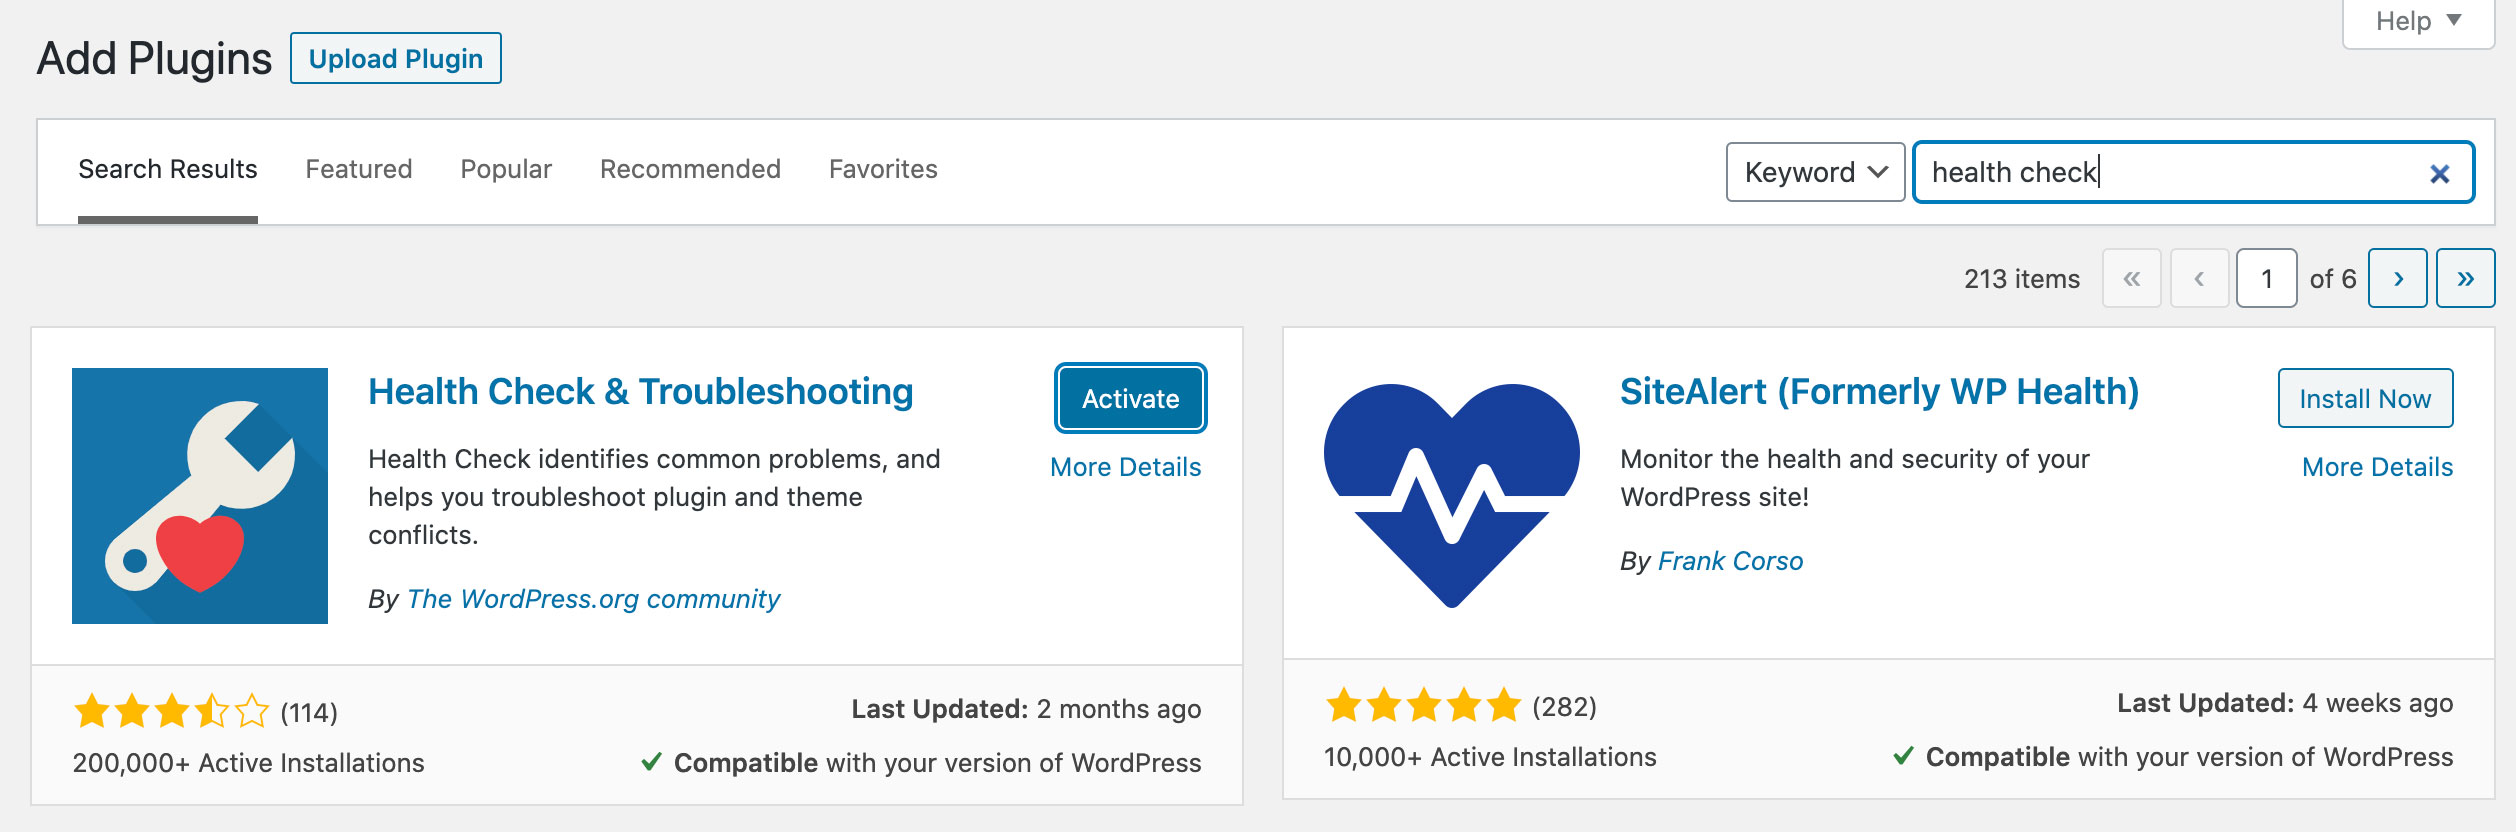
1. Install the Health Check Plugin by going to plugins > add new in your admin. Then in the search type “health check”. Install and activate the Health Check & Troubleshooting plugin by the WordPress Community.
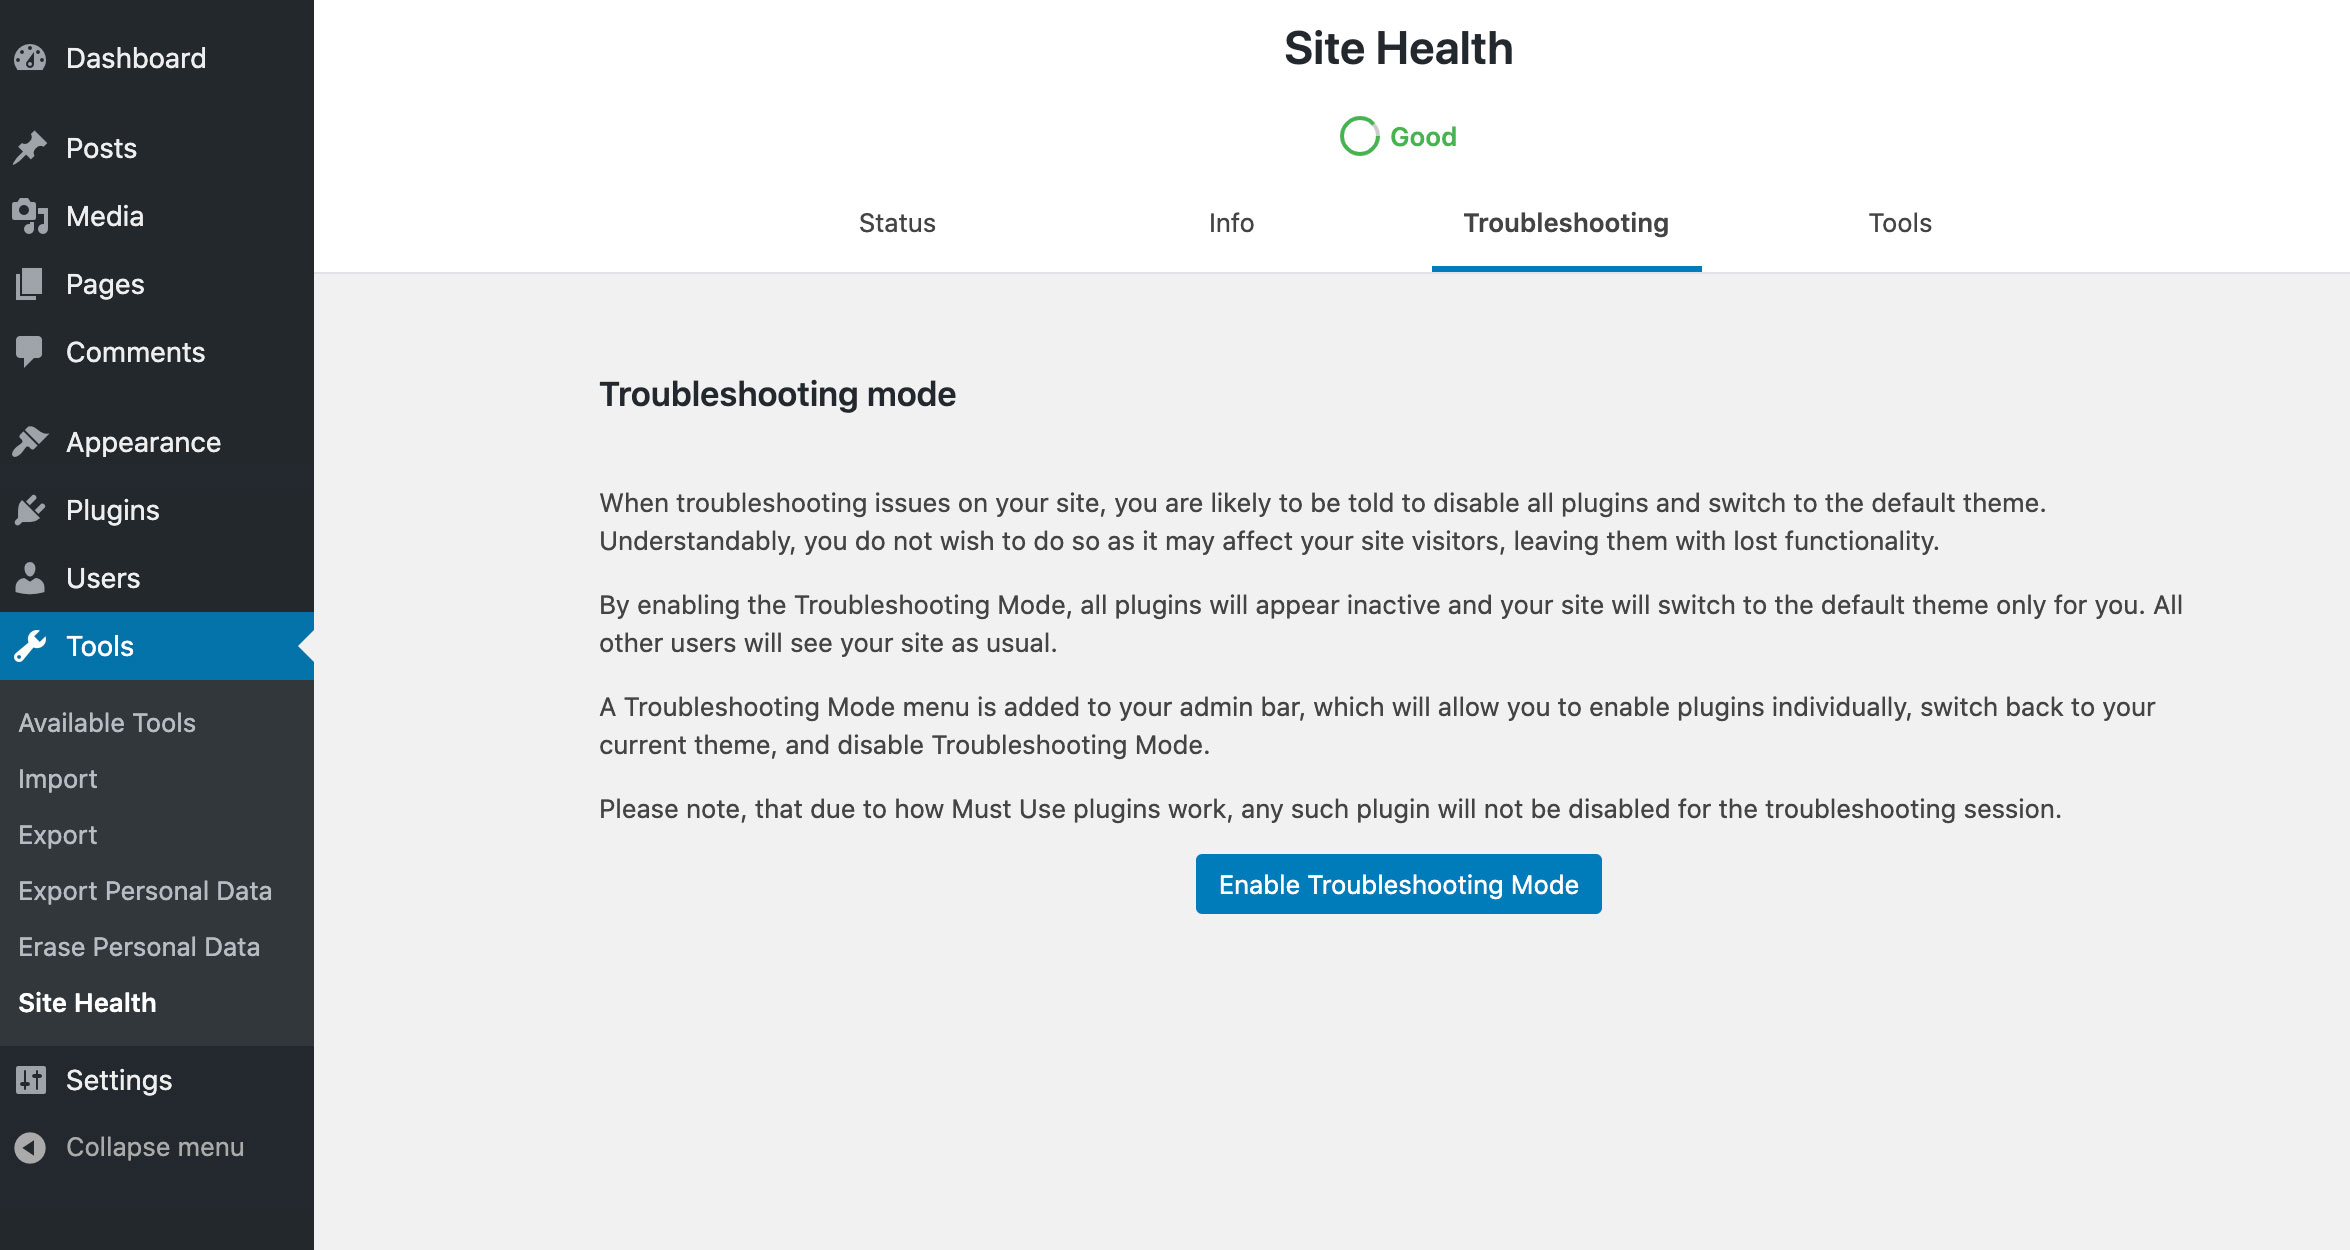
2. Navigate to the tools > health check in your admin and there click on the “troubleshooting” tab at the top of the page. That will reveal the “Enable Troubleshooting Mode” button.
Troubleshooting mode will allow you and only you to view your site and admin with everything turned off. That way your users can keep using your site without issue and you can test and discover what conflicts might be going on. Once enabled you will be using a default theme and no plugins will be active. Usually, the first thing is to start by activating the Kadence Theme, then you can test by activating plugins one by one.
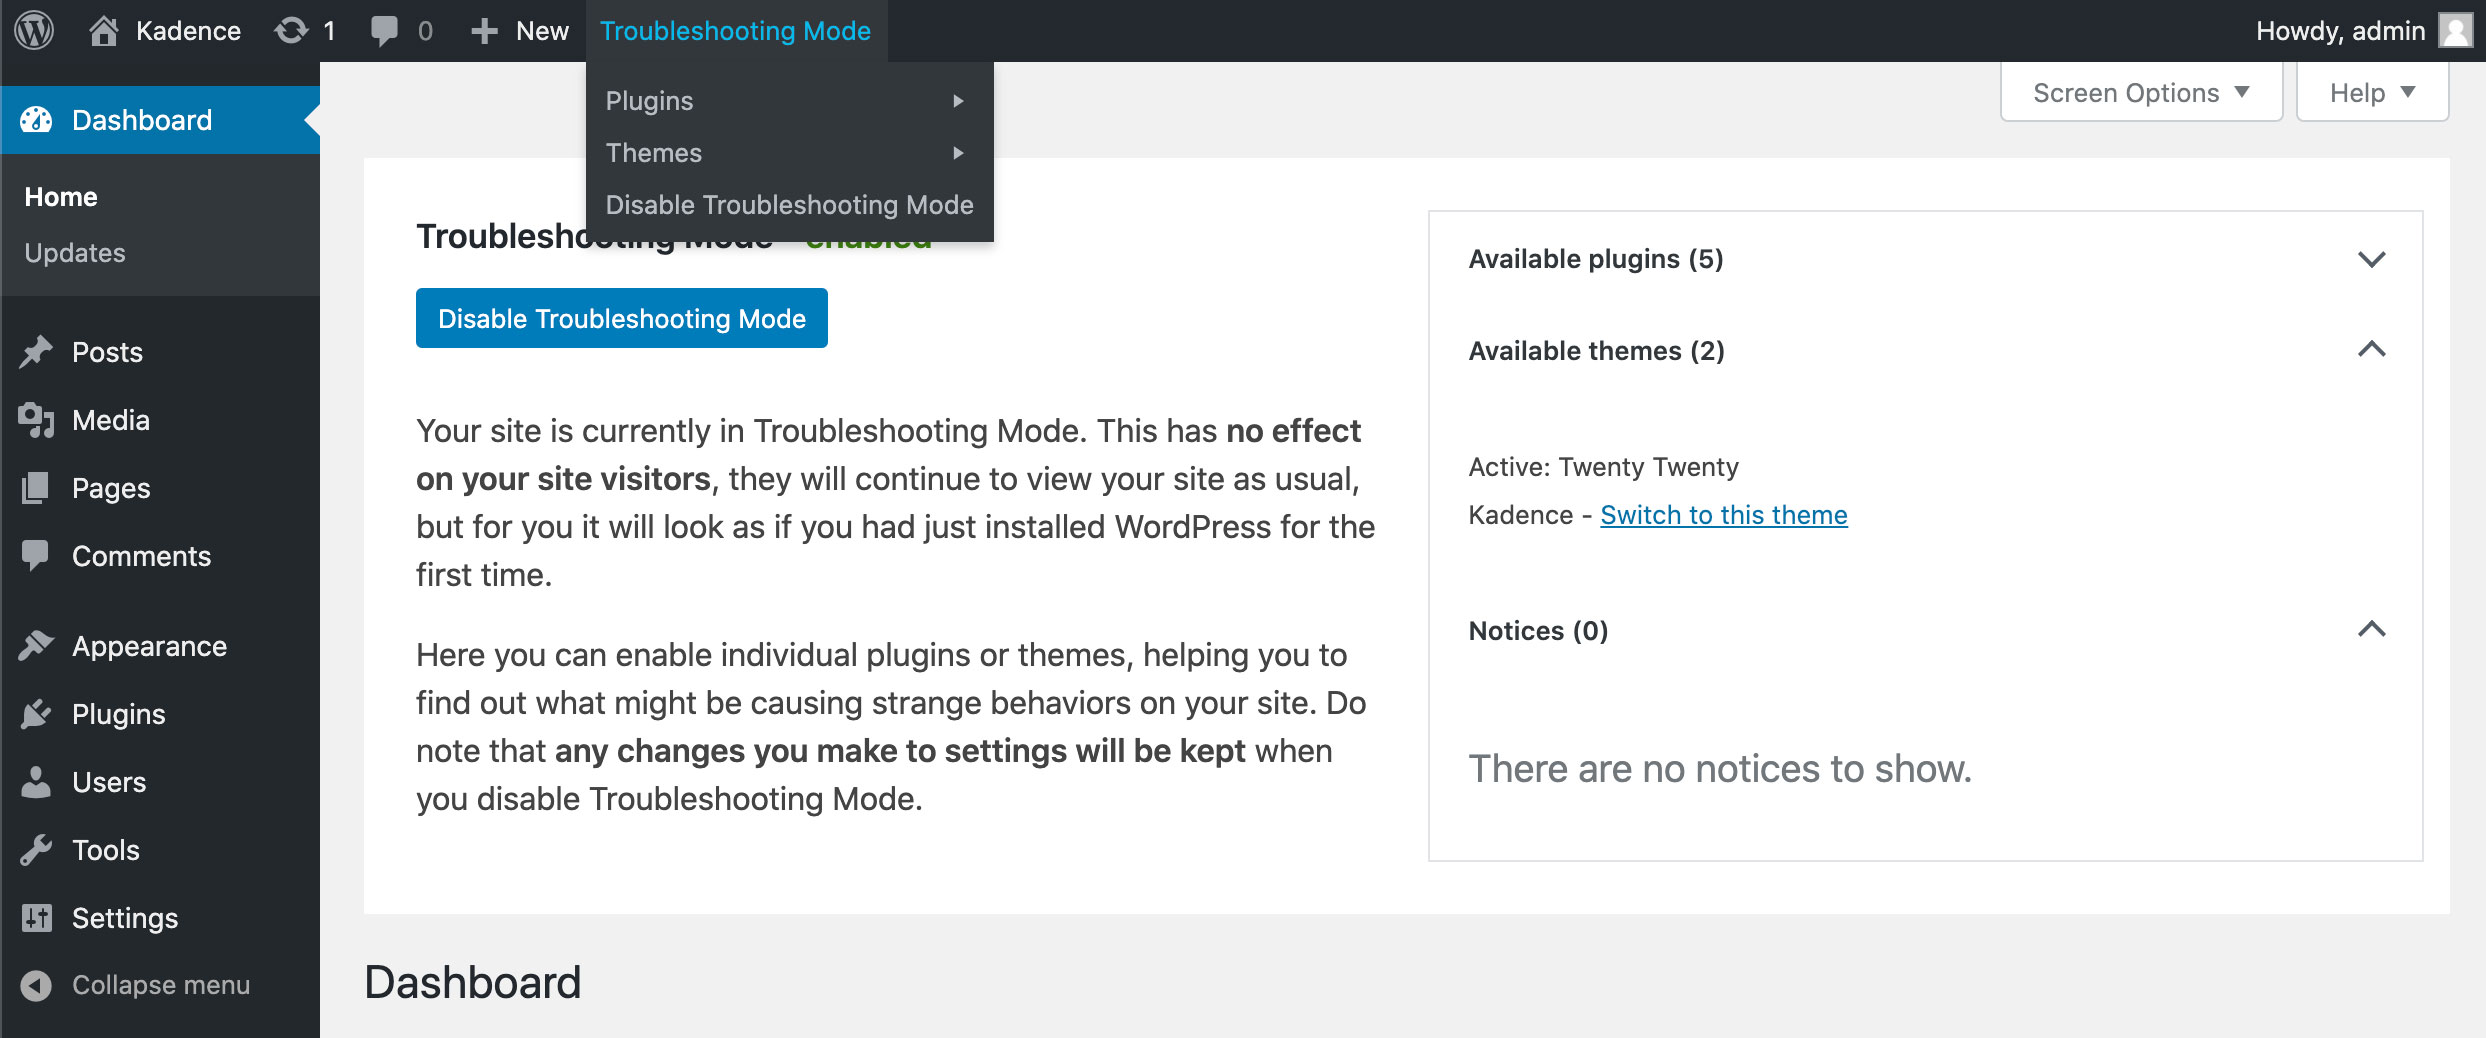
You can get out of troubleshooting mode at any time from your admin bar or from the home page in your admin dashboard. Now it’s time to test away without worry of breaking your site or ruining your user’s experience.
Test each plugin on by one to see if one is causing an issue, if you find a plugin causing an issue contact that plugin author to see about resolving it.
If your issue is happening with all plugins deactivated let us know and we can help you resolve it.
