
All of the Kadence Bundles give you access to the Kadence Custom Fonts Plugin. You can upload Custom Font Files to your website or import your Adobe Type Kit Project fonts directly to your Kadence website with ease.
Getting the Kadence Custom Fonts plugin
- You can download the Kadence Custom Fonts plugin by logging into your KadenceWP Account and navigating to your Product Downloads page.

- From your WordPress Dashboard, navigate to Plugins -> Add New -> Upload Plugin.
- Find the Custom Fonts ZIP file, and install and activate it.
Upload Your Font
You can upload your Font by going to your Dashboard -> Appearance -> Kadence -> Custom Fonts. You can press on the Add A New Custom Font button to add a new Font.
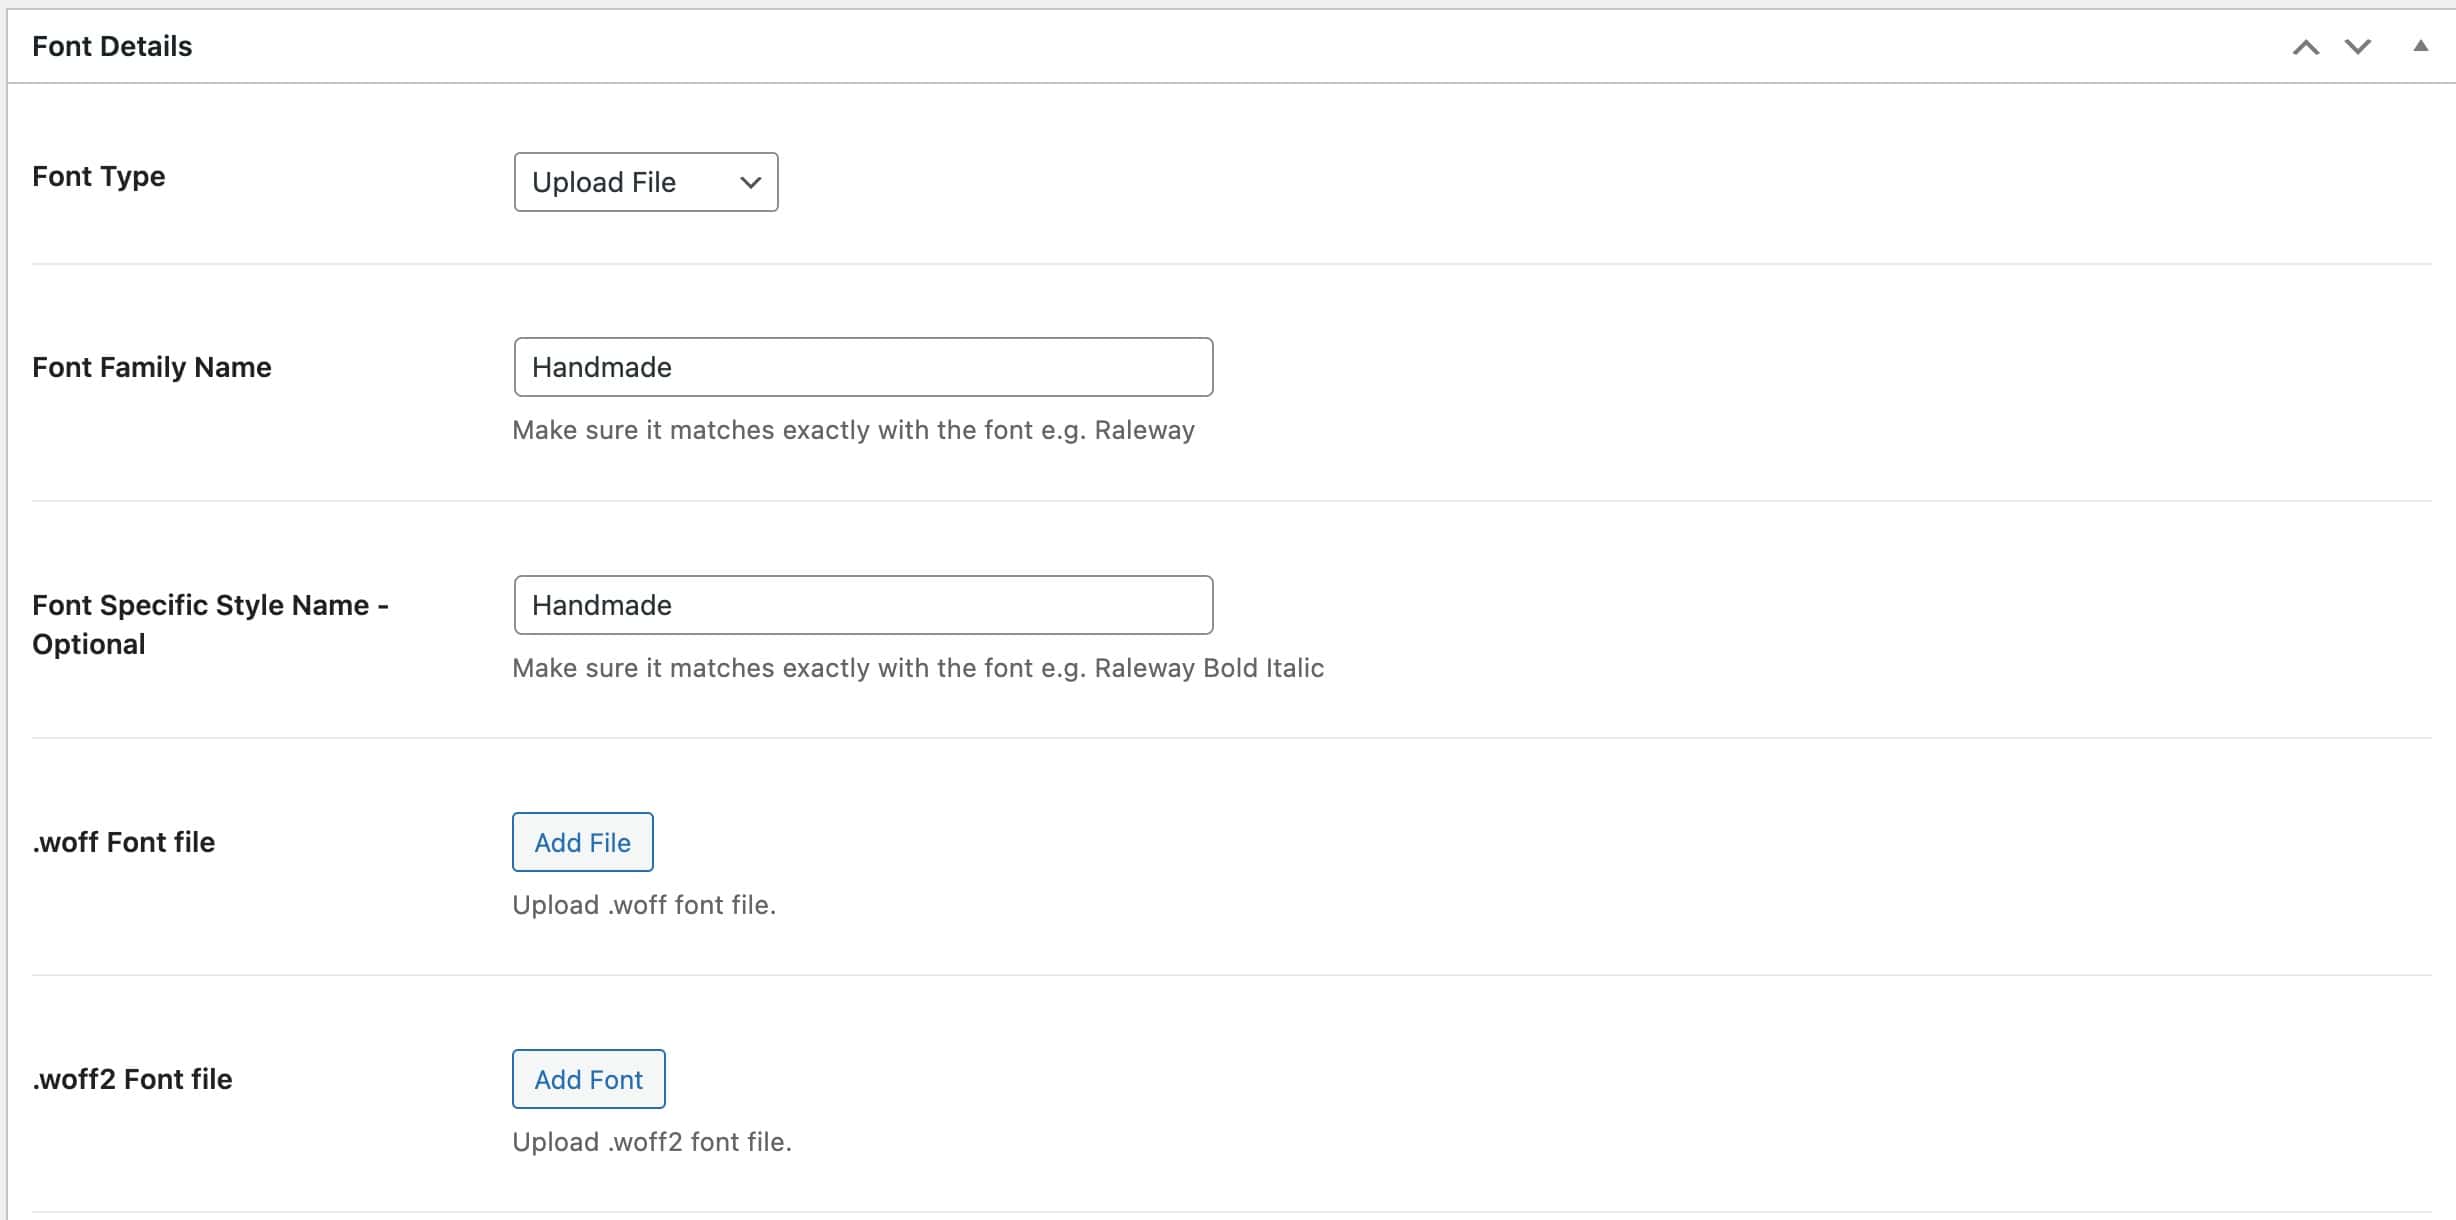
When adding a new Custom Font;
The Font Family Name option is where you specify the name of the new font.
Then, you can optionally also set the Font Specific Style Name. If you do not know what this is, you can leave it blank.
Then, you will be able to upload the .woff and woff2 files of the font.
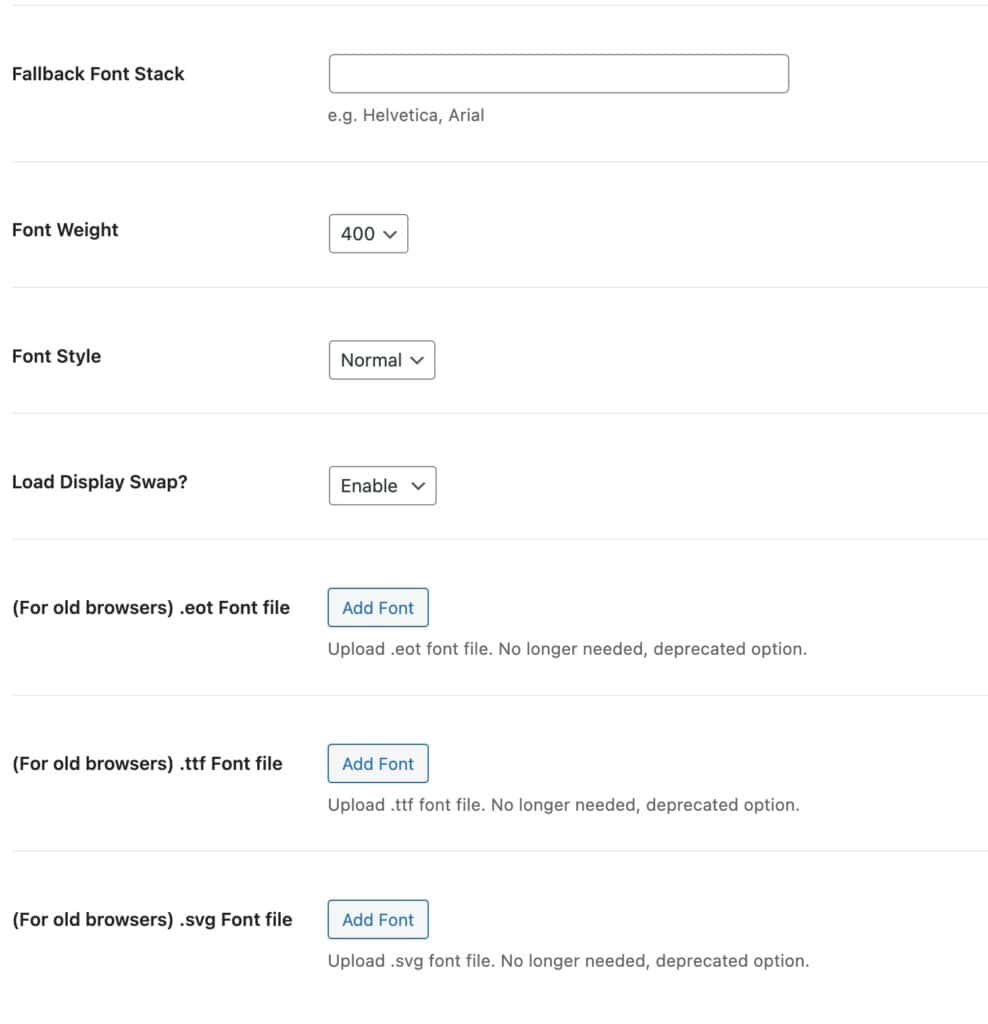
You can use the Fallback Font Stack setting to set your fallback fonts.
You can also set the Font Weight and Font Style.
Finally, you can upload the OTF, TTF, and/or SVG versions of the font if you would like for the font to be supported on older browsers.
Once you publish your new font, it will be available in your Kadence Theme and Block Settings.
Adobe TypeKit Fonts
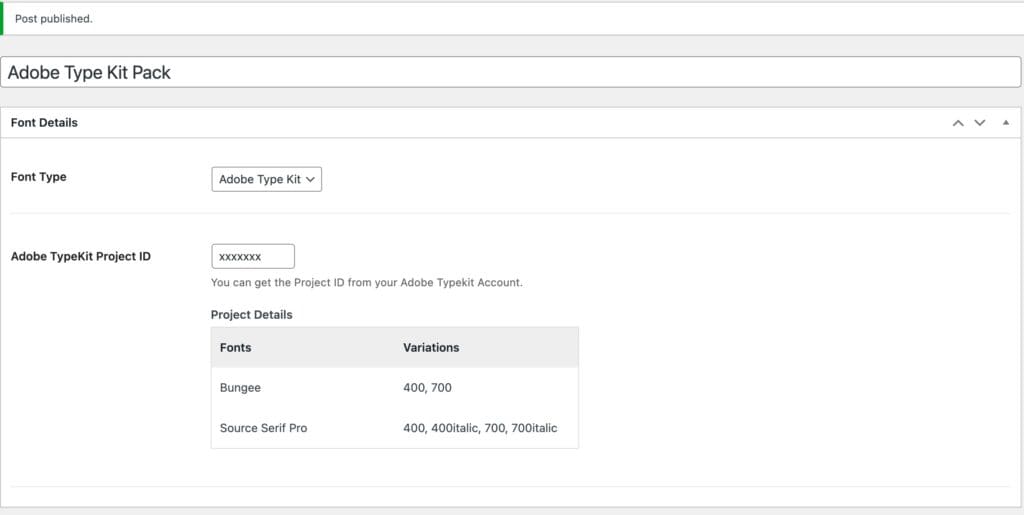
You can also import your Fonts from Projects in Adobe TypeKit. When adding a new Custom Font, the first option is Font Type. From the dropdown menu, you can select Adobe Type Kit to use it instead. You can learn about adding fonts to your website using Adobe TypeKit here.
You will then be prompted to enter your Adobe TypeKit Project ID. You can find this when viewing your Adobe TypeKit Project.

Once you add a Project ID, Publish the new Custom Font. The Custom Fonts Plugin will then begin to Import all of the Fonts and Variations added to the Adobe Type Kit Project.
Now your Adobe Type Kit Fonts can be used across your website.
