Step-by-Step Guide to Add Custom Fonts in WordPress
Bold, sleek, playful, or elegant — your WordPress site’s personality shines through its fonts. But if you’re still using the default options, you might be selling your brand short. It’s like trying to stand out at a party while wearing the same outfit as everyone else. Sure, you’re dressed to the nines, but are you really making an impression?
When you’re trying to make your mark online, the fonts you pick are a big deal. They communicate your brand’s personality to visitors before they even read a single word. It’s no wonder the Font and Typeface Market is booming, with experts predicting it’ll hit a whopping $1293.04 million by 2030. People are catching on to the appeal of custom fonts, and here’s why:
- Unique fonts make your site look sharp and professional.
- They keep your brand looking consistent everywhere.
- The right fonts make your content easier to read.
- Different styles can set just the right mood for your site.
- Custom-looking fonts help you stand out from the crowd.
- Great typography keeps visitors glued to your content.
Now, you might be thinking, “Sounds great, but isn’t adding custom fonts to WordPress complicated?” Not anymore. With tools like those from Kadence WP, giving your WordPress site a typographic makeover is easier than ever.
Ready to see how custom fonts can transform your site? Let’s start!
The importance of font licensing
When picking out the perfect font for your project, there’s more to consider than just how it looks. Font licensing is a bit like the fine print of the typography world — it’s easy to overlook, but it’s a major part of the process.
Font licenses typically fall into two main categories: personal use and commercial use. Personal-use fonts are perfect for non-commercial projects that don’t generate income. Think personal blogs, school assignments, or those family reunion invitations you’ve been putting off.
Commercial use fonts, on the other hand, cover any scenario where you’re using the font for business purposes or to make money. Commercial licenses usually come with a price tag, but they give you the legal green light to use the font in your business activities.
For a WordPress site, you’ll want to opt for a commercial license. It’s the smart move to avoid any potential legal issues down the road. However, keep in mind that font licenses can vary significantly. Some might limit your site’s visitor count, while others could restrict how and where you use the font. Always take the time to read through the licensing terms to ensure you’re in the clear.
The consequences of using fonts without proper licensing can be severe, as illustrated by the high-profile case in 2017, when HypeForType, a font foundry, sued Universal Music for $1.25 million for using two fonts, Nanami Rounded and Ebisu Bold, in their logo without a proper license. This case highlights the potential financial and legal risks of using fonts without appropriate licensing, even for large corporations.
Don’t stress, though! There’s a wide selection of fantastic fonts out there with clear, flexible commercial licenses. Many are even free, so you can find the perfect typography for your site without breaking the bank or bending any rules.
Where to find custom fonts for WordPress
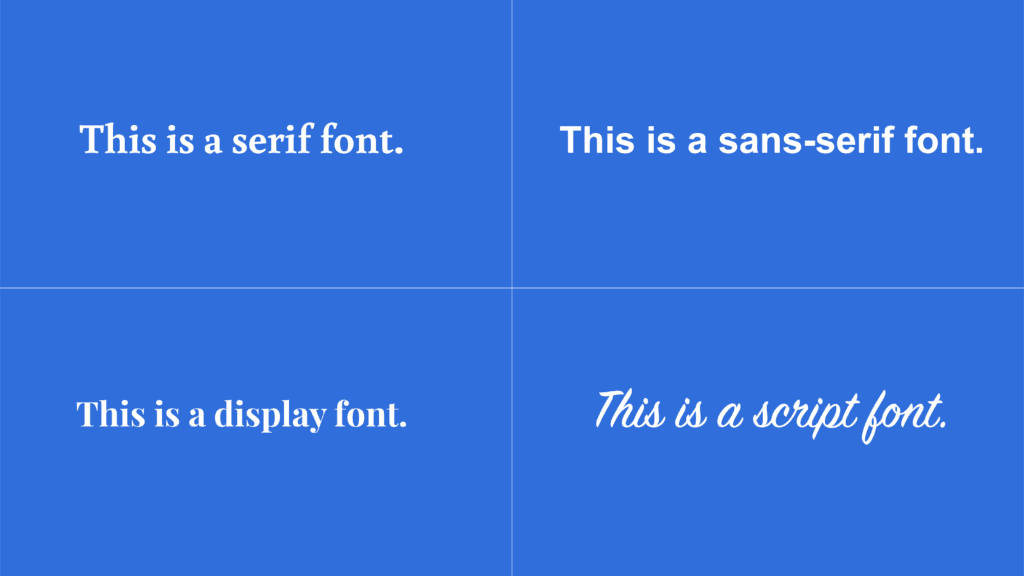
Before we dive deeper, let’s quickly cover the main font types you’ll encounter:
- Serif fonts: These have small lines or strokes at the ends of characters (like Georgia). They often convey tradition and reliability.
- Sans-serif fonts: These lack the small lines of serif fonts (like Helvetica Neue). They’re seen as modern and clean.
- Display fonts: These are decorative and best used for headlines or logos. They tend to be attention-grabbing but are less suitable for body text.
- Script fonts: These mimic handwriting or calligraphy. They can add elegance but should be used sparingly for readability.
You’ve probably also heard of web-safe fonts — those tried-and-true options like Arial, Times New Roman, and Verdana that properly display on virtually any device. They’re reliable, but they’re also… well, everywhere.
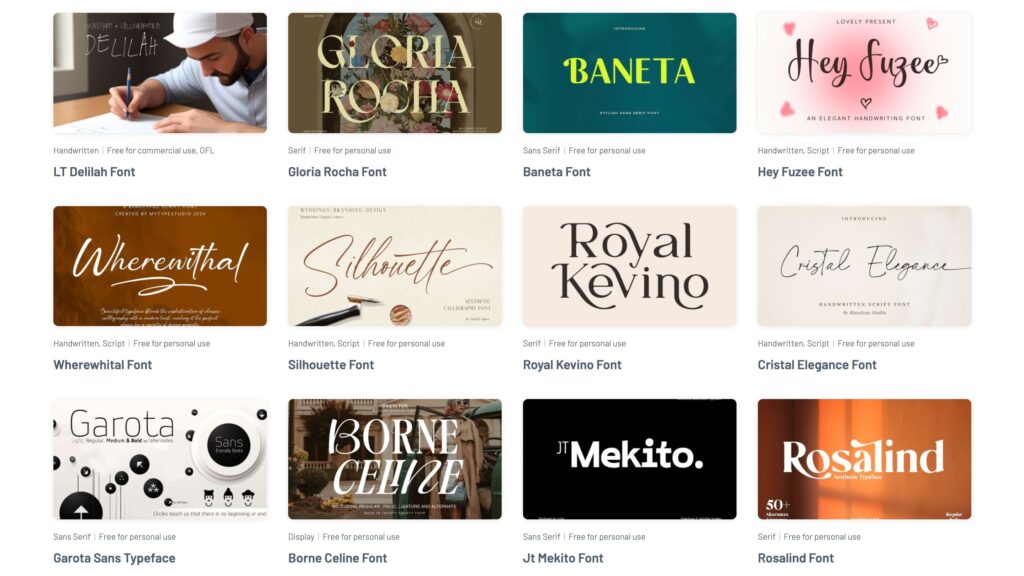
That’s why many brands are turning to custom fonts to make their websites stand out. But where can you find these typographic treasures? Here are some popular sources:
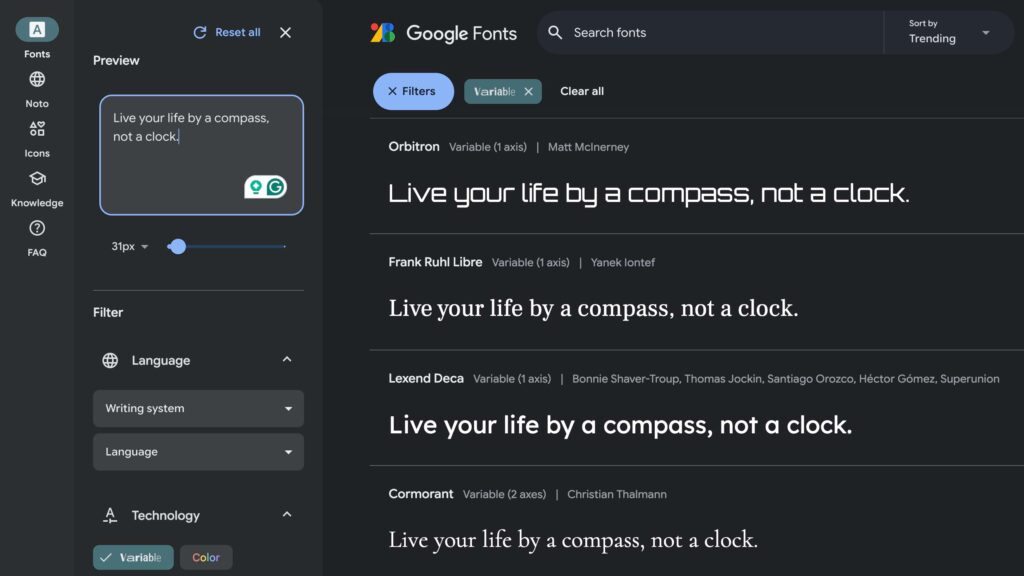
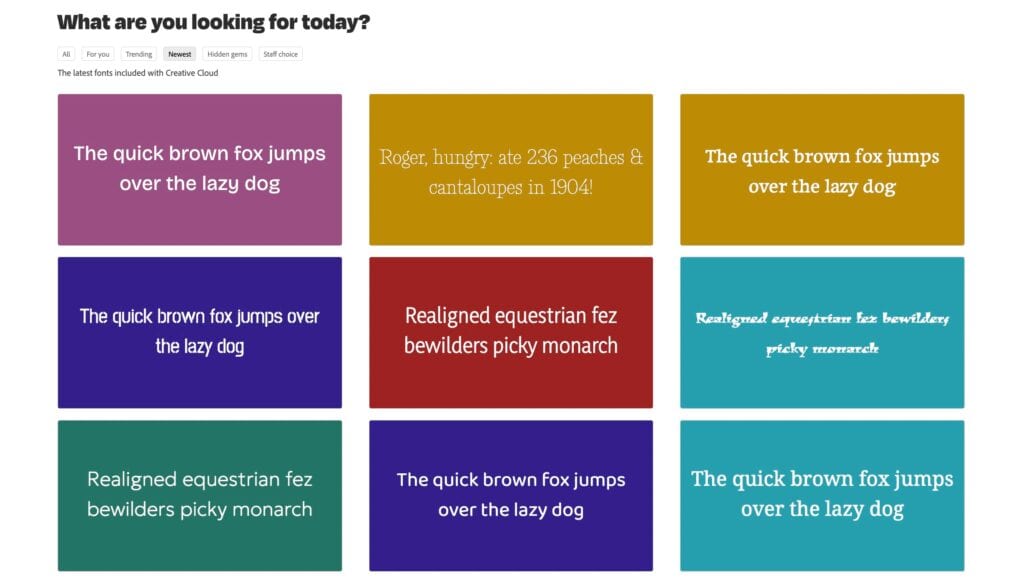
- Google Fonts: This is a massive collection of free, open-source fonts that work well with WordPress. With over 1,700 font families and more than 400 variable font families to choose from, Google Fonts offers an incredible variety of styles.
- Adobe Fonts (formerly Typekit): If you’re looking for premium quality, Adobe is a very popular option. These fonts integrate smoothly with Adobe Creative Cloud which is a paid service, but the selection is truly top-notch. However, it’s worth noting that some users report negative impacts on site speed when using Adobe Fonts, so consider testing thoroughly before fully implementing. (More on site speed later.)
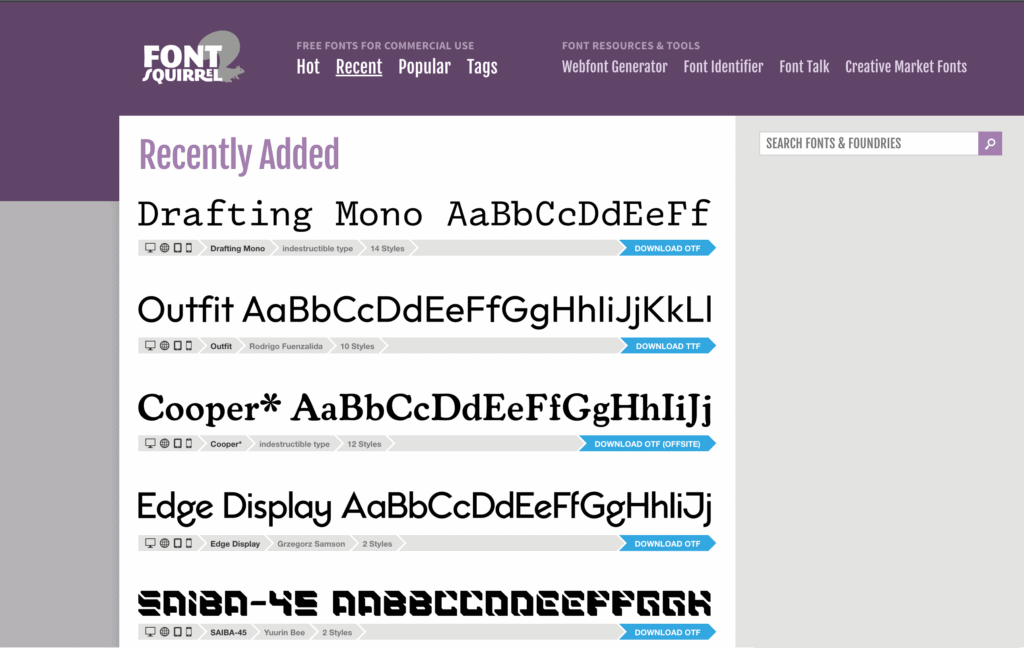
- Font Squirrel: Font Squirrel offers a wide selection of fonts you can use commercially without spending a dime. One of the major advantages of using Font Squirrel is its commitment to transparency in licensing (which we’ll explore in more detail in the next section). Every font on the platform is labeled as “100% free for commercial use,” which eases concerns about legal issues related to font usage in projects. (Double-check the terms of the license agreement though, just to cover your bases.)
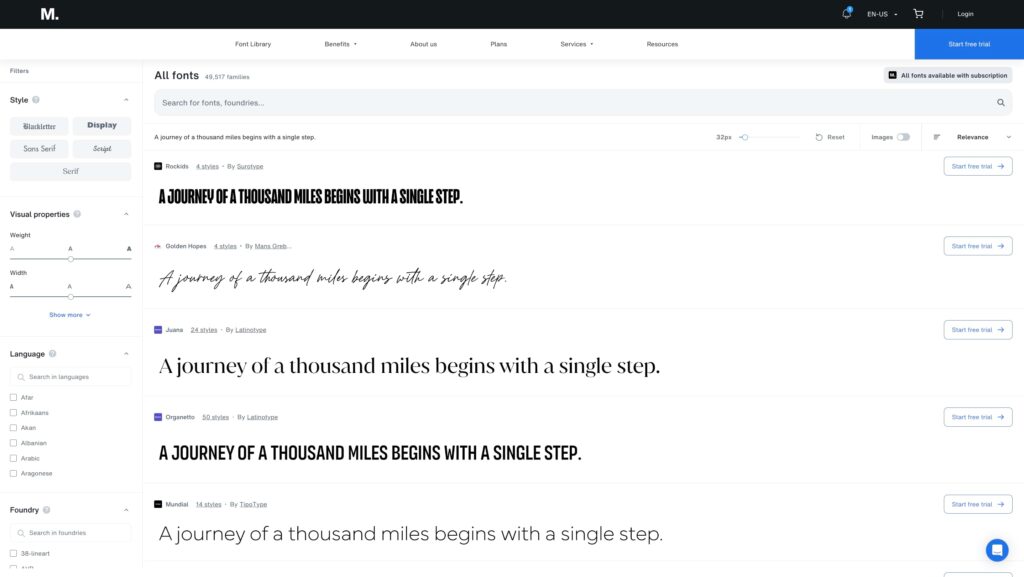
- Fonts.com (now part of MyFonts.com and Monotype Fonts): If you’ve been around the web design block, you’re probably familiar with Fonts.com. However, as of March 2024, Fonts.com joined forces with MyFonts.com and Monotype Fonts. Luckily, all the fonts you knew and loved are still available, just under a new roof. In fact, this merger has expanded your typographic options. You can now access an even broader range of fonts (almost 50,000, to be precise), from free options to premium designs that will make your site stand out.
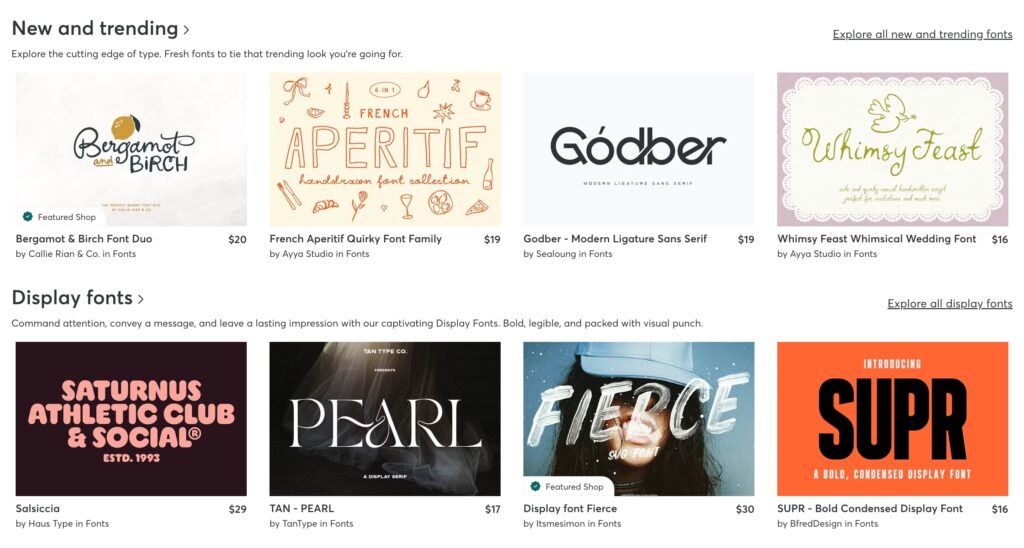
- CreativeMarket.com: Looking for a unique font? CreativeMarket.com offers an impressive selection of over 315,000 high-quality fonts from independent designers and foundries. You’ll find diverse styles for every project, all with commercial licensing.
- Fontesk: If you’re watching your budget, check out Fontesk. It specializes in free fonts, but don’t think that means boring. Fontesk curates collections of distinctive typefaces, often showcasing hidden gems you won’t see elsewhere. Plus, they put a big emphasis on accessibility, which is always a win in our book.
- Independent designers: Have you considered the creators behind the fonts you use? Supporting indie designers like James Coffman, Floraine Rousselot, Lucas Descroix, Minjoo Ham, and more is a great way to get unique typefaces while nurturing the creative community.
- Custom-made fonts: For the ultimate in brand uniqueness, you could also have a font created just for you. It’s an investment, but it ensures your brand stands out in the best way possible.
Choosing the perfect font pairing for your brand
Font pairings can make or break your WordPress site’s visual appeal, so let’s talk about how to nail it.
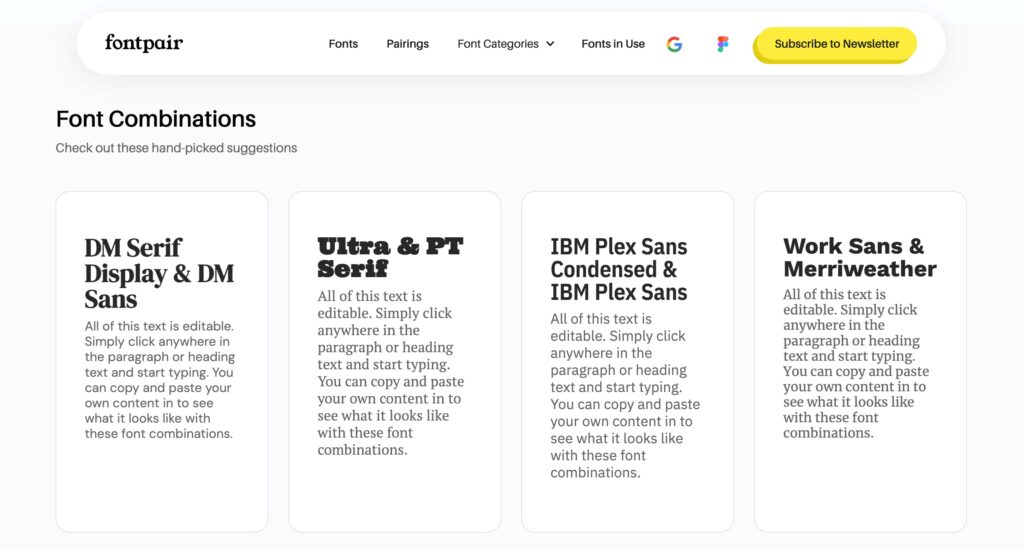
First up, think about mixing and matching. Pairing a serif font with a sans-serif can create a beautiful contrast. Not sure where to start? Check out tools like Fontpair or Typ.io for some killer combinations. Adobe Fonts is another great resource that suggests font pairings.
But looks aren’t everything — readability is key. Consider these accessibility points:
- Go for fonts with clear, distinct letterforms to help visually impaired users.
- Save those fancy script fonts for decorative touches only. They look great, but they’re tough to read in large chunks.
- Make sure there’s enough contrast between your text and background. The WebAIM Contrast Checker is a handy tool for this.
- Don’t go overboard — stick to two to three fonts max for consistency and better site performance.
Pro tip: Only load the font weights and styles (like regular, bold, and italic) you actually need instead of the entire font family. This helps your site load faster, and your users will be happier.
And don’t forget, your font choices speak volumes about your brand. A sleek sans-serif might scream “modern,” while a classic serif could whisper “traditional”. Choose wisely!
Once your fonts have been selected, it’s time to upload the font to WordPress.
Methods for adding custom fonts to WordPress
Let’s explore two primary methods for adding custom fonts to your WordPress site.
Option 1. Adding custom font via Kadence Theme or Kadence Blocks
Many themes come with tons of built-in font options, making it as simple as selecting your preferred typeface from a dropdown menu.
The Kadence Theme is an excellent example of this user-friendly approach. As a comprehensive WordPress theme, Kadence offers extensive customization options, including a wide range of typography choices. Even in its free version, Kadence provides 12 different professional font pairings, allowing you to give your website a unique personality right out of the box.
In fact, many users have found Kadence’s font customization options to be superior to other popular themes. As one user shared on the WordPress Forum: “I moved from Astra and other themes because fonts, margins, and paddings work best only [on Kadence]. I can’t explain this magic, but the free theme has everything I need.”
If you need even more variety than what the Kadence Theme offers, Kadence Blocks expands your options significantly, providing access to over 900 Google fonts. This wide selection ensures you find the perfect typeface to match your brand and design vision.
For those who want to take it a step further, upgrading to a Kadence bundle unlocks the Custom Fonts Plugin, which allows you to upload and manage custom fonts directly through the theme customizer.
With Kadence Custom Fonts, you have multiple options for adding custom typography to your site. You can upload and use self-hosted fonts, or integrate with Adobe Fonts via Type Kit. When adding a new Custom Font, the first option you’ll see is Font Type. From this dropdown menu, you can select either to upload your own font or use Adobe Type Kit.
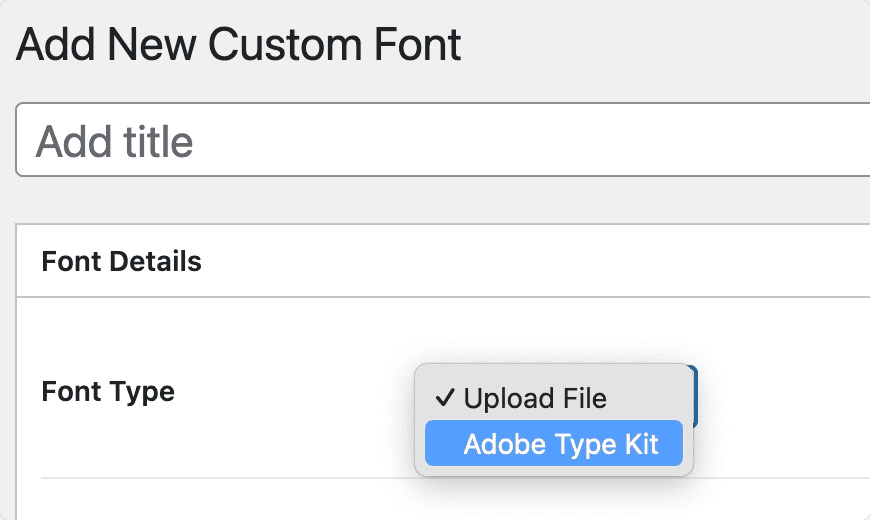
For self-hosted fonts, Kadence Custom Fonts automatically converts your uploads for broader browser support. If you’re using Adobe Fonts, always use the Type Kit option, as uploading Adobe font files directly violates its terms of service.
Regardless of which method you choose, Kadence Custom Fonts works smoothly with the Kadence Theme and Kadence Blocks, so you can start using your new fonts right away. Here’s how to get started:
Step 1: Install and activate the Kadence Custom Fonts Plugin.
Step 2: Go to Dashboard > Appearance > Kadence > Custom Fonts.
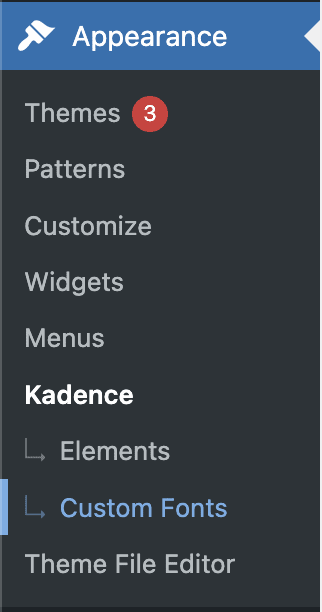
Step 3: Select Add New Custom Font. When adding a new custom font, you’ll first need to give your font a name in the Font Family Name field. This is how you’ll identify it later.
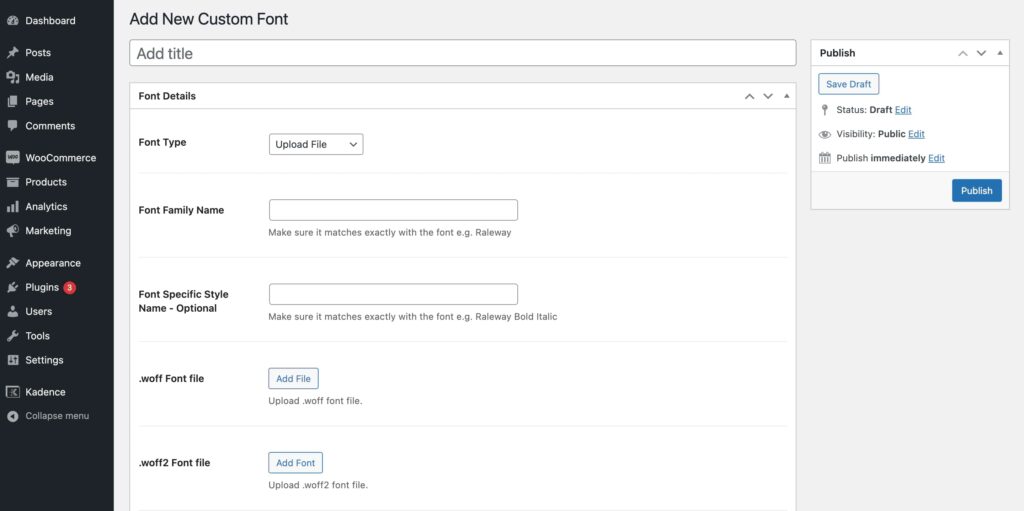
Step 4: You’ll see an option for Font Specific Style Name. Don’t worry if you’re not sure what this is — it’s okay to leave it blank.
Step 5: Now comes the important part: uploading your font files. You’ll need to add the .woff and .woff2 versions of your font here.
Pro tip: Modern font formats like WOFF2 offer better compression, which helps with site performance. If you need to convert your fonts, the Webfont Generator at fontsquirrel.com can be a useful tool. Simply upload your font file, and it’ll generate the necessary web font formats for you.
Step 6: Want to make sure your site looks good even if your custom font doesn’t load? That’s where the Fallback Font Stack comes in. Use this to set backup fonts.
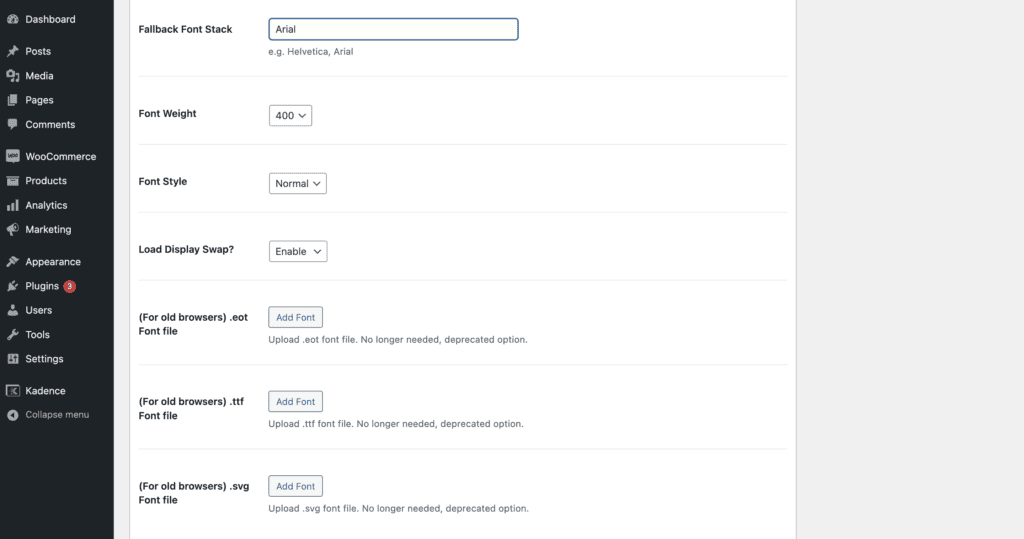
Step 7: Specify the Font Weight and Font Style to fine-tune how your font appears.
Step 8: If you want your font to work on older browsers, you can upload OTF, TTF, or SVG versions, too. This step is optional but can help with broader compatibility.
That’s all there is to it! Once you publish your new font, it will be available in your Kadence Theme and Block Settings. You can assign them to different elements of your site, like headings, body text, or specific blocks.
One of the great things about Kadence Custom Fonts is that it lets you self-host your fonts. This gives you more control over font loading and caching, which can help speed up your site. You’re not relying on external services, which means one less potential point of failure.
The plugin also makes it easy to add custom-looking fonts to your site and assign them through the theme options panel. This means you can maintain a consistent look across your entire site without having to edit CSS files manually.
Option 2. Adding custom fonts manually
For those comfortable with code, manual methods offer precise control over font implementation. Here’s how to do it:
1. Download your desired font files (commonly in .ttf or .otf format). Use an SFTP client like FileZilla or your hosting provider’s file manager to upload these files to a directory within your theme, such as wp-content/themes/your-theme/fonts.
2. Use the @font-face CSS rule in your stylesheet to define the custom font:
@font-face {
     font-family: 'YourFontName';
     src:
url('http://your-site.com/wp-content/themes/your-theme/fonts/YourFontFile.ttf') format('truetype');
     font-weight: normal;
}
3. Now, let’s put that font to work! Apply it to your desired elements like this:
body {
     font-family: 'YourFontName', sans-serif;
}
Pro tip: Always use a child theme to keep your changes safe during updates. Some themes make this even easier with built-in font uploaders. And if you’re using Google Fonts, you can simply link them directly.
Related article: Everything you need to know about child themes
Other cool things Kadence offers for advanced typography
1. Use Kadence Theme’s built-in fonts
The Kadence Theme comes with a wide range of Google Fonts already built-in, offering user-friendly and intuitive typography controls. Here’s how to make the most of these pre-installed font options:
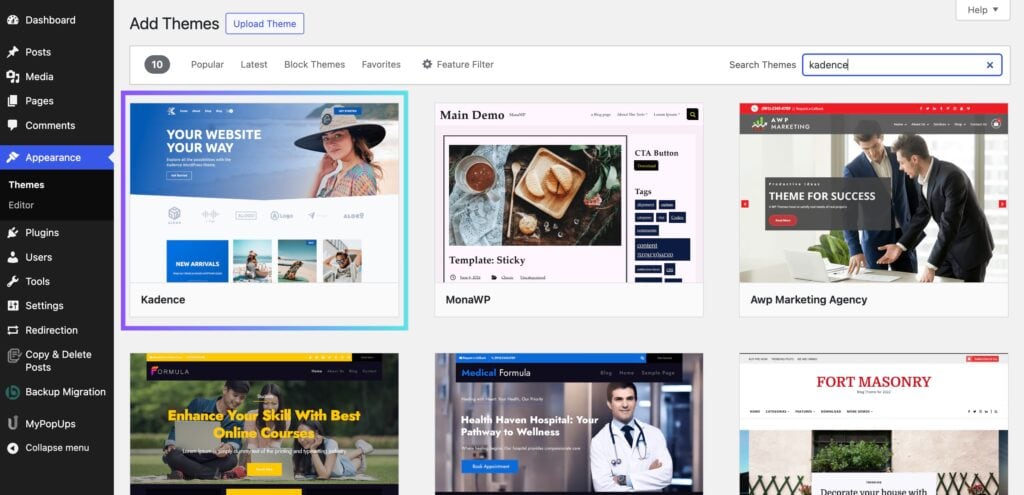
Step 1: Install the Kadence Theme
Go to your WordPress dashboard. Navigate to Appearance > Themes. Click on Add New, search for Kadence, and install it.
Step 2: Access the Customizer
Once you’ve activated the Kadence Theme, go to Appearance > Customize. This opens the WordPress Customizer, where you can modify various aspects of your site, including your fonts.

Step 3: Experiment with the typography settings
This is where the fun starts! Choose Colors & Fonts > Typography. Here, you’ll find a wide range of fonts for headings, body text, buttons, and links.

Want to mix things up a bit? Try clicking on the folder icon next to Base Font. You’ll find some pre-configured font pairings, including a heading font and a body font, that play nicely together, giving your site a polished look without all the guesswork. Feel free to play around with these—you might stumble upon the perfect combo for your site’s style.

2. Advanced text styling with Kadence Blocks
As we said earlier, Kadence Blocks expands your options even further. In addition to accessing over 900 Google fonts, you can set different fonts for individual blocks and maintain consistency across your site. It’s also optimized for performance, loading only what’s necessary to keep your site running smoothly.
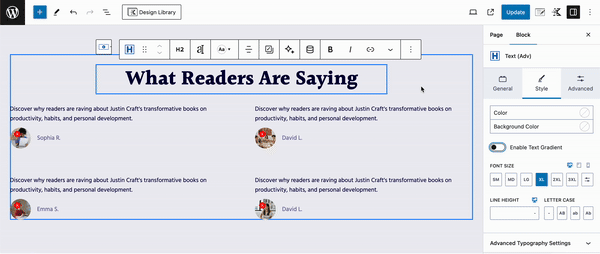
For those who want to get creative, the Text (Adv) Block offers powerful typography controls. Here’s what you can do:
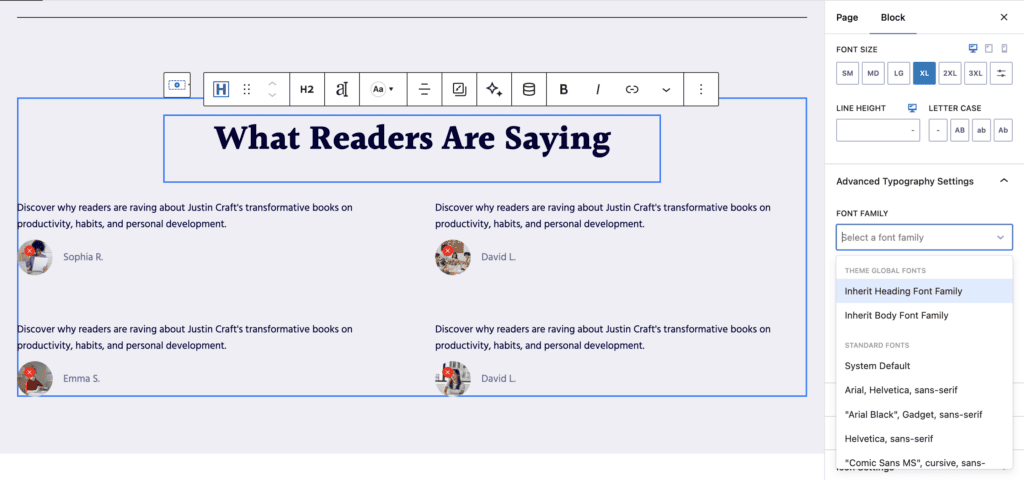
Set typography controls (free)
Within the Advanced Typography settings, you can select your preferred font family and customize the font weight. You’ll also find controls for letter spacing, line height, and font size — all adjustable for desktop, tablet, and mobile views to ensure your text looks perfect on every device.
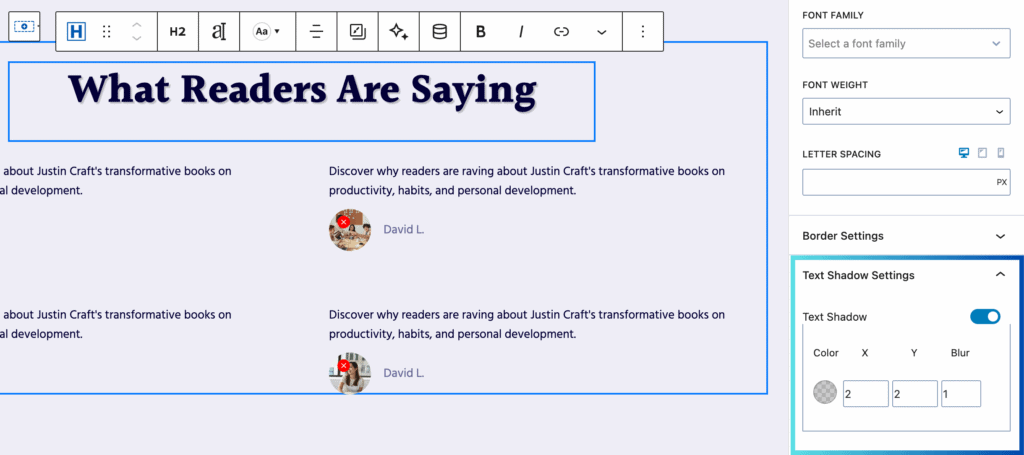
Add text shadow effects (free)
Add dimension to your text with customizable shadows. You can fine-tune the shadow’s appearance by adjusting the color and the X, Y, and Blur values. This feature is perfect for creating standout headers or adding subtle depth to your text.
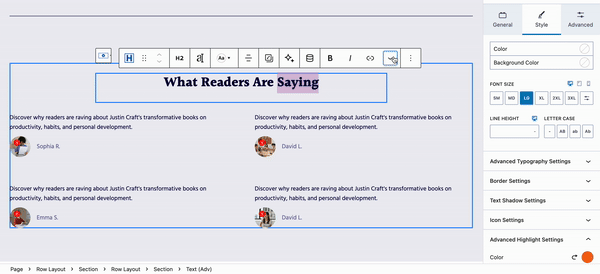
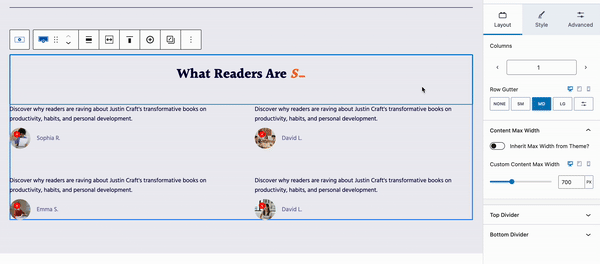
Display multi-colored text (free)
Apply Advanced Highlight Settings to create eye-catching multi-colored text. Simply select your text, choose your colors, and customize the background. You can even add borders and adjust the border radius for a polished look.
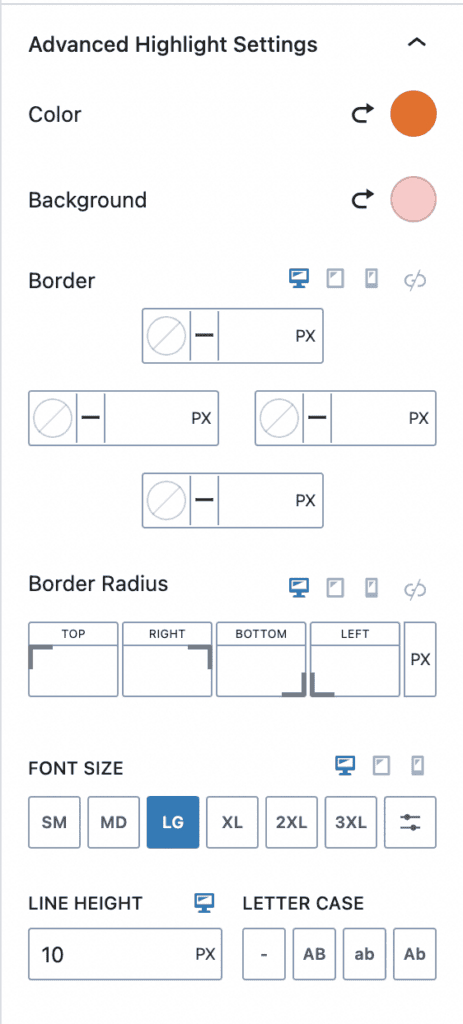
Here’s what it looks like in action:
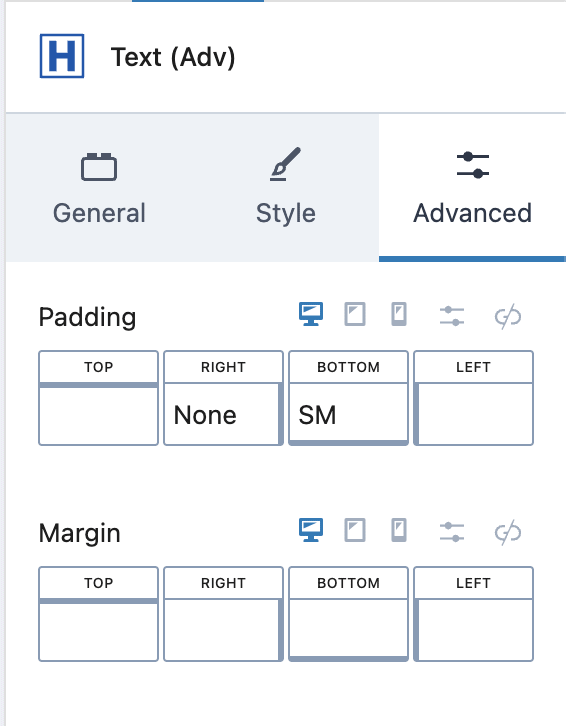
Control padding and margins (free)
Take full control of your text’s positioning with padding and margin settings. These controls let you adjust spacing precisely, helping you create professional-looking layouts that work across all devices.
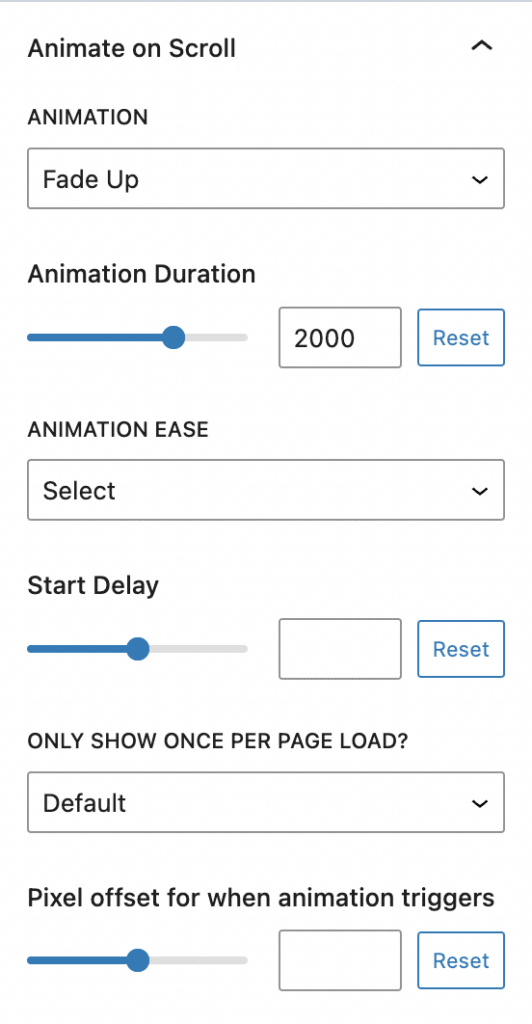
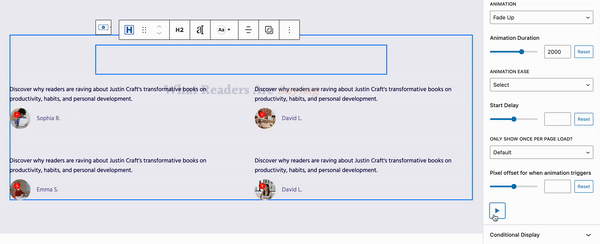
Add animations (Kadence Blocks Pro)
Bring your text to life with scroll animations (requires Kadence Blocks Pro). Select your preferred animation style, then customize the duration, ease, and start delay. You can preview your animation right in the editor before publishing.
Here’s what it’ll look like:
Use Typed Text effects (Kadence Blocks Pro)
Create Typed Text effects. You can add this effect to your Advanced Text Block by highlighting the word(s), clicking on the View More drop-down icon on the Toolbar, and clicking on Typed Text.
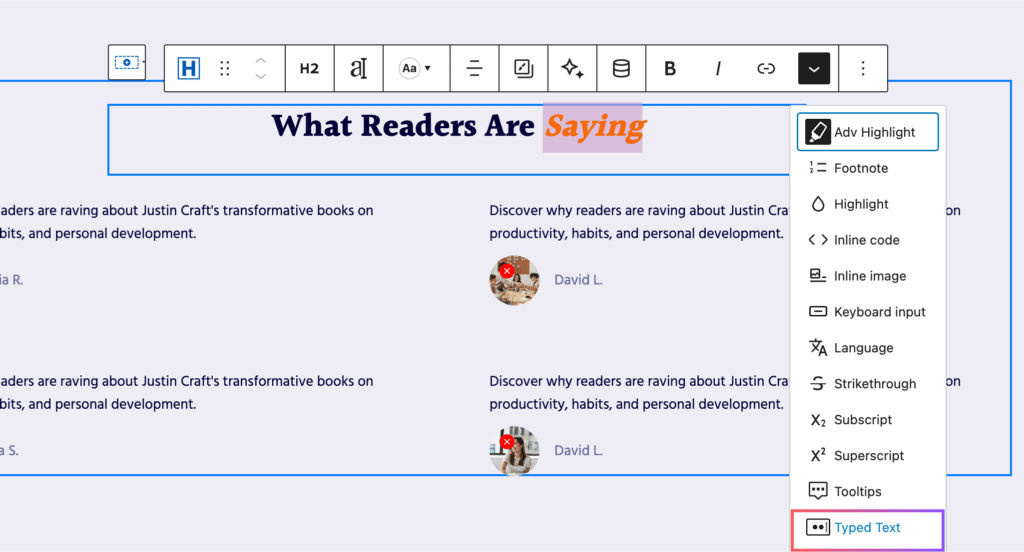
The Typed Text feature lets you add multiple text strings that display in sequence. You can set it to loop, shuffle the order, or use smart backspace for a more natural effect. Plus, you can adjust the typing speed to match your site’s vibe. Have fun experimenting with these options!
Apply gradient effects (free)
Beyond basic color settings, you can Enable Text Gradient under the Style settings to create stunning gradient effects instead of using solid text colors and backgrounds.
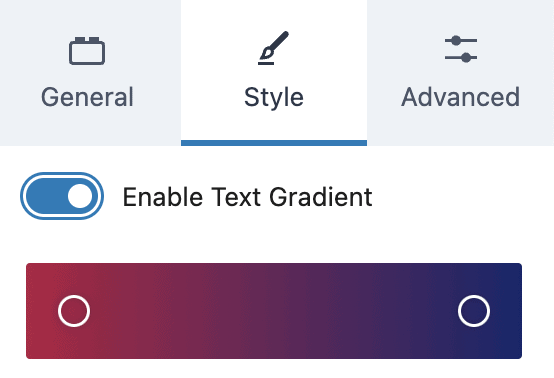
Here’s what it’ll look like:
Create a more unique WordPress site with custom fonts
Customizing your fonts is a great way to make your WordPress site pop. Beyond just looking good, these fonts give your site a unique identity that helps you stand out from the competition. The right choices can make your content easier to read and keep visitors interested. As a bonus, custom fonts are great for maintaining brand consistency across your entire site.
But here’s the thing — using custom fonts effectively is all about making smart choices. Keep these tips in mind:
- Pick fonts that match your brand’s personality.
- Stick to two to three fonts to keep things consistent and fast.
- Make sure everything’s easy to read, especially on phones.
Ready to give it a try? Tools like the Kadence Theme, Blocks, and Custom Fonts add-on can simplify the whole process. With its great typography controls, Kadence helps you incorporate custom fonts while keeping your site running smoothly.
Get started with the Kadence Pro Bundle today to unlock professional typography options!
Create Your Website With KadenceWP Today!

Written by Alexis Bryan
Alexis Bryan is a content marketing specialist at StellarWP with over five years of experience in the marketing industry. She loves writing and creating content for all kinds of audiences, from blog articles and website copy to videos and guides. Alexis enjoys crafting engaging and informative content that helps businesses and people thrive.
By Alexis Bryan
Alexis Bryan is a content marketing specialist at StellarWP with over five years of experience in the marketing industry. She loves writing and creating content for all kinds of audiences, from blog articles and website copy to videos and guides. Alexis enjoys crafting engaging and informative content that helps businesses and people thrive.
Updated November 5, 2024
Create Your Website With Kadence