
Kadence Insights provides the option to perform A/B Testing. Create multiple Variations of a Design/Call-to-Action, then compare the analytics to find the best-performing design. This document goes over creating your first A/B Test and adding it to your WordPress website.
A/B Testing
An A/B Test is a Custom Post Type. It can be created from either the WordPress Dashboard via the Insights -> A/B Tests page, or you can turn existing designs into A/B Tests directly from within the Block Editor, such as when editing a post or page.
Creating A/B Tests Posts
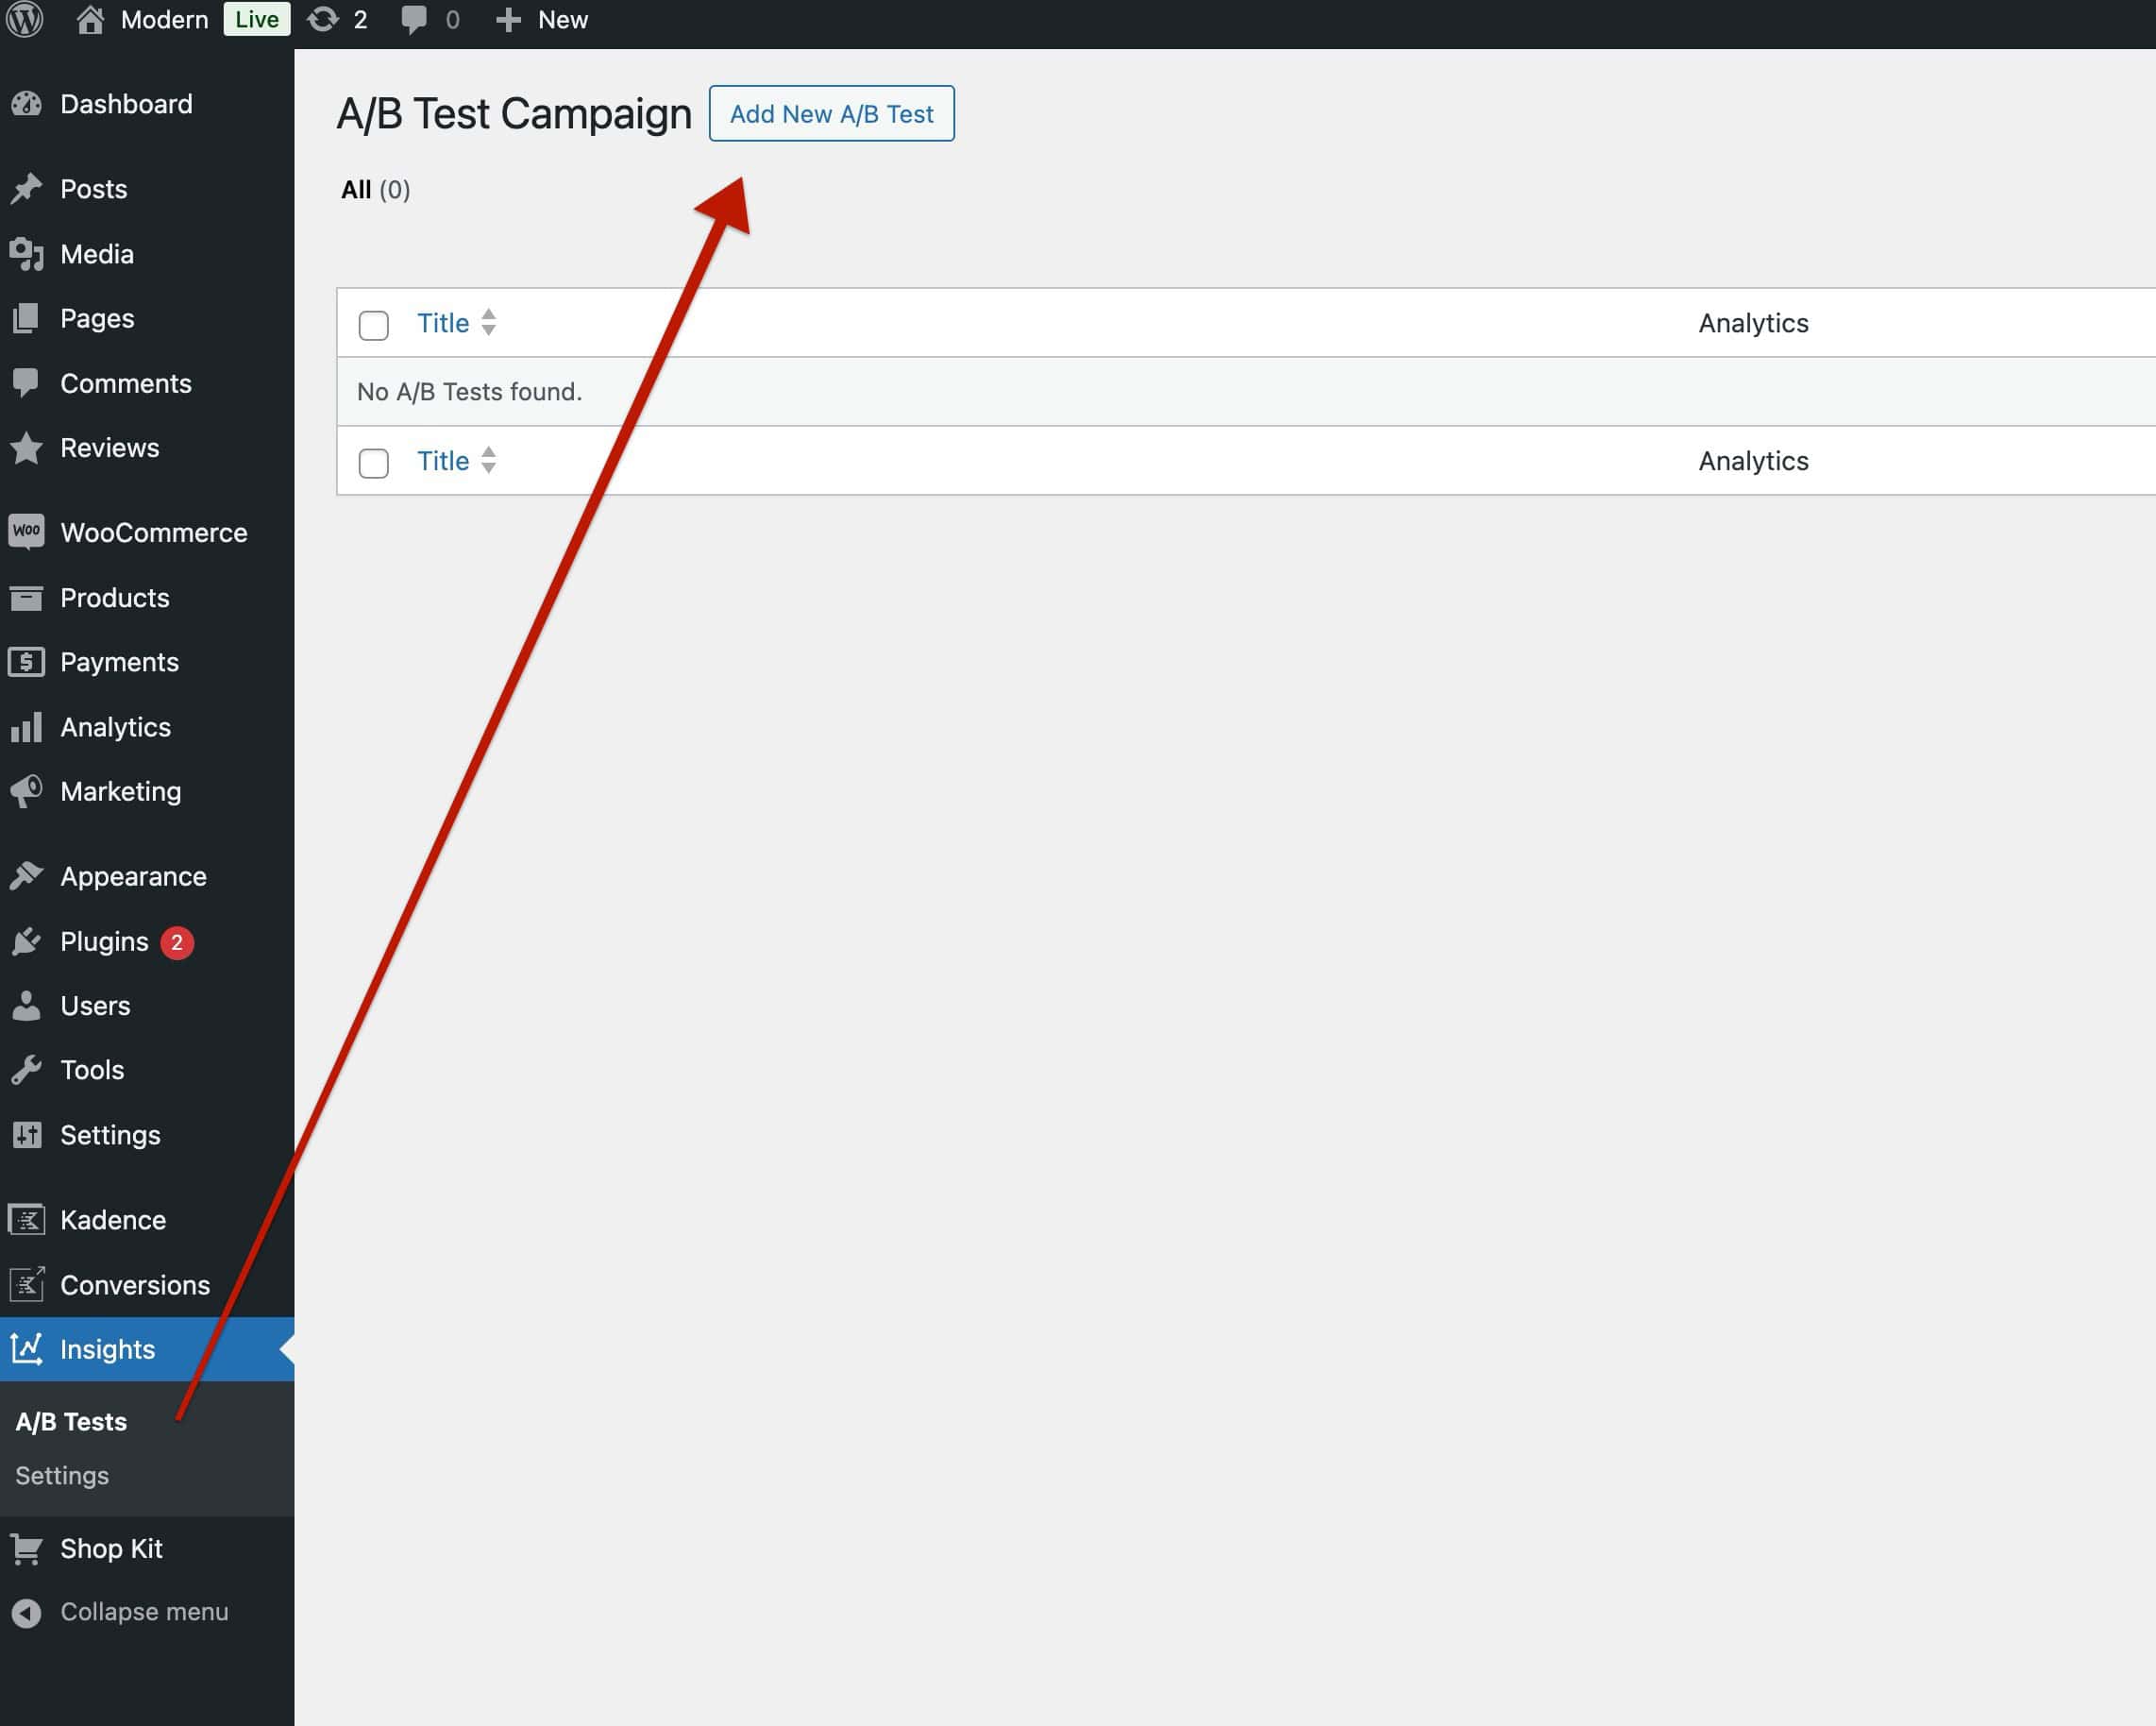
To get started, you should first Set Up Kadence Insights. Once finished, you can begin creating a new Insights A/B Testing scenario from the Dashboard -> Insights -> A/B Tests page. This can be a good approach for when you have two brand-new designs you want to compare against each other.
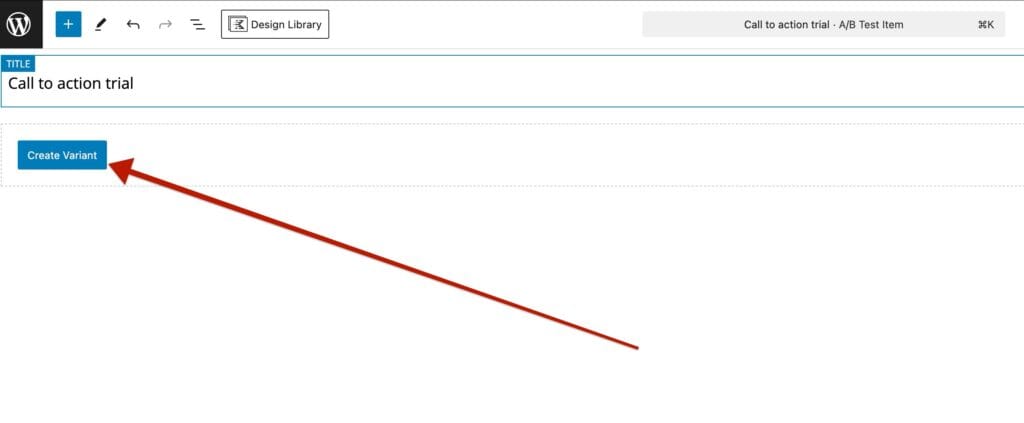
Once inside a new A/B Test, add a Title, then click on the Create Variant button to create an Initial Variant.
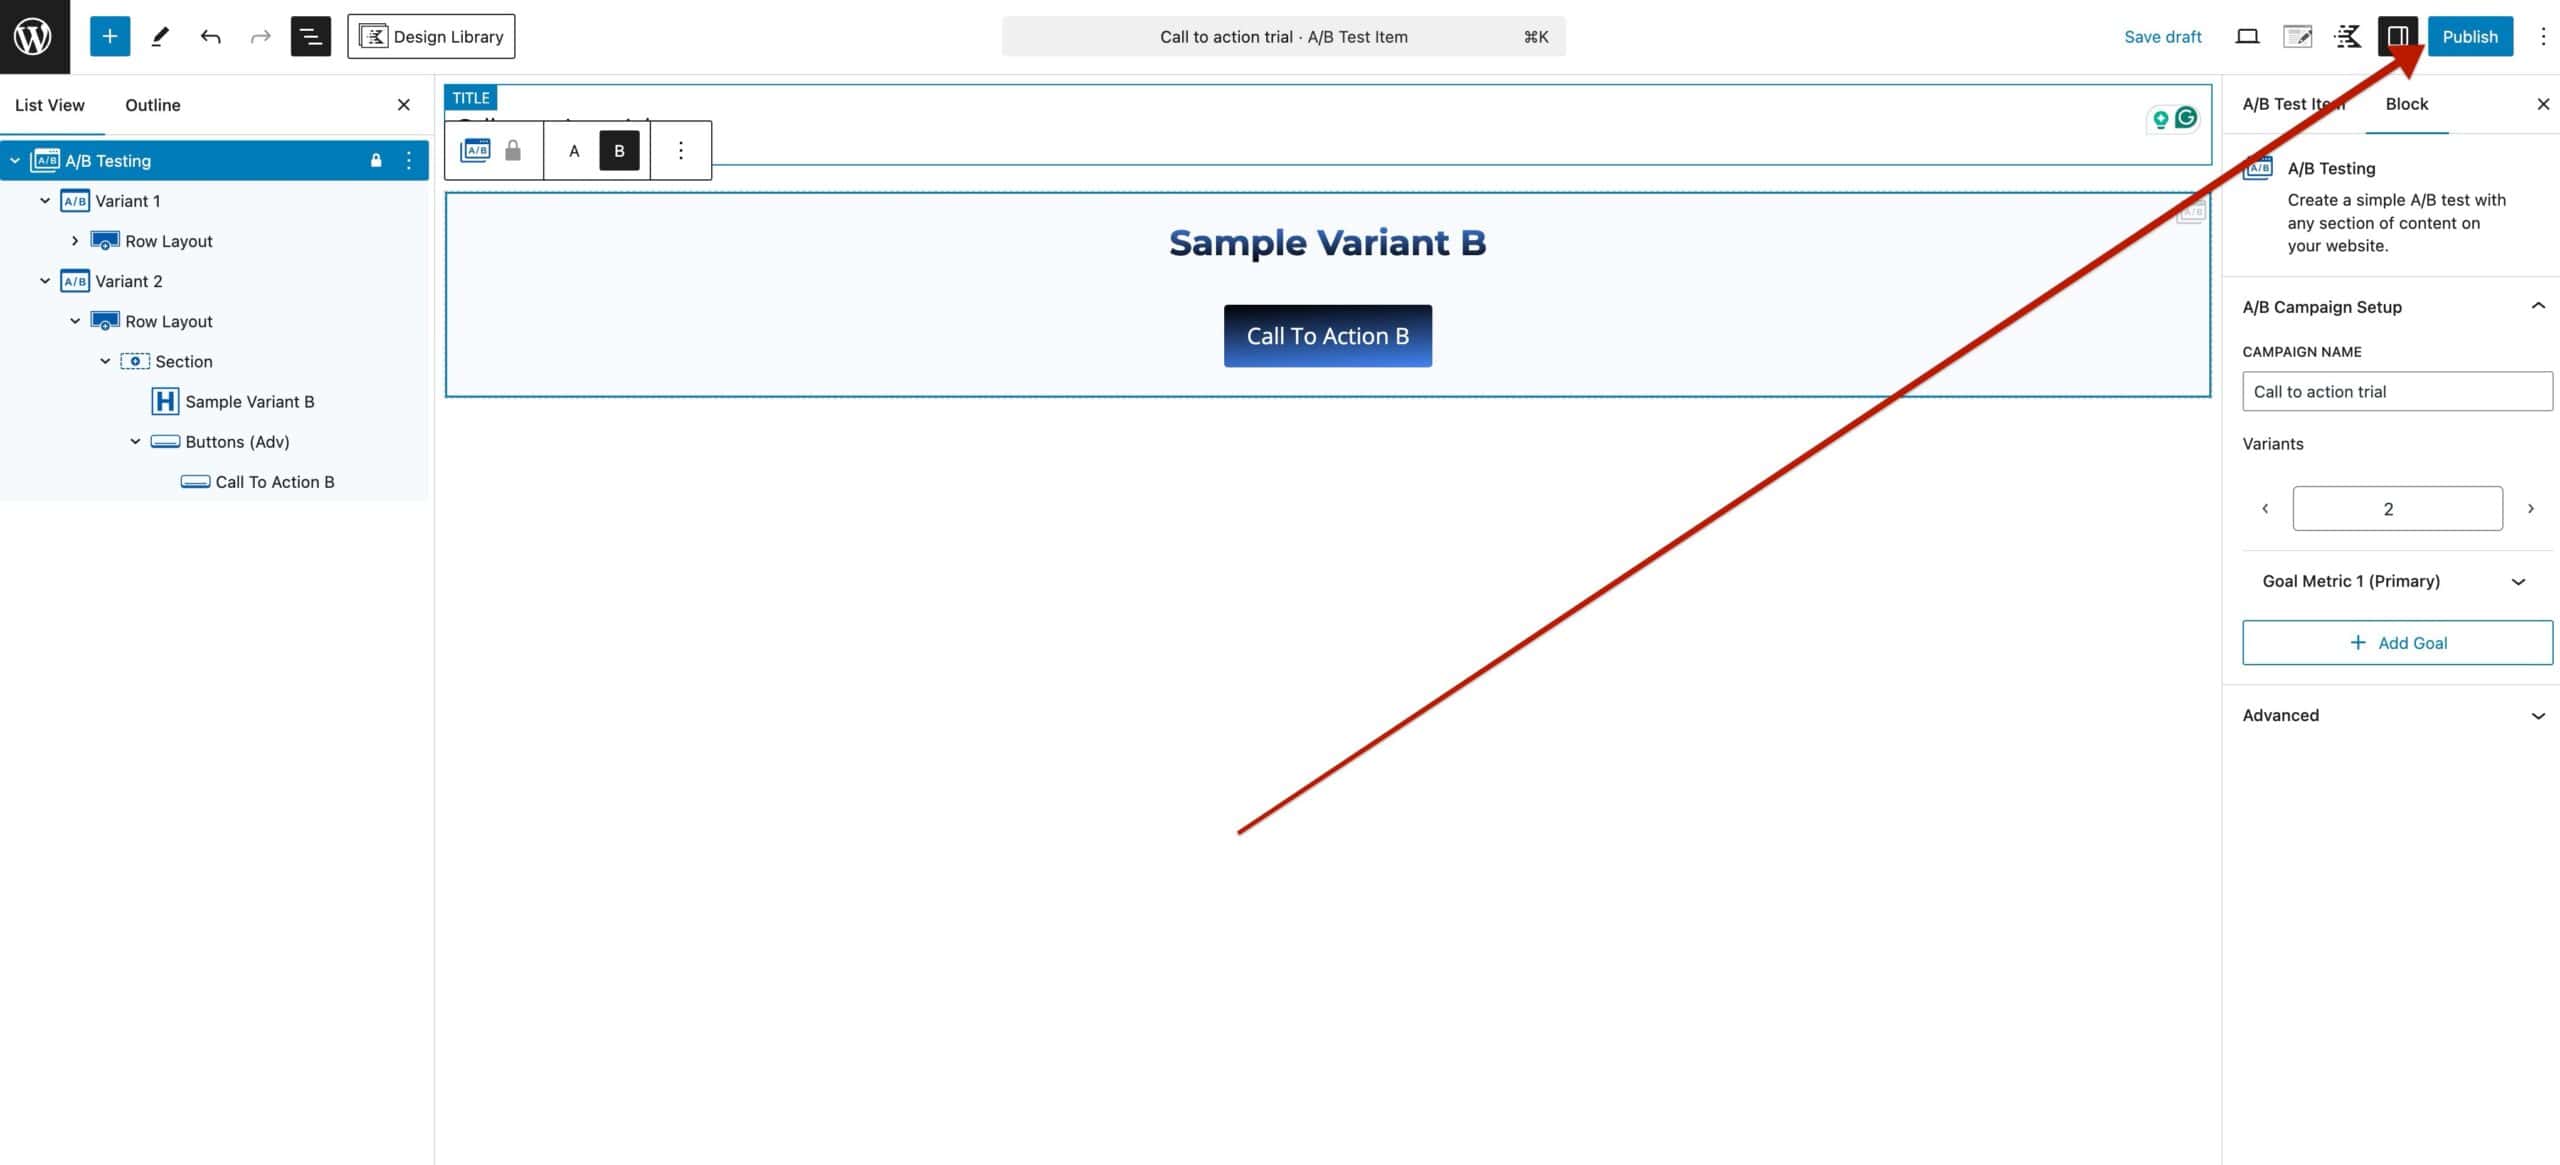
Use the Block Editor to add any available Block to the Variant. Once the initial design is finished, select the main A/B Testing Block and use the Block Settings to add additional Variant Options to the A/B Test.
Campaign Name: Set a name for your A/B Testing group.
Variants: Use this option to add multiple variants to the test. Each Variant will be displayed randomly to users based on the Browser Session.
Goal Metric: When using A/B Testing, there is a Goal Metric. When analyzing the A/B Test Analytics, you would compare the Views to Conversion Goals (Goal Metrics). Add multiple Goal Metrics for accurate measurements as you see fit. Click here to learn about all of the available Goal Metrics and how they work.
When selecting the main A/B Testing Block, use the Block Toolbar to switch between different Variants. This allows you to adjust designs for different Variants all from the same place. Each Variant should differ to be compared to the others to find the best results.
Each Variant can be seen in the List View and selected. Selecting a Variant here does not change the current Variant being viewed. However, it allows you to set unique Variant Names for better organization and identification of each Variant.
Once you have your Variations and Goal set up for A/B Testing, click the Publish button to save and save your A/B Test.
Once your A/B Test is set up, you can add it to various places across your website by inserting an A/B Testing Block into the Block Editor.
A/B Tests can be added anywhere the Block Editor is available. It’s best to focus on optimizing specific elements, such as Calls to Action or smaller design components, rather than testing entire page designs, headers, or other larger sections of the website.
Turn Existing Designs into A/B Tests
A/B Tests can also be created directly within the Block Editor using the Block Toolbar. To do this, select a Block on a page, click the three dots in the Block Toolbar for more options, and select the Create A/B Test option.
This can be extremely useful for easily turning existing designs into A/B Tests. By default, the design will be placed into A and B Variants, allowing you to make changes without needing to copy and paste blocks.
When creating an A/B Test Block within the Block Editor (outside of the A/B Tests page), you will be provided with two Variations of the Block’s current state. Adjust the B Variant as needed, and add or customize additional Variants as required.
Viewing A/B Analyitcs
Once your A/B Tests are created, enable and use Analytics to track their performance. Analytics can initially be enabled from the Dashboard -> Insights -> Settings page.
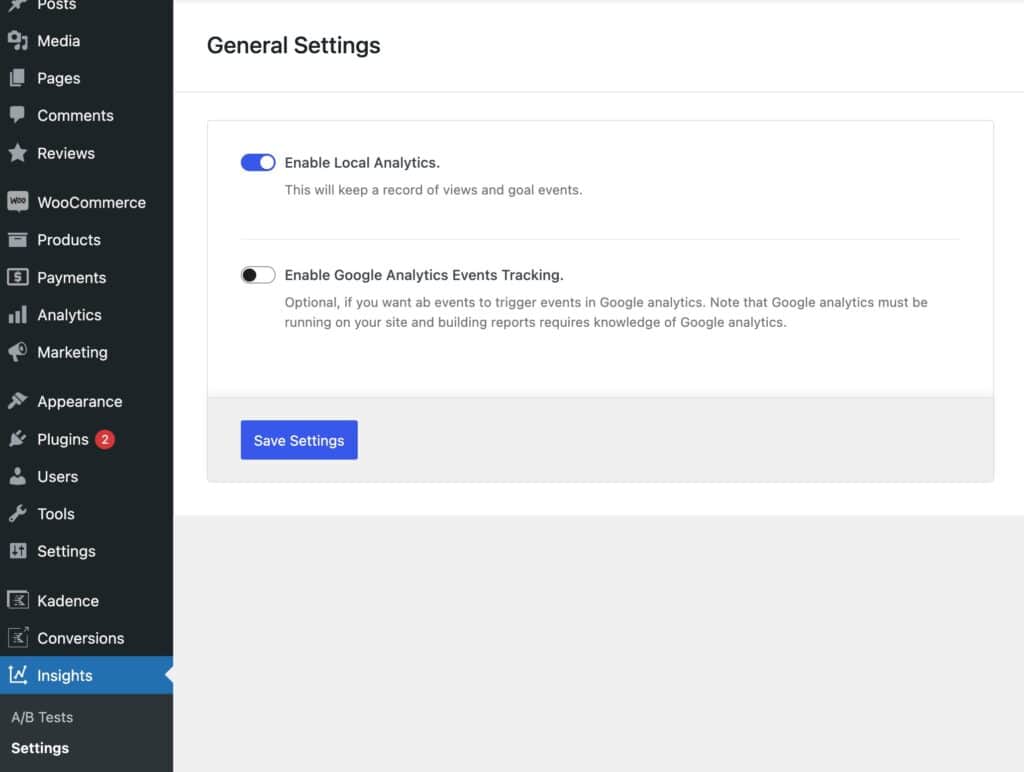
Local Storage: When managing websites with high traffic, consider using Google Analytics instead of relying on local storage for tracking data.
Google Analytics: When using Google Analytics, Kadence Insights events will be listed under the category named Kadence, making it easy to track and analyze A/B Testing performance.
View your Analytics from the Dashboard -> Insights -> A/B Tests. Next to each A/B Test Post, there will be a View Analytics button for doing so.
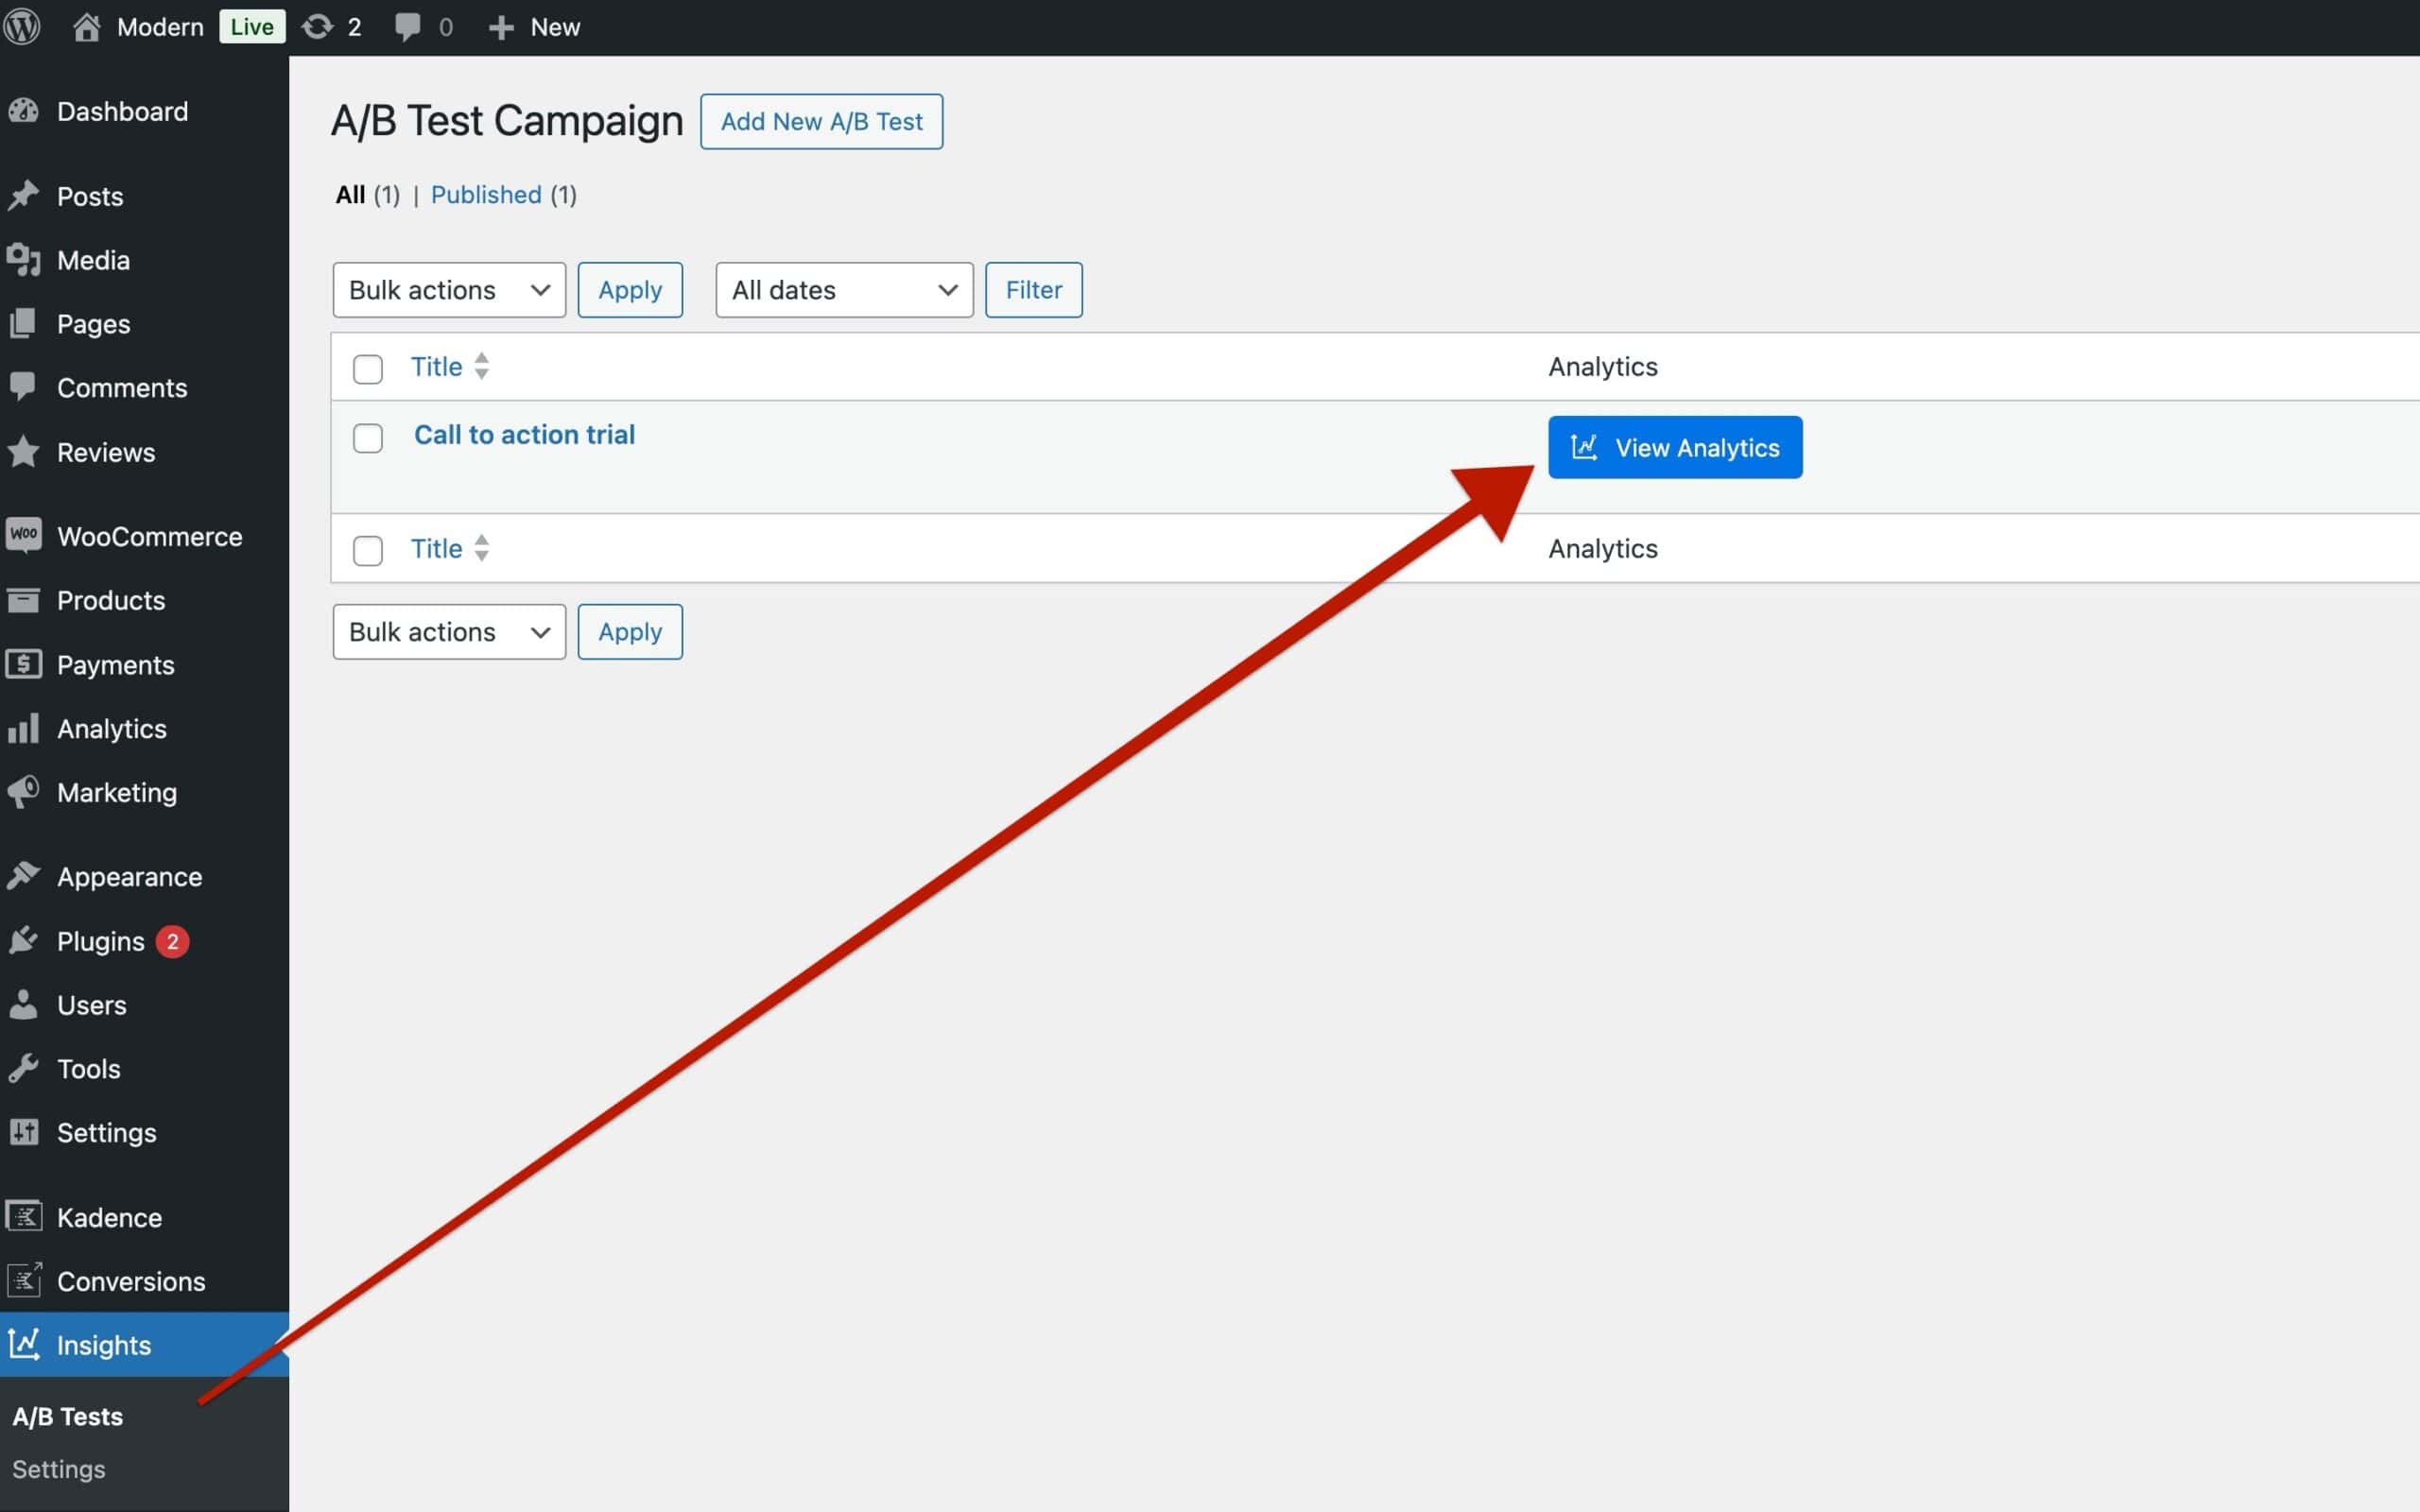
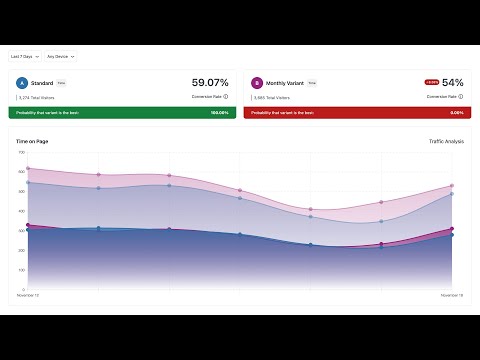
The Analytics will allow you to view the performance of different Goal Metrics (if applicable). You can compare Views to Conversions to determine the accurate Conversion Rate for each variant. Additionally, you can adjust the Timeframe and Device Type to obtain more precise reporting for your A/B Test.
Picking a Winner Variant
Once you have a sufficient amount of Analytical Data to know which Variant is performing the best, you can then select a Winner. This will stop the additional variants from showing. This can be done directly on the Page or Post where the A/B Testing Block lives.
Select the A/B Testing Block and use the Block Toolbar to select your preferred variant. Then, click on the Star Icon in the Block Toolbar to select a Winning Variation.
Once the winning variant is selected, the A/B Testing Block will no longer function as an A/B Test. It will convert the Block back to a regular Block, removing the losing variants from the page. However, the A/B Test, along with its variants and analytics, will still be available on the A/B Tests page, but it will no longer be active.
