How to Add a Countdown Timer to Your WordPress Site
Need to add a countdown timer to your WordPress site? If you’re counting down the days, hours, or minutes to a specific event, a countdown timer is one of the best ways to drive urgency or excitement. In this tutorial, we’ll cover how to easily create a countdown timer for your WordPress site or blog, step-by-step.
Do You Need a WordPress Countdown Timer Plugin?
First things first: do you need a WordPress countdown timer plugin? No, not necessarily!
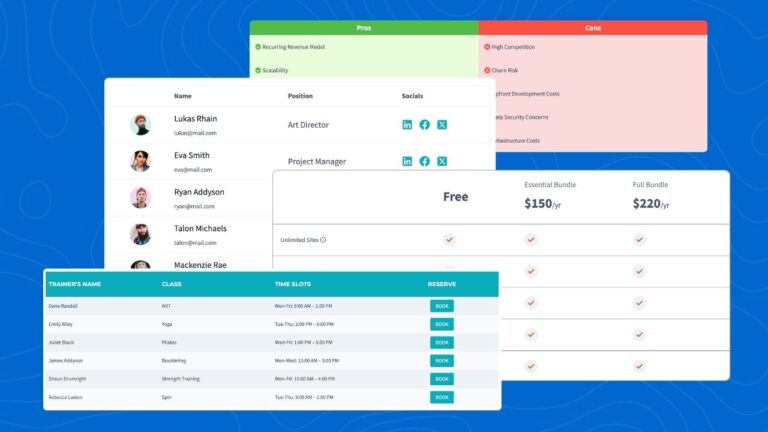
With the free Kadence Blocks plugin, you get an entire library of WordPress blocks, including a countdown block, form block, table of contents block, and more. With a plugin like Kadence Blocks that adds all of these types of elements to your website, you don’t need a separate WordPress countdown timer plugin.
Each Kadence Block is crafted with care with regard to performance, accessibility, and extensibility. These blocks are not simply one preset-styled item, but tools to create beautiful content with unlimited design potentials.
In the past, you might have used a separate countdown timer plugin or a countdown shortcode, but Kadence Blocks give you an entire library of useful elements like countdown timers with lots of customization options. And because Kadence Blocks works in the WordPress block editor, you can add countdowns and tweak settings from inside your WordPress page or post.
How to Create a Countdown Timer in WordPress
The Kadence Blocks Countdown Block allows you to post a banner with a timer counting down the time. You can use it to give a sense of urgency to your a sale or coupon or to display time left until an event.
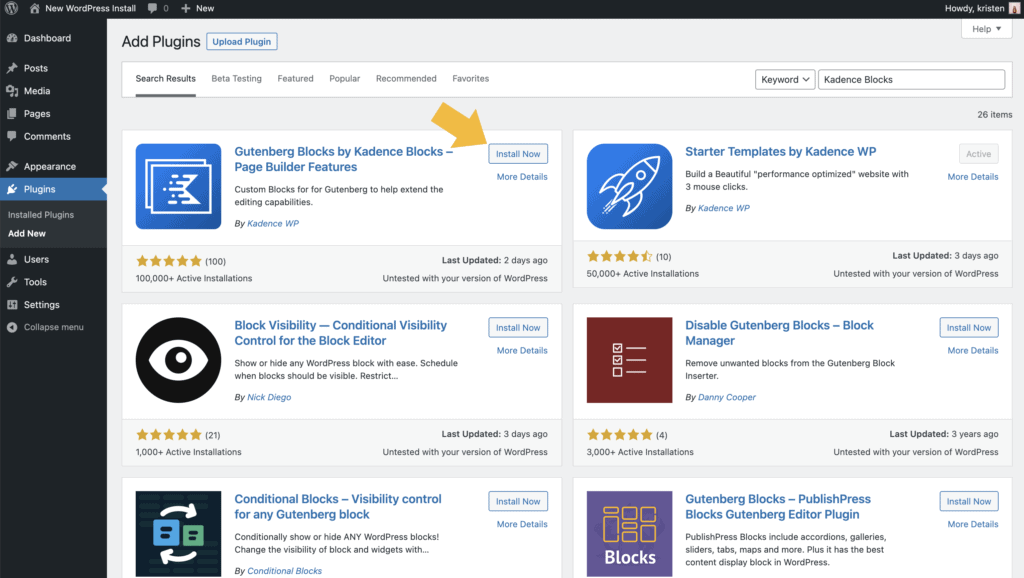
To get started, download and install the Kadence Blocks plugin.
- From within your WordPress admin, you can navigate to Plugins > Add New.
- Then in the top right corner search for “Kadence Blocks.”
- Finally, once you see the Kadence Blocks Plugin, click the Install Now button.
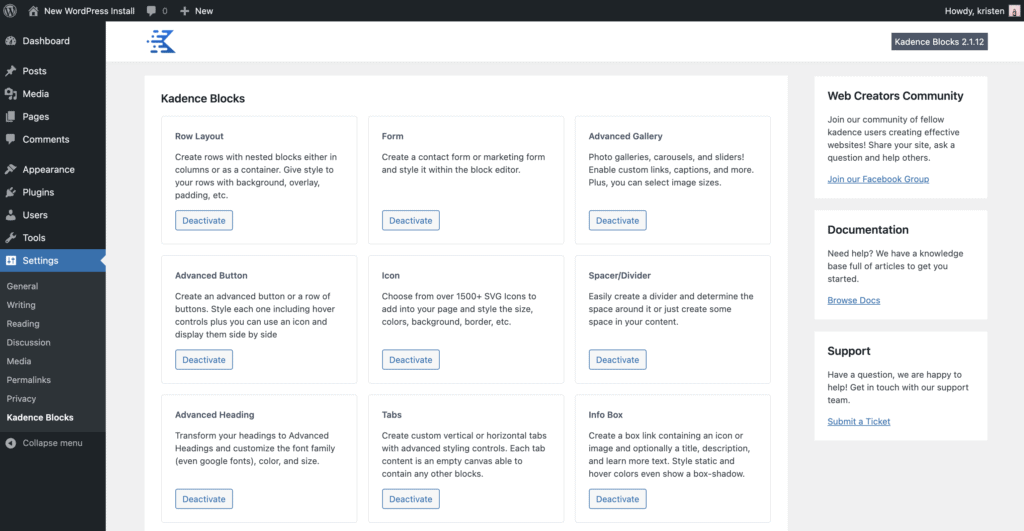
After activating the plugin, you’ll see the Kadence Blocks settings screen with options for deactivating blocks you may not need or want.
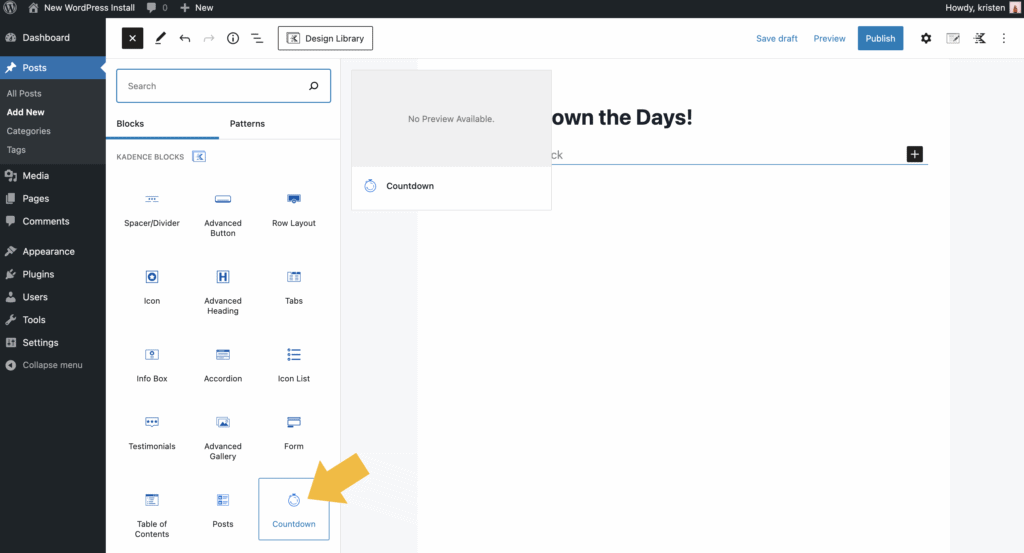
Now, navigate to the post or page that needs a countdown timer.
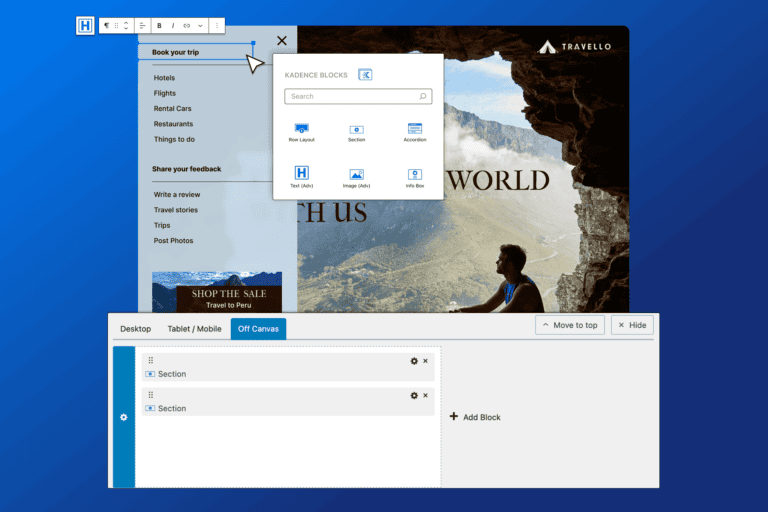
- Click the “+” icon to see the available blocks you can add to your post or page
- Find Countdown in the list.
- Click the Countdown icon to add a countdown timer to your post or page
Note: The Kadence Blocks Wireframe Blocks Library also has several countdown timer options! Just use the “Design Library” button at the top of the page instead.
Customizing Your Countdown Timer Settings & Design
After adding the Countdown block to your post or page, navigate to the block settings by using the control panel on the right side of your screen.
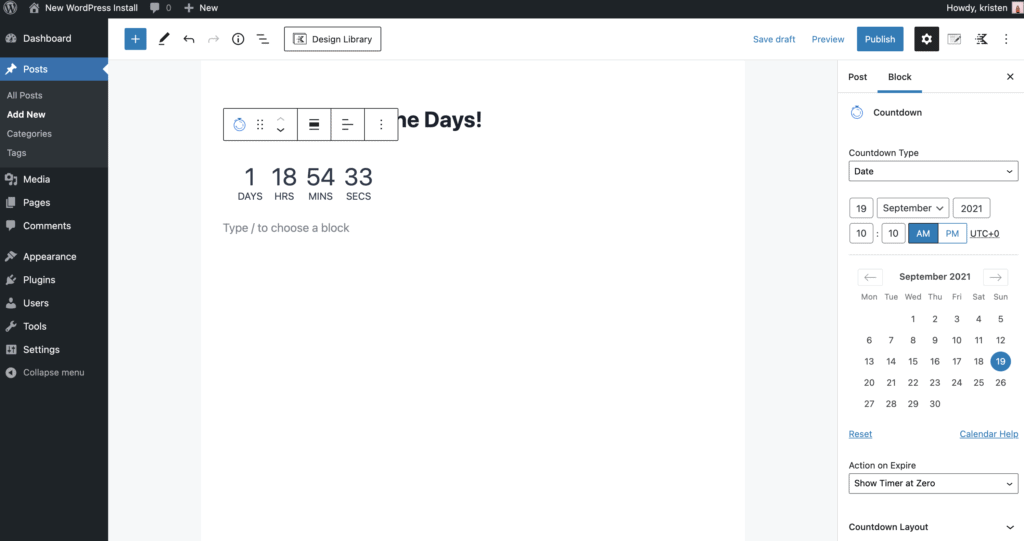
From here, you can customize your settings for the countdown timer to control how the countdown timer looks:
- Countdown Type: Date or Evergreen (Pro)
- Date: Use the Calendar picker and date/time inputs to choose the date and time the countdown timer will end.
- Action on Expire: Show Timer at Zero, Hide (Pro), Replace with Content (Pro), Redirect (Pro)
- Countdown Layout: These settings control Pre/Post text and labels for the days, hours, minutes and seconds.
- Count Item Settings: These settings are where you can style your countdown timer with a background color, border color, border, and padding.
- Number Settings: Customize the color of the numbers, font size, line height, letter spacing, and font.
- Label Settings: Tweak the label font size, color, and font family.
- Container Settings: The container is the space around your countdown timer, so this setting allows you to add a background color, border, and padding/margin settings.
- Visibility Settings: The visibility settings allow you to hide the countdown timer on desktop, tablet, or mobile. Super useful!
- Advanced: Finally, his setting allows you to add an HTML anchor or an additional CSS class(es)
With just a few settings tweaks, you can completely customize the settings and design of your countdown timer.

More Options for Countdown Timers in Kadence Blocks Pro
Kadence Blocks Pro offers even more features for your WordPress countdown timers, including the option for Evergreen countdown timers and useful actions for your countdown timers after expiration.
Evergreen Countdown Timers unlock the ability to do a countdown timer based on when a visitor lands on your site, rather than a static date or time. This can be really useful for driving actions and urgency that is more tailored to user experience.
- Everygreen Hours & Minutes: Set when the evergreen countdown timer should expire
- Campaign ID: Create a unique ID. To reset the timer for everyone change this id. To link with other timers give them all the same ID.
- Amount of days to wait until the evergreen is reset for visitors:
- Veryify by IP Address: This setting will add a delay to the rendering of the countdown if no cookie found as it will query the server database to see if the user can be found by their IP address
Action on Expire Settings give you even more options for what happens to the countdown timer after it expires. This is incredibly useful if, say, you aren’t planning to stay up until midnight the night a sale ends. 🙂
- Hide: Completely hide your countdown timer after it expires
- Replace with Content: After your countdown timer expires, you can display a message or image instead.
- Redirect your countdown timer to another link
Wrapping Up
A countdown timer can be a really effective element on your website that drives urgency or excitement for a particular date or time. You can also utilize them in more creative ways, based on visitor activity. Now you can easily add countdown timers with just a few clicks, thanks to the Kadence Blocks plugin.
How will you utilize countdown timers on your site? 🎵 It’s the Final Countdown! 🎵

Create Your Website With KadenceWP Today!

Written by Kristen Wright
Kristen has been with iThemes since 2011. You can usually find her at her standing desk, working on new articles for the iThemes blog or preparing the next email newsletter (so sign up!). Outside of work, Kristen enjoys journaling (she’s written two books!), hiking and camping, cooking, and daily adventures with her family, hoping to live a more present life.
By Kristen Wright
Kristen has been with iThemes since 2011. You can usually find her at her standing desk, working on new articles for the iThemes blog or preparing the next email newsletter (so sign up!). Outside of work, Kristen enjoys journaling (she’s written two books!), hiking and camping, cooking, and daily adventures with her family, hoping to live a more present life.
Updated July 22, 2024
Create Your Website With Kadence